Do you ever feel like you’re tucked away in a cramped kitchen while the rest of the house enjoys the fun? It is beyond frustrating to feel isolated by heavy walls that chop up your home and block out beautiful natural light.
I know that specific struggle well, and it is exactly why I love helping people design an open concept kitchen living room that actually works.
You deserve a home that breathes and flows with your daily life instead of feeling restricted. I have put together practical layouts and clever design tricks to help you define your zones without losing that airy feel.
By the end, you will have a clear plan for your renovation.
Every Small Patio Has Untapped Potential
Most patios I’ve worked on weren’t broken. They were just… ignored. A forgotten corner with a dusty chair, or a bare slab that nobody actually used. The potential was always there; it just needed someone to see it.
Over the past year, I worked on three very different outdoor spaces, each with its own constraints, personality, and story.
One was my own. One was for a close friend. One was for my parents. Three spaces, three completely different challenges, three results that still make me smile when I think about them.
Great patio design isn’t about spending more. It’s about making deliberate choices that fit your life. And once you see what’s possible even in the tightest of spaces, you won’t look at your patio the same way again.
The Kit I Never Start a Project Without
Good outcomes start before the first nail goes in. Over the years, I’ve stripped my kit down to what actually earns its place on a project, nothing redundant, nothing ‘just in case.’
These are the tools and materials I reached for across all three builds.
| Tool / Material | Use Case |
|---|---|
| Measuring tape & spirit level | Getting proportions right before anything is fixed in place |
| Cordless drill | Fixing frames, mounting brackets, assembling furniture |
| Sandpaper (80 & 120 grit) | Smoothing rough wood edges for a clean, safe finish |
| Exterior wood paint or stain | Weather-proofing and adding personality to wooden surfaces |
| Decking screws | Rust-resistant fastening for any outdoor woodwork |
| Landscape fabric | Suppressing weeds under gravel or plant beds |
| Gravel or pea shingle | Ground cover that drains well and looks intentional |
| Outdoor adhesive & rawl plugs | Mounting wall-fixed elements like planters or lighting |
| Weather-resistant cushion fabric | Comfort that actually survives a British summer |
| Cable ties & hooks | Keeping climbers, lights, and cables neat and secure |
You don’t need all of this for every project, but knowing what each does means you’re never caught mid-build making a supermarket run.
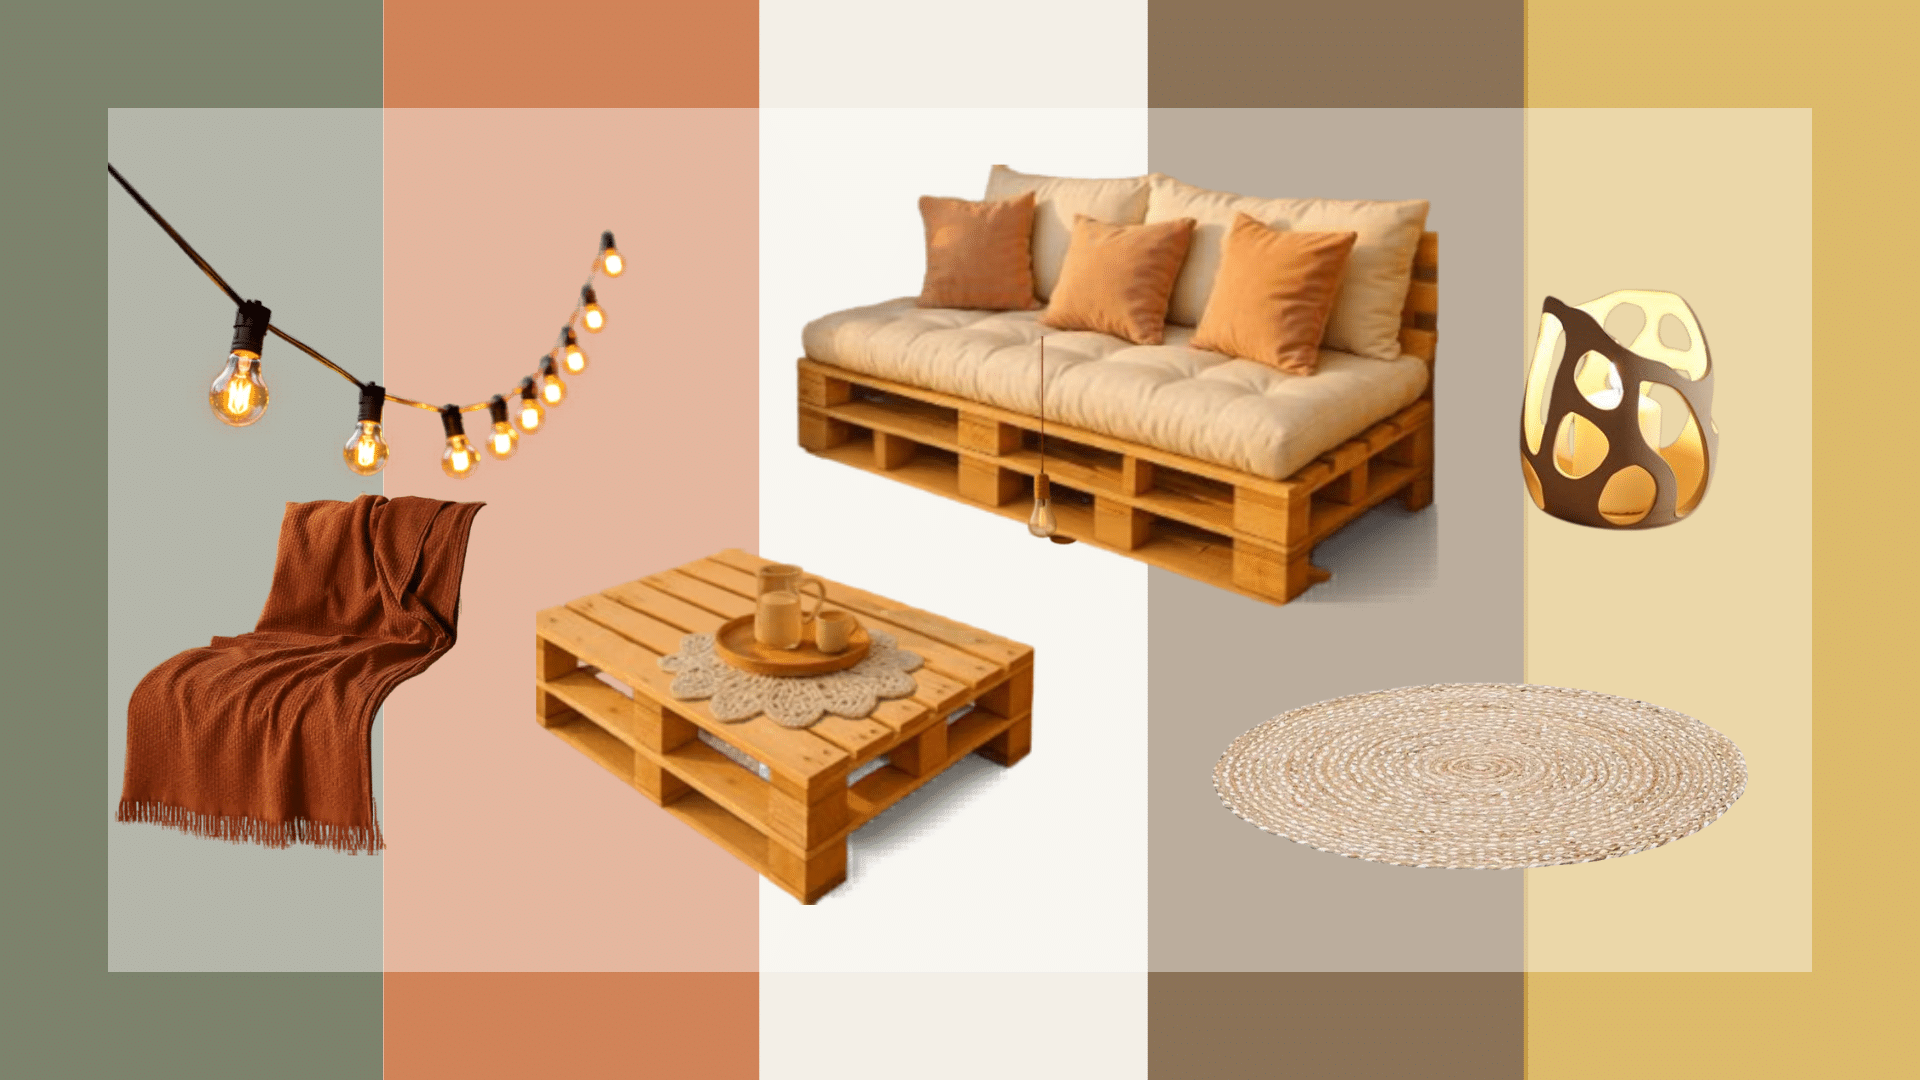
Idea 1: The Cozy Outdoor Lounge
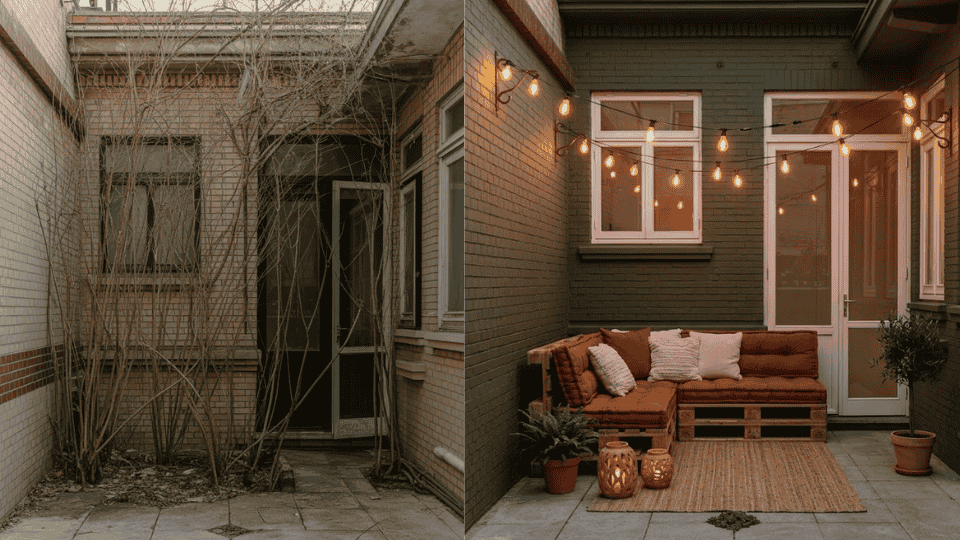
Weeds through every crack, overgrown shrubs swallowing the walls, a concrete slab nobody had looked at in years, my own patio was the kind of space you walked past, not into.
Today it’s where I end most evenings, warm Edison bulbs overhead, deep cushions, no desire to go back inside.
Design Decisions and Choices
Color went dark and earthy, a muted olive on both walls, closer to dry sage than anything bright. Counterintuitive for a small space, but a deep wall color pulls the eye outward rather than closing things in.
It also made the concrete floor feel far less harsh. Furniture stayed low profile throughout. A hand-built pallet sofa treated in walnut-toned exterior stain, loaded with deep terracotta and off-white cushions, and one simple side table.
Nothing with high backs, nothing oversized. The rug went down before any furniture was placed, a jute-effect weatherproof weave that immediately defined the living zone.
Lighting sealed it. Warm-white Edison bulbs at a natural droop between two wall hooks, two ceramic lanterns at ground level. The space genuinely looks better at 8 pm than at midday.
How Did It Come Together
- Clean and patch first: Fill every crack, pressure-wash thoroughly, and let it dry completely. Anything you skip here shows through everything that goes on top.
- Walls before floor: Paint before the rug goes down. Drips on bare concrete don’t matter. Drips on a jute-effect weave do.
- Rug before furniture: Place the rug first and arrange everything around it. It defines your zone and keeps you from buying pieces that eat too much floor space.
- Lights before final furniture placement: Get the bulbs up early, even temporarily. The way evening light falls across a small space changes where everything should sit.
If I Did This Again: I’d get the lights up on night one before finalising anything else. How a space feels after dark is the only test that actually matters.
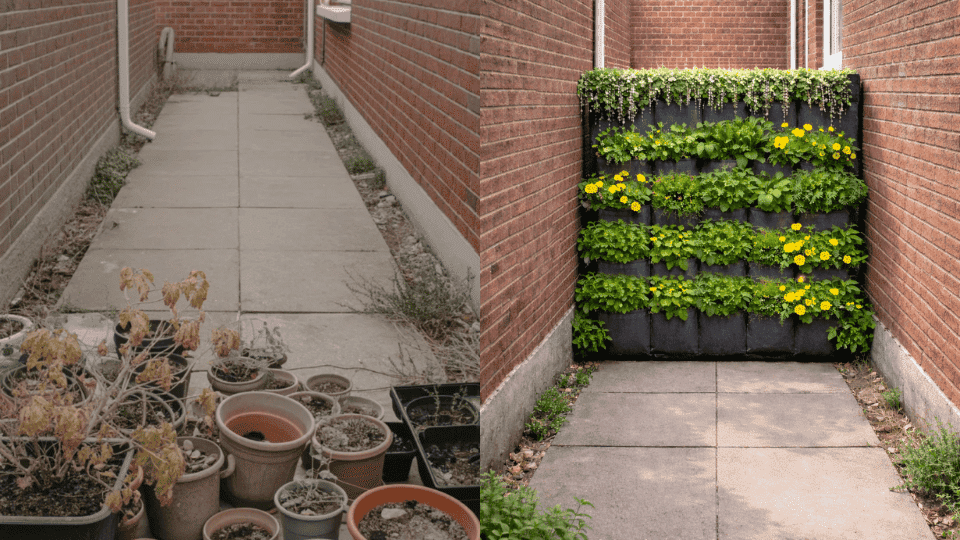
Idea 2: The DIY Vertical Garden
A row of sad, mismatched pots along the wall, some dead, some barely surviving, none of them placed with any intention. My friend had the right instinct, just no system.
The same wall now holds a full fabric pocket planter setup, layered with herbs, trailing flowers, and leafy greens. It looks deliberate, alive, and gets used every time she cooks.
Design Decisions and Choices
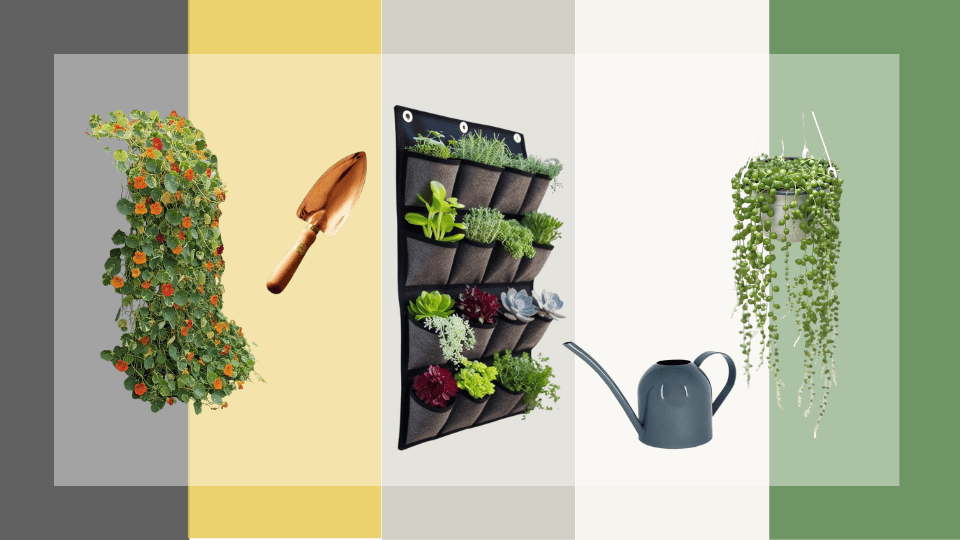
The structure was fabric pocket planters fixed directly to the wall, no drilling into brick, no permanent fixtures, which mattered for a rented space.
The planters came in a deep charcoal grey that sat cleanly against the existing light-toned wall without competing with the planting.
Plant selection was split between practical and visual. The top two rows went to trailing plants, string of pearls, and trailing nasturtiums, to soften the upper edge.
The middle rows held bushy herbs: basil, mint, and flat-leaf parsley. The bottom row, easiest to reach, got the most frequently used ones. Every placement had a reason.
Color within the planting mattered more than most people expect. We chose a mix of deep greens, silver-leafed herbs, and occasional pops of yellow from the nasturtiums. No single color dominates; it reads as abundant rather than busy.
How Did It Come Together
- Map the wall before buying plants: Measure the full width and height of the wall you’re working with. Fabric planters come in different configurations. Know your wall first, so you’re not trimming or doubling up awkwardly.
- Group by watering needs: Plants that need frequent watering go together. Mixing a drought-tolerant succulent next to a thirsty herb means one of them is always suffering.
- Fill pockets two-thirds full with compost: Overfilling can cause spills and uneven drainage. Two-thirds gives roots room and keeps the wall face clean.
- Water from the top down on day one: Let it soak through every pocket slowly before the plants settle in. This sets the drainage pattern for everything that follows.
If I Did This Again: I’d spend more time on the plant groupings upfront. We moved three pockets around after the first week because the trailing plants were shading the herbs below them, ten minutes of planning would have saved it.
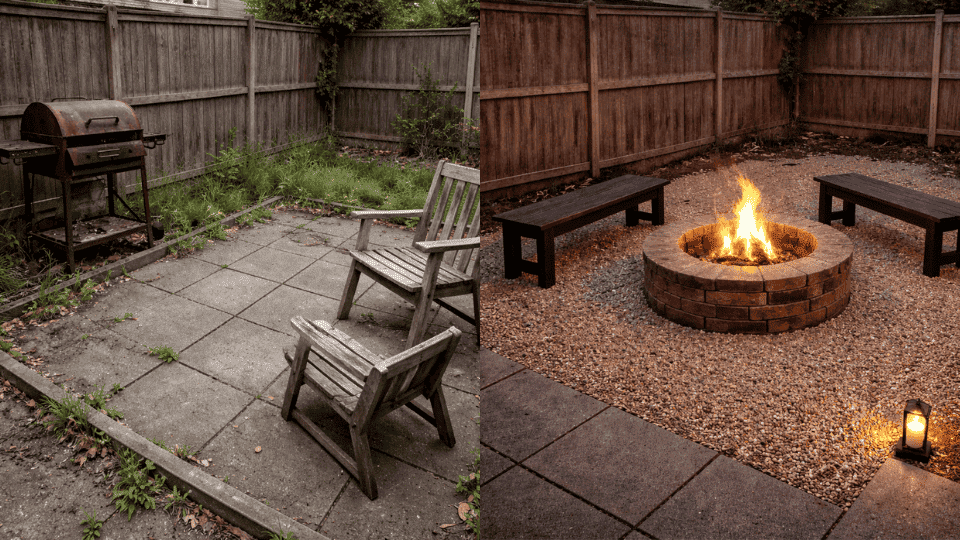
Idea 3: The Fire Pit Area
An old BBQ nobody had fired up in years, two broken chairs sitting at odd angles, a modest outdoor space that felt even smaller than it was because nothing in it had any purpose. Today, that same space feels like it doubled in size.
A brick-built fire pit, wooden bench seating, and a gravel surround that gives the whole area definition. Most weekends, the whole family ends up there without anyone having to suggest it.
Design Decisions and Choices
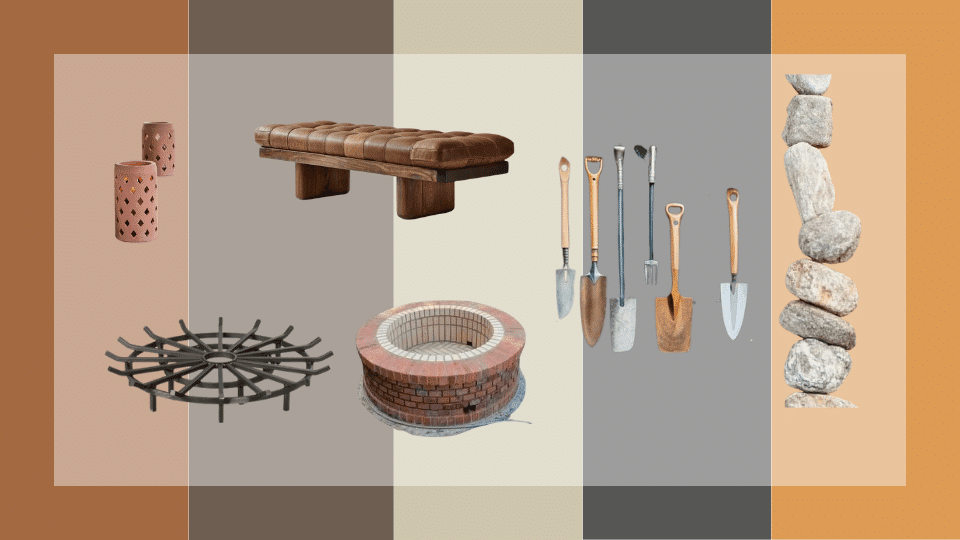
The fire pit was built from reclaimed house bricks sourced from a local salvage yard. Aged and uneven, they carry a warmth that new materials simply don’t.
Built in a simple circular form, two courses high, with a steel grate inside, straightforward to construct, looks like it’s always been there. Seating was built, not bought.
Two compact wooden benches treated in dark exterior oil, arranged in a horseshoe on either side of the pit. Backless by design, it keeps sightlines open across the fire and stops the area from feeling enclosed.
The absence of backs is what makes a small space feel generous. Ground cover tied it all together. Pea gravel over landscape fabric between the benches and the pit, clean, low maintenance, and it gave the fire pit zone a defined footprint that made the surrounding patio feel intentionally open rather than just empty.
How Did It Come Together
- Mark the circle before laying a single brick: Use a stake and string to draw your circle on the ground first. An uneven base is impossible to correct once you’re two courses up.
- Reclaimed over new every time: Call your nearest salvage yard before buying bricks. The price difference is significant, and the character is incomparable.
- Lay landscape fabric generously: Cut it wider than you think you need. Gravel migrates, and exposed soil at the edges looks unfinished fast.
- Build benches to the pit, not the other way around: Get the pit in place first, then position and size the benches around it at the right distance from the heat.
If I Did This Again: I’d add a small flat stone surface beside one bench from the start, somewhere to rest a drink. It sounds minor until you’re holding a mug at 9 pm with nowhere to put it down.
Small Patio Styles Worth Stealing
Not every patio needs a full redesign to find its personality. Sometimes it just needs a direction. Here are five distinct looks that work particularly well in compact outdoor spaces.
1. Cottage Garden-Inspired Patio
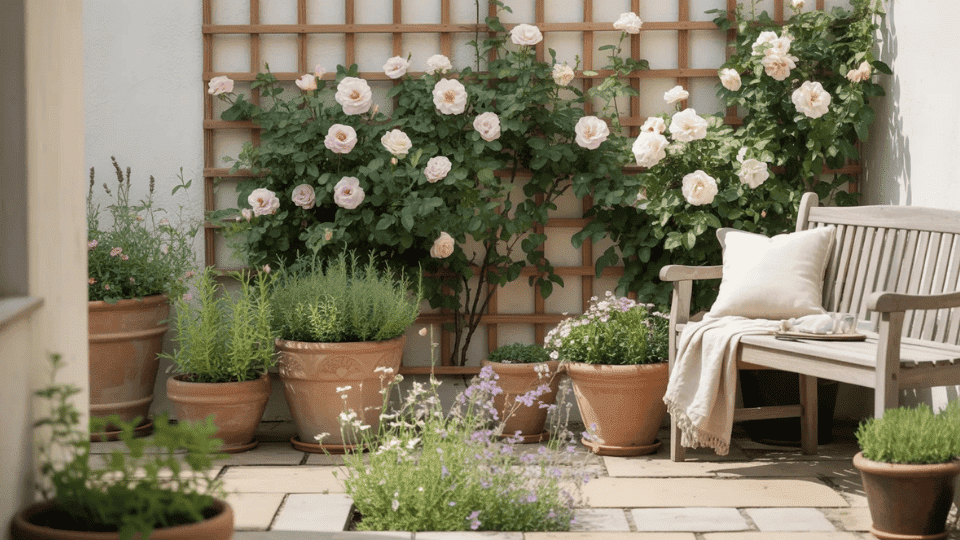
Mismatched terracotta pots, climbing roses on a simple trellis, a weathered wooden bench with a faded cushion. This style thrives on organized chaos; the more it looks like it grew naturally, the better it’s working.
Wildflowers in gaps, moss between paving, nothing too precious or symmetrical. The key is restraint in planning but generosity with planting.
2. Bohemian Flowy Patio
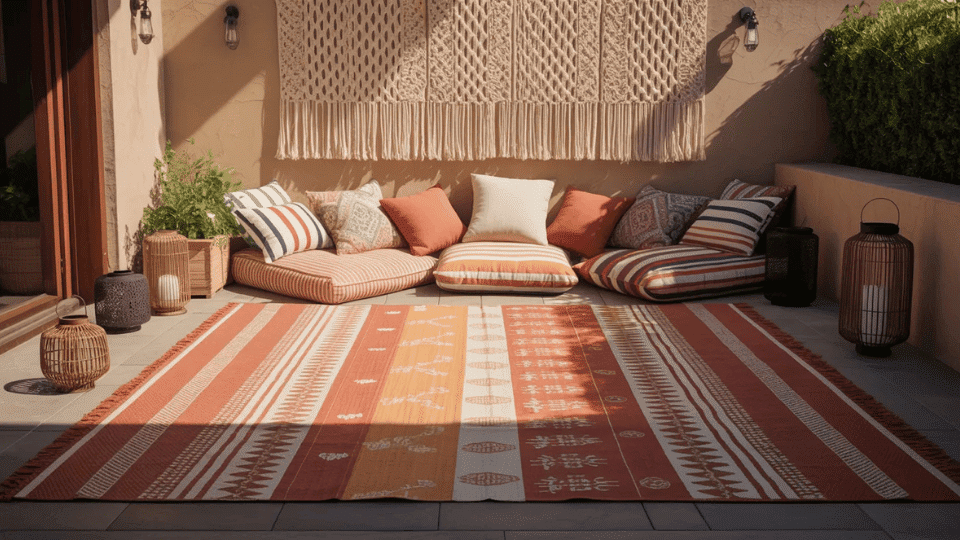
Layered rugs, macrame wall hangings, and low floor cushions in clashing patterns that somehow agree with each other. Lanterns at every level, hung, stacked, placed directly on the ground.
This is the style that looks most expensive when done right and costs the least to pull off. Charity shops and market stalls are your best friends here.
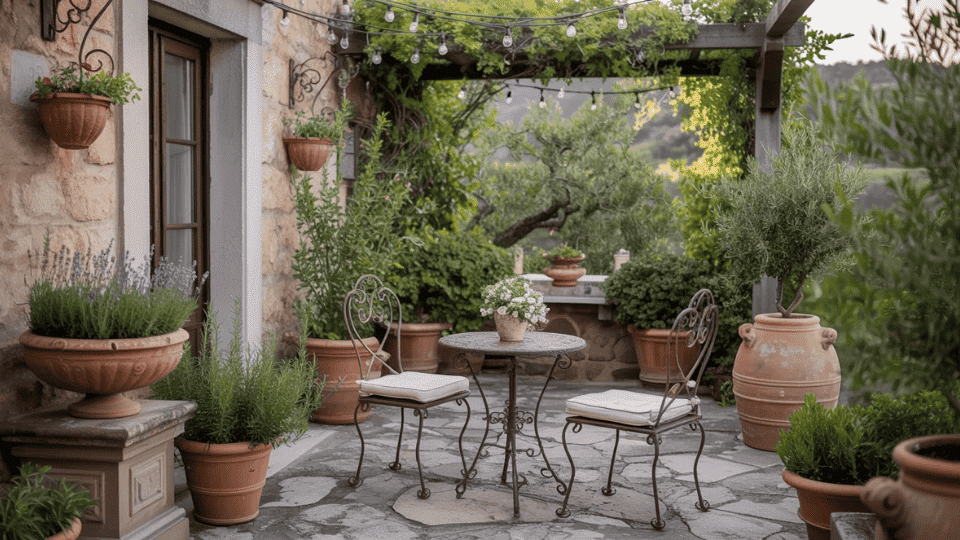
3. Mediterranean Patio Remodel
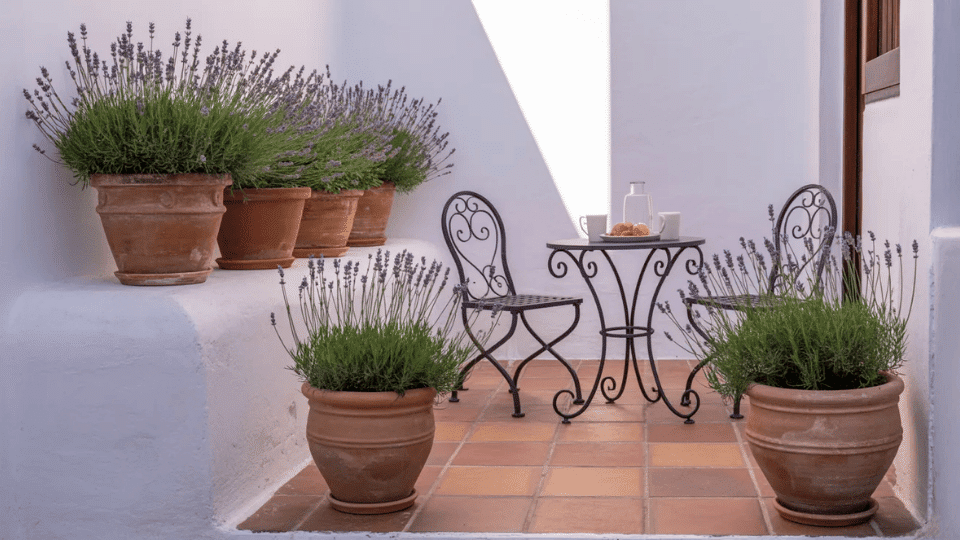
Terracotta everywhere, pots, tiles, tones. Whitewashed walls, if you can manage it, trailing lavender or bougainvillea along the edges, a simple bistro set in wrought iron.
Warm, unhurried, and remarkably easy to achieve on a modest budget. This style rewards patience, let the plants fill in, and the whole thing softens beautifully over time.
Keeping Your Patio Great All Year Round
A beautiful patio in July means nothing if it’s falling apart by November. Here’s what to do, and what to avoid, across every season.
| Season | What to Do | Mistake to Avoid |
|---|---|---|
| Spring | Deep clean all surfaces, re-oil wooden furniture, check fixtures and fittings for winter damage, reintroduce plants gradually | Rushing to put everything out before the last frost, one cold night ruins cushions and kills young plants |
| Summer | Water plants early morning or late evening, check fabric and cushion wear regularly, keep the gravel raked and tidy | Overwatering vertical planters in heat, roots rot faster than they dry out |
| Autumn | Bring cushions and fabric indoors, treat wooden surfaces with exterior oil, clear fallen leaves from gravel and drainage points | Leaving metal fixtures untreated during wet months, rust sets in faster than you’d expect |
| Winter | Cover or store furniture, lift pot plants off cold ground using feet or bricks, and check wall fixings on vertical planters | Ignoring the space entirely, a monthly ten-minute check prevents most damage before it becomes expensive |
Small habits across the year keep the work light. Neglect any one season, and you’re undoing the one before it.
Summing Up
Every space I have worked on has had a different problem and a different personality waiting underneath it.
Whether you take the cozy lounge route, build a living wall, or gather the family around a fire pit, the size of your space was never the real obstacle. Intention always was.
The seasonal habits, the style inspiration, the kit, all of it exists to make the process less guesswork and more confidence. Good outdoor spaces aren’t designed in one afternoon, but they do start with one decision.
If any of these small patio decor ideas sparked something for your own space, drop a comment below.