A master bathroom layout remodel is one of those impossible projects you keep putting off until the day it all breaks down and your plumbing goes awry.
Initially, it feels like a passion project, but time flies by quickly when you spend days selecting a tile color and fighting with your spouse over the shower type you want.
I have spent quite a bit of time deciding on the tile color that will accentuate my walls, whether to do heated floors, and a ton of other decisions that come with it.
After years of having a contractor on my speed dial, I have gathered all my anecdotes and have brought you a tasteful list of master bathroom layout ideas.
What to Think Through Before Choosing a Bathroom Layout
When planning a bathroom layout, what you prioritize in the design makes all the difference in how functional and enjoyable the space feels day to day. Balancing form with function, ensuring adequate storage, and maximizing available space while staying within a budget are all factors worth thinking through before making any decisions.
The primary bathroom has evolved significantly; it’s no longer just a utilitarian space. Today, homeowners expect it to serve multiple purposes: a morning staging area, a place to decompress after a long day, and sometimes a personal sanctuary that reflects individual style.
Smart planning from the start helps avoid costly changes later. Before looking at specific layouts, consider what your daily routine actually requires, how many people will share the space, and which features matter most to you.
Master Bathroom Layout Ideas
These ideas pull from classic design history, modern trends, and the most-saved layouts on Pinterest right now.
Each one brings something distinct to the table: color, material, mood, or structure. Use them as starting points and shape them around your actual floor plan.
1. Gallery Wall Layout with One Open Floor
Run every fixture, the double vanity, walk-in shower, toilet, and storage, along a single long service wall. The opposing wall stays completely clear, creating a visual corridor that reads as intentional.
All plumbing on one wall keeps construction costs low. A continuous floating shelf above the fixture line handles towels and accessories. Best for long, narrow master bathrooms where floor clearance is the primary concern.
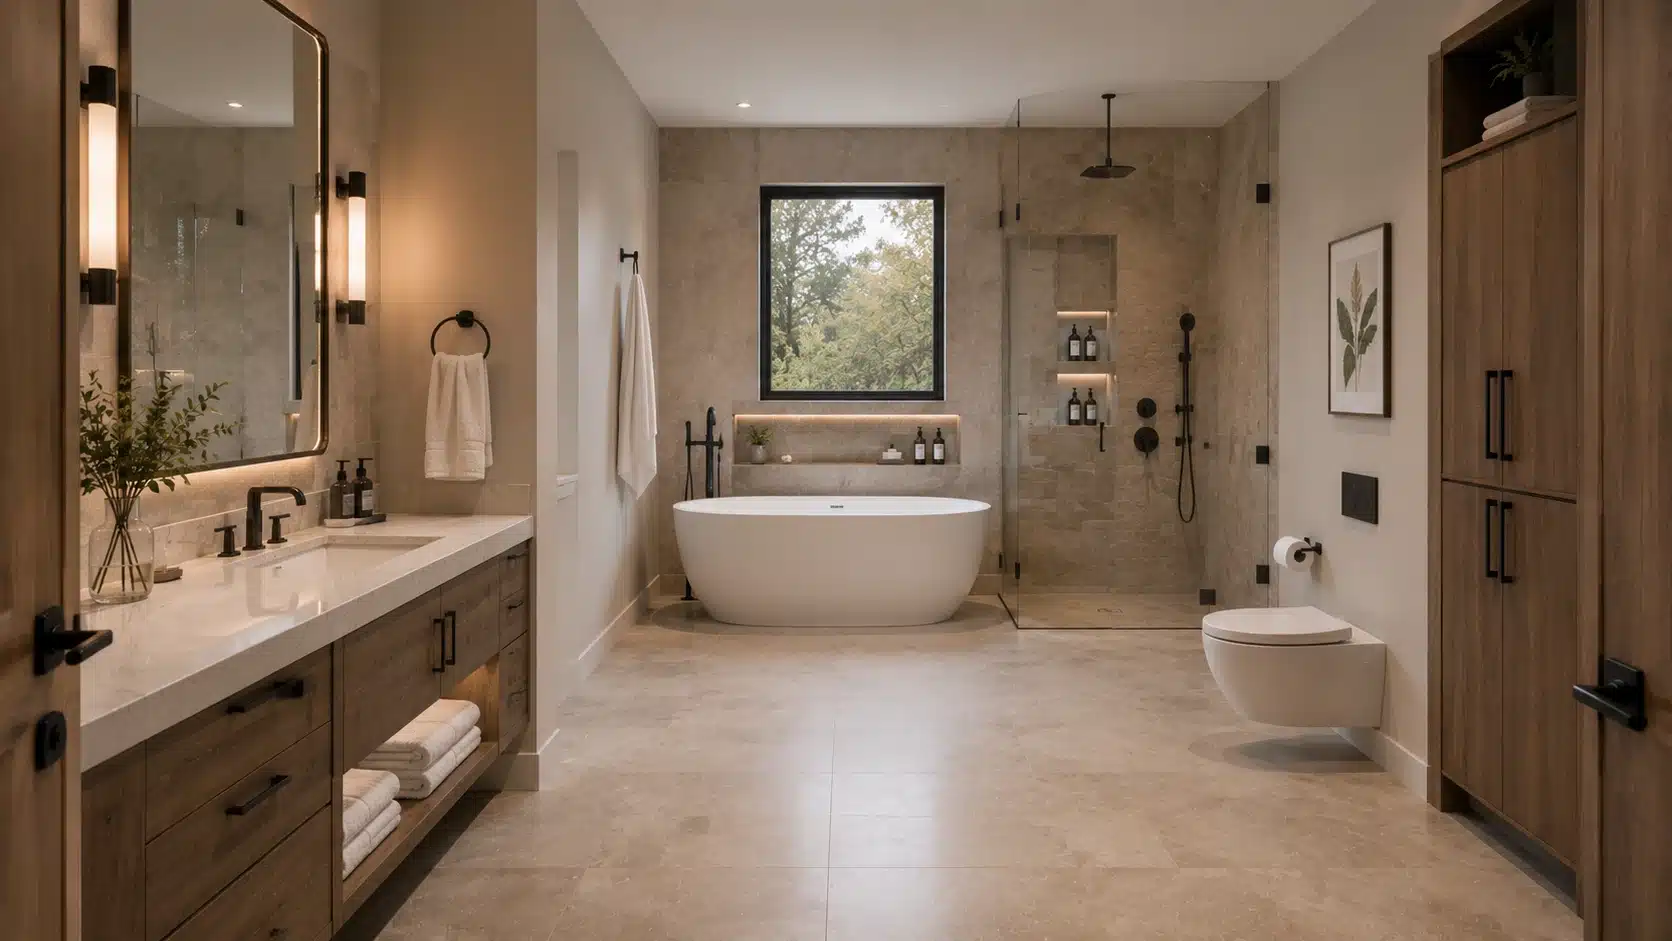
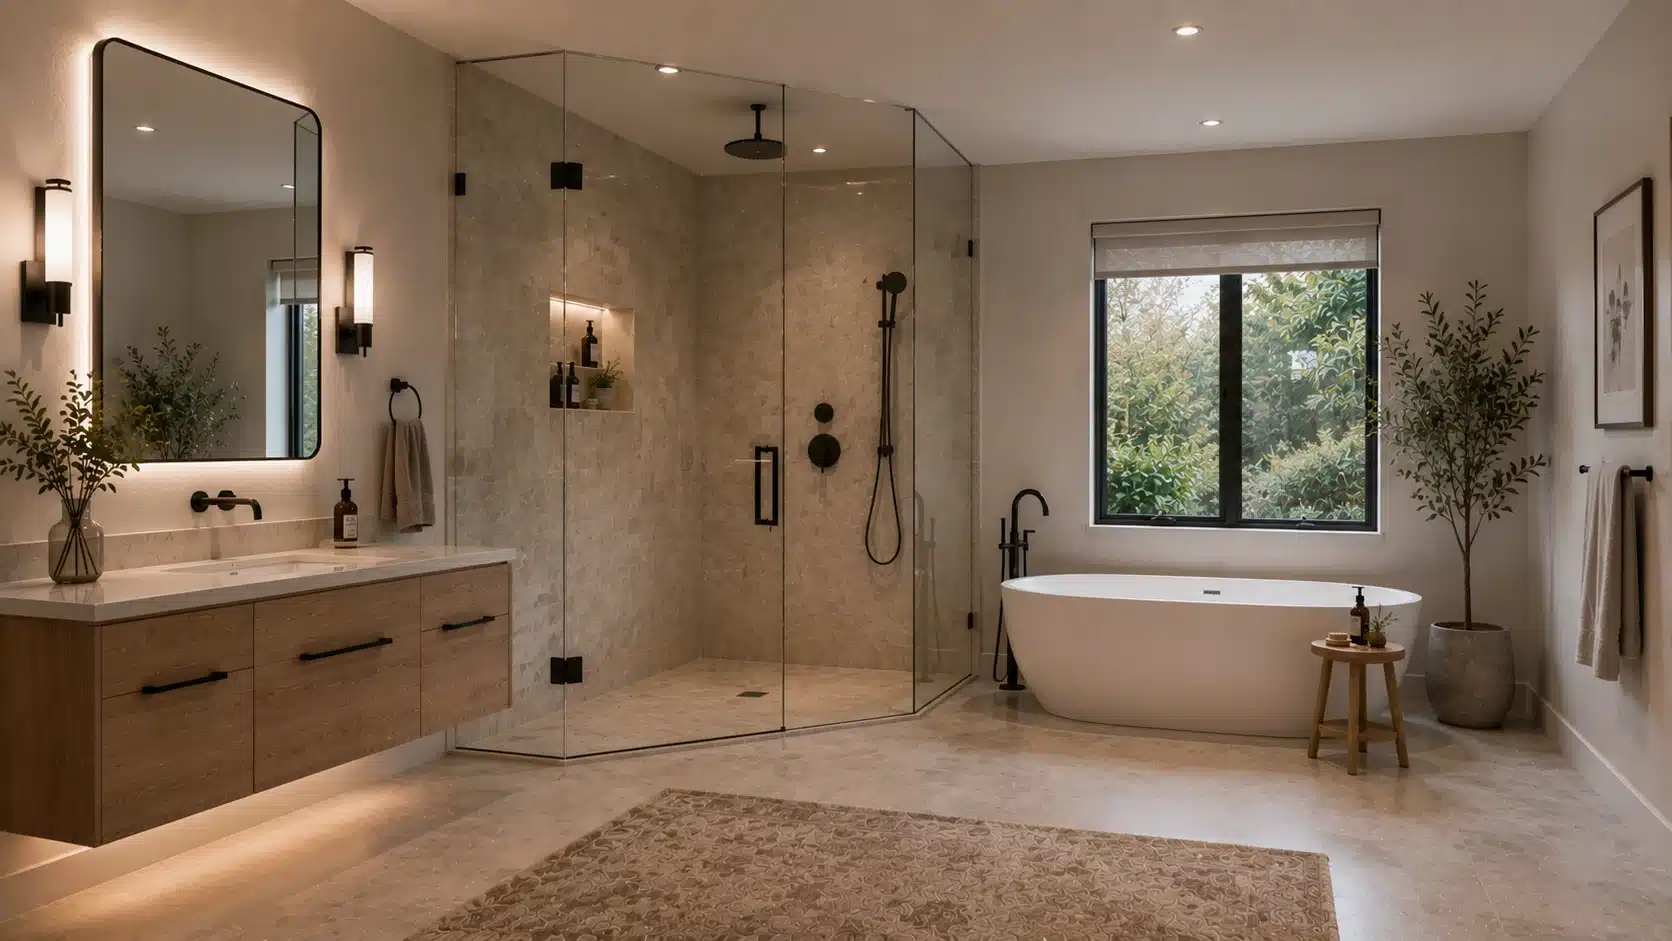
2. Freestanding Tub as the Entry Focal Point
Position a freestanding soaking tub directly in the sightline from the bathroom door, centered on the far wall or near a window. The shower, toilet, and vanity wrap around the perimeter.
A floor-mounted tub filler with a hand shower keeps hardware minimal. Everything else in the room supports the tub. Works best in bathrooms with at least 120 square feet.
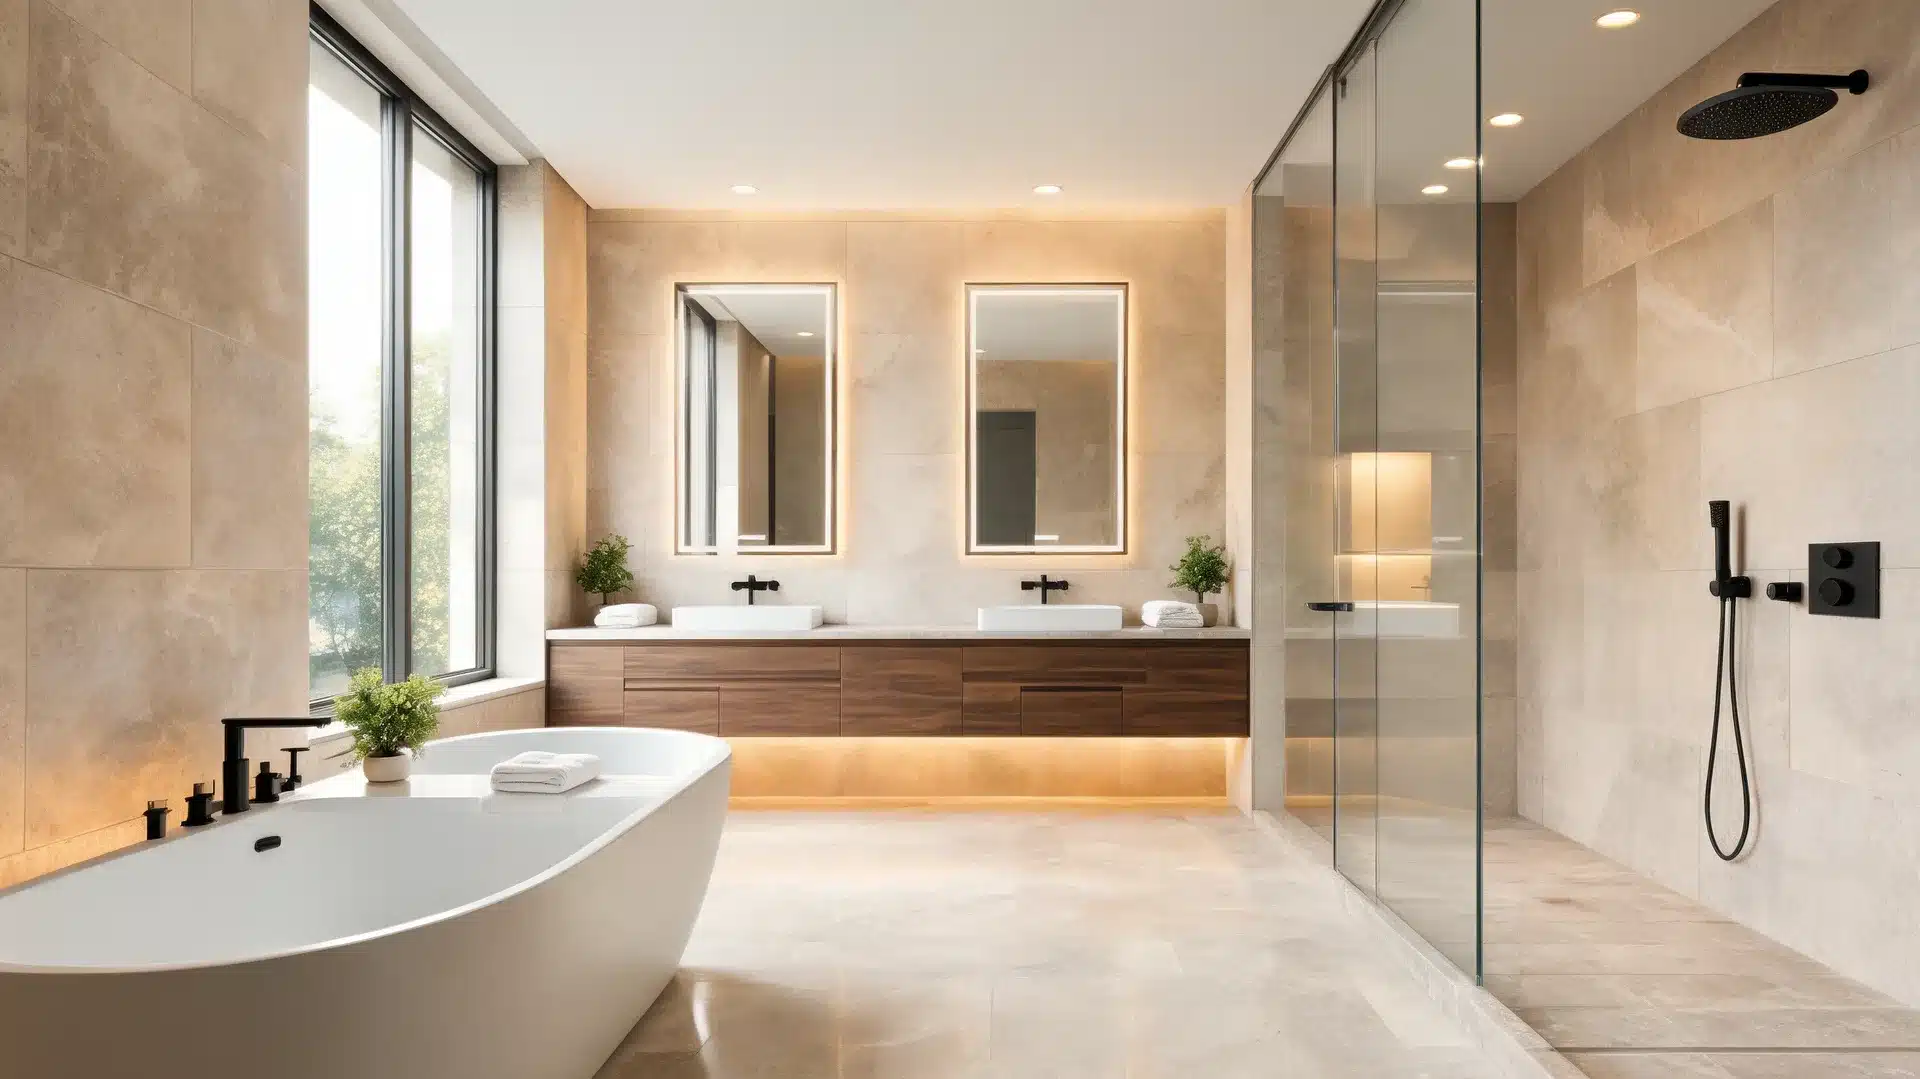
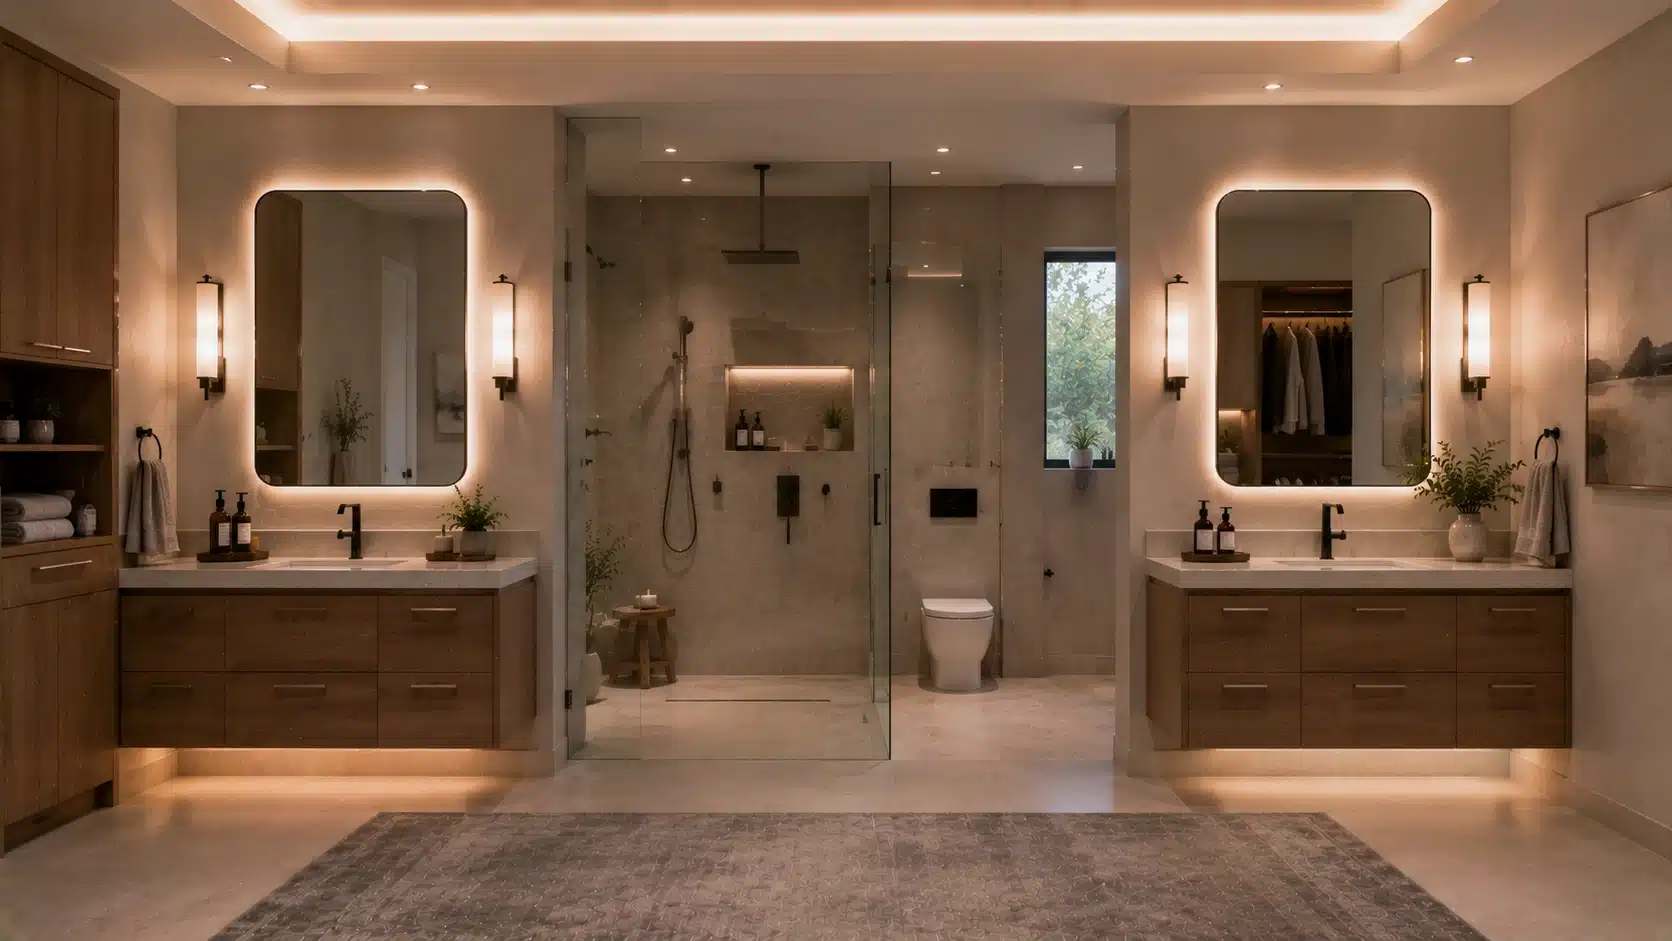
3. Opposite-Wall His-and-Hers Vanity Layout
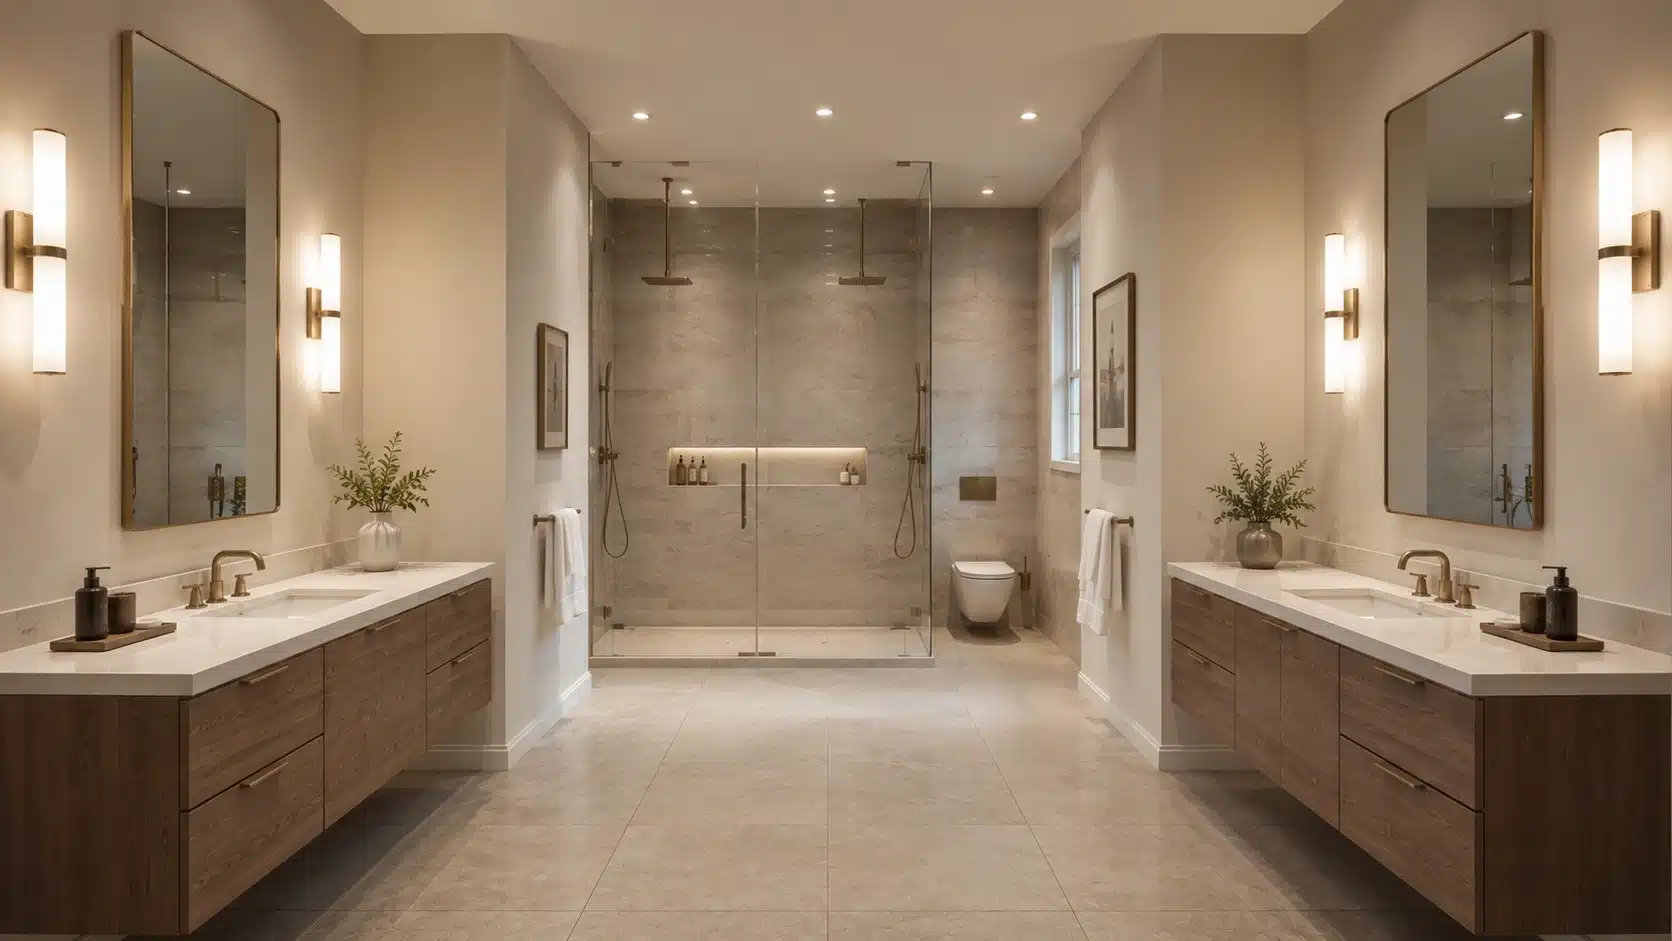
Each person gets a dedicated vanity on a separate wall, no shared mirror, no shared counter, no morning traffic conflict. The toilet and shower sit at the far end between them.
Each station gets its own wall-mounted sconces, medicine cabinet, and full drawer set. This resolves the most common friction point in shared bathrooms. Requires at least 10 feet of floor width.
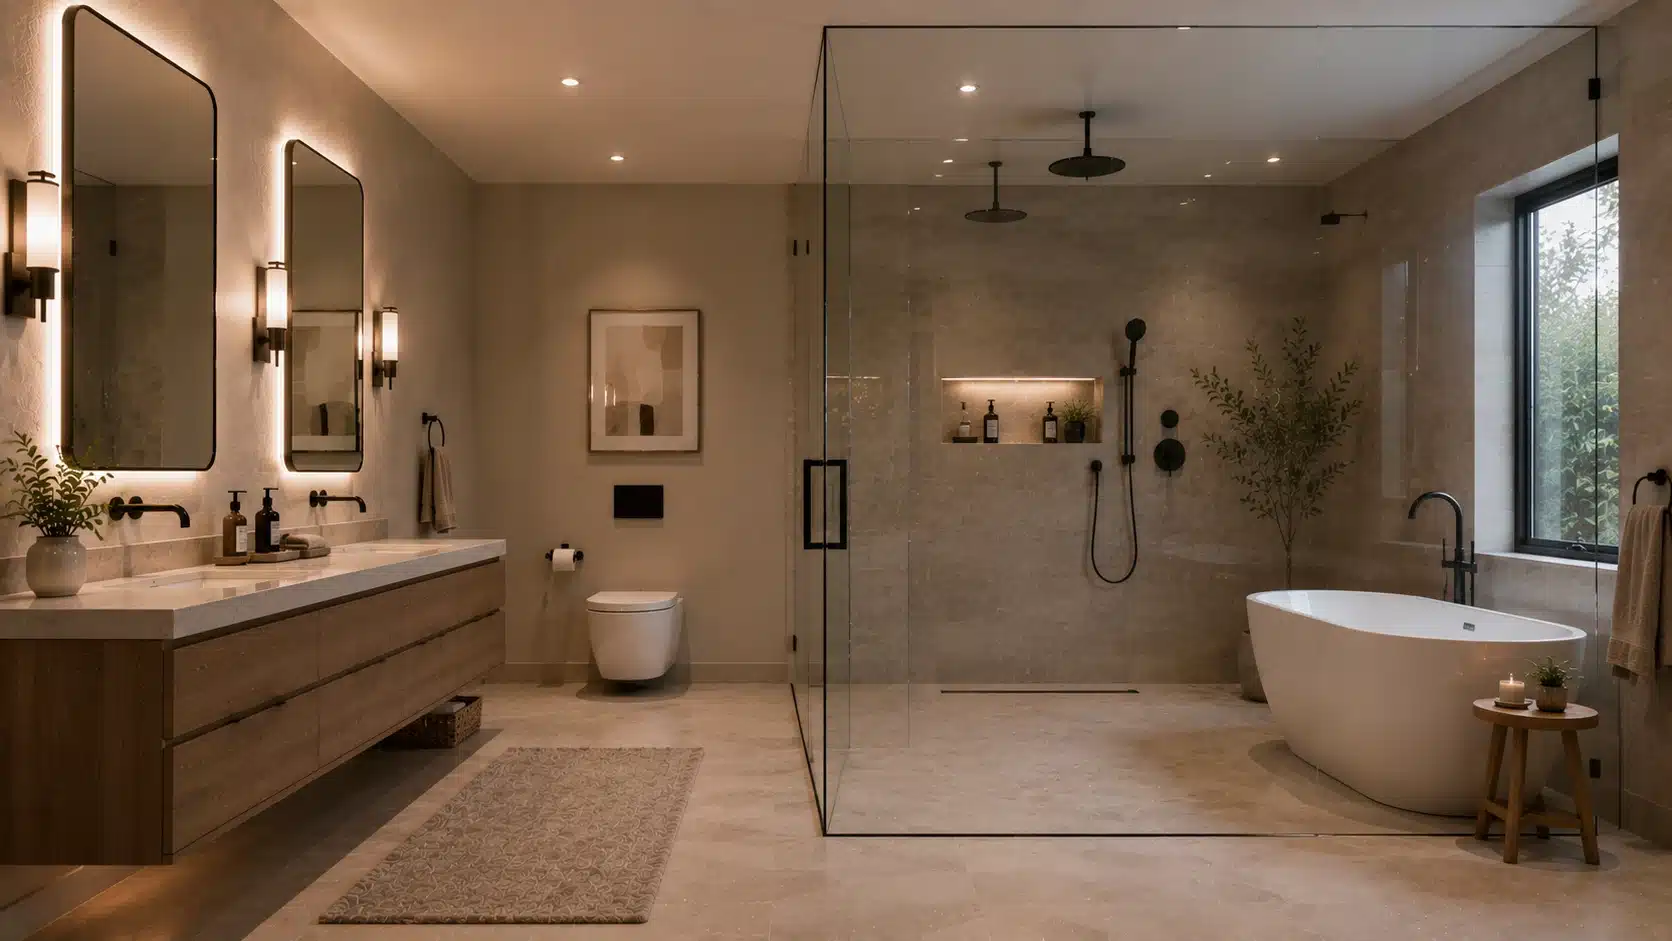
4. L-Shaped Wet Zone with Tub and Shower Separated
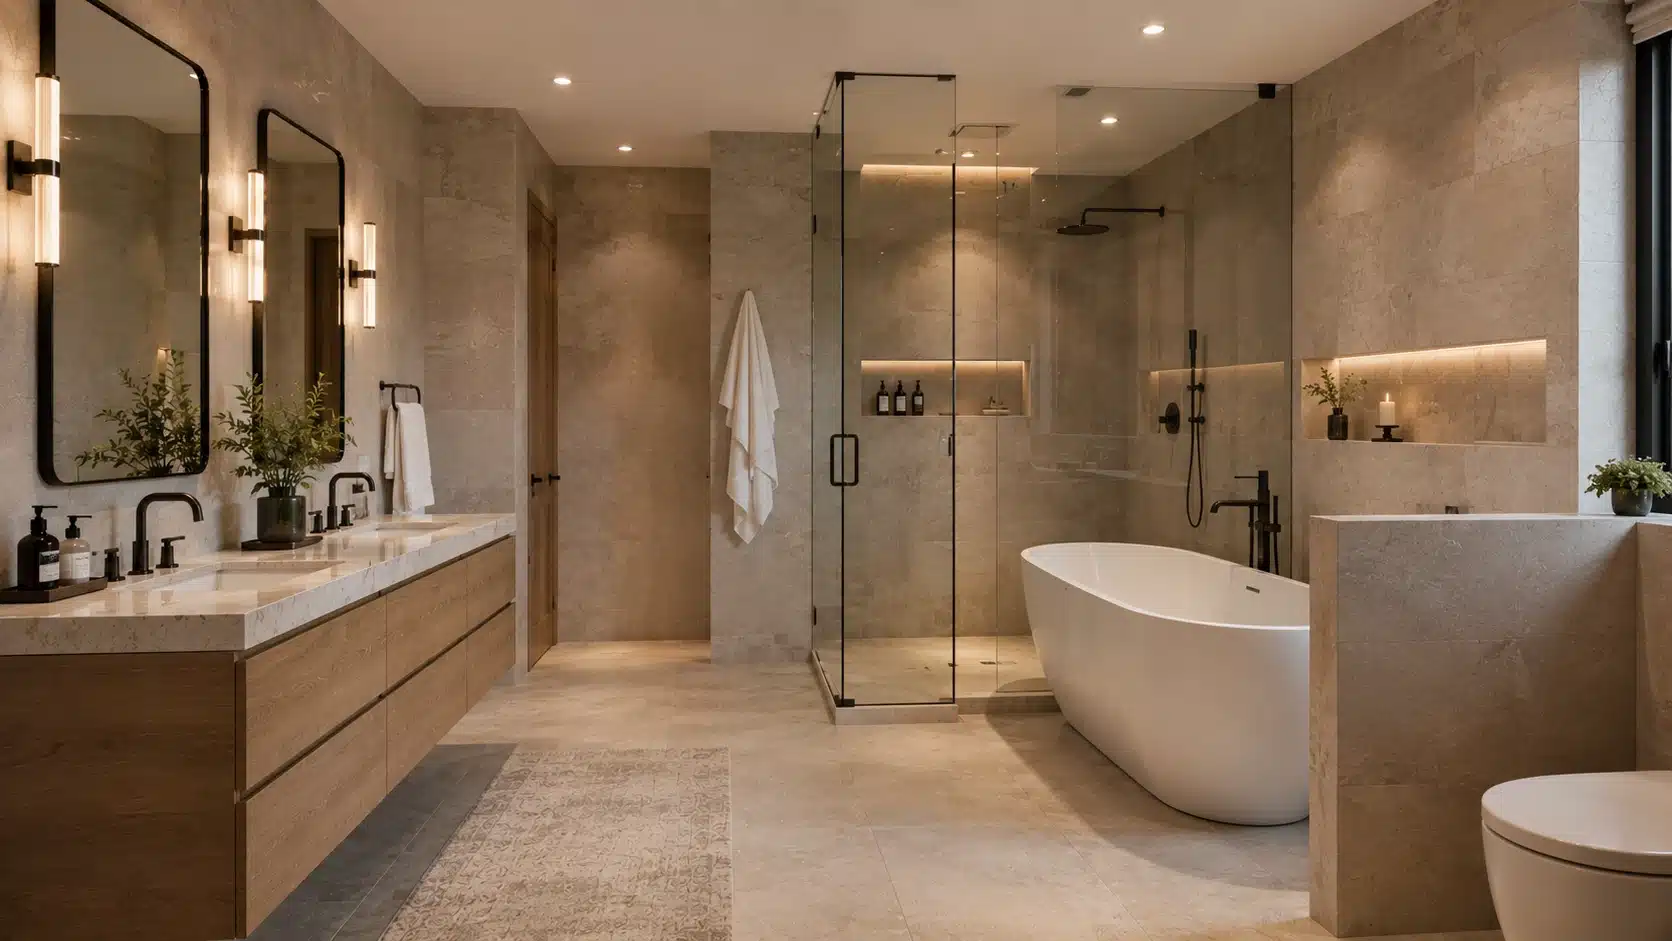
The shower occupies one arm of the L-shape, the freestanding tub sits in the other, and the double vanity runs along the opposite wall. A frameless glass wall on the inner corner keeps sightlines open without spreading water.
The toilet tucks into the far corner behind a half-wall. Best in square bathrooms with 150 or more square feet of floor space available.
5. Enclosed Water Closet with Pocket Door
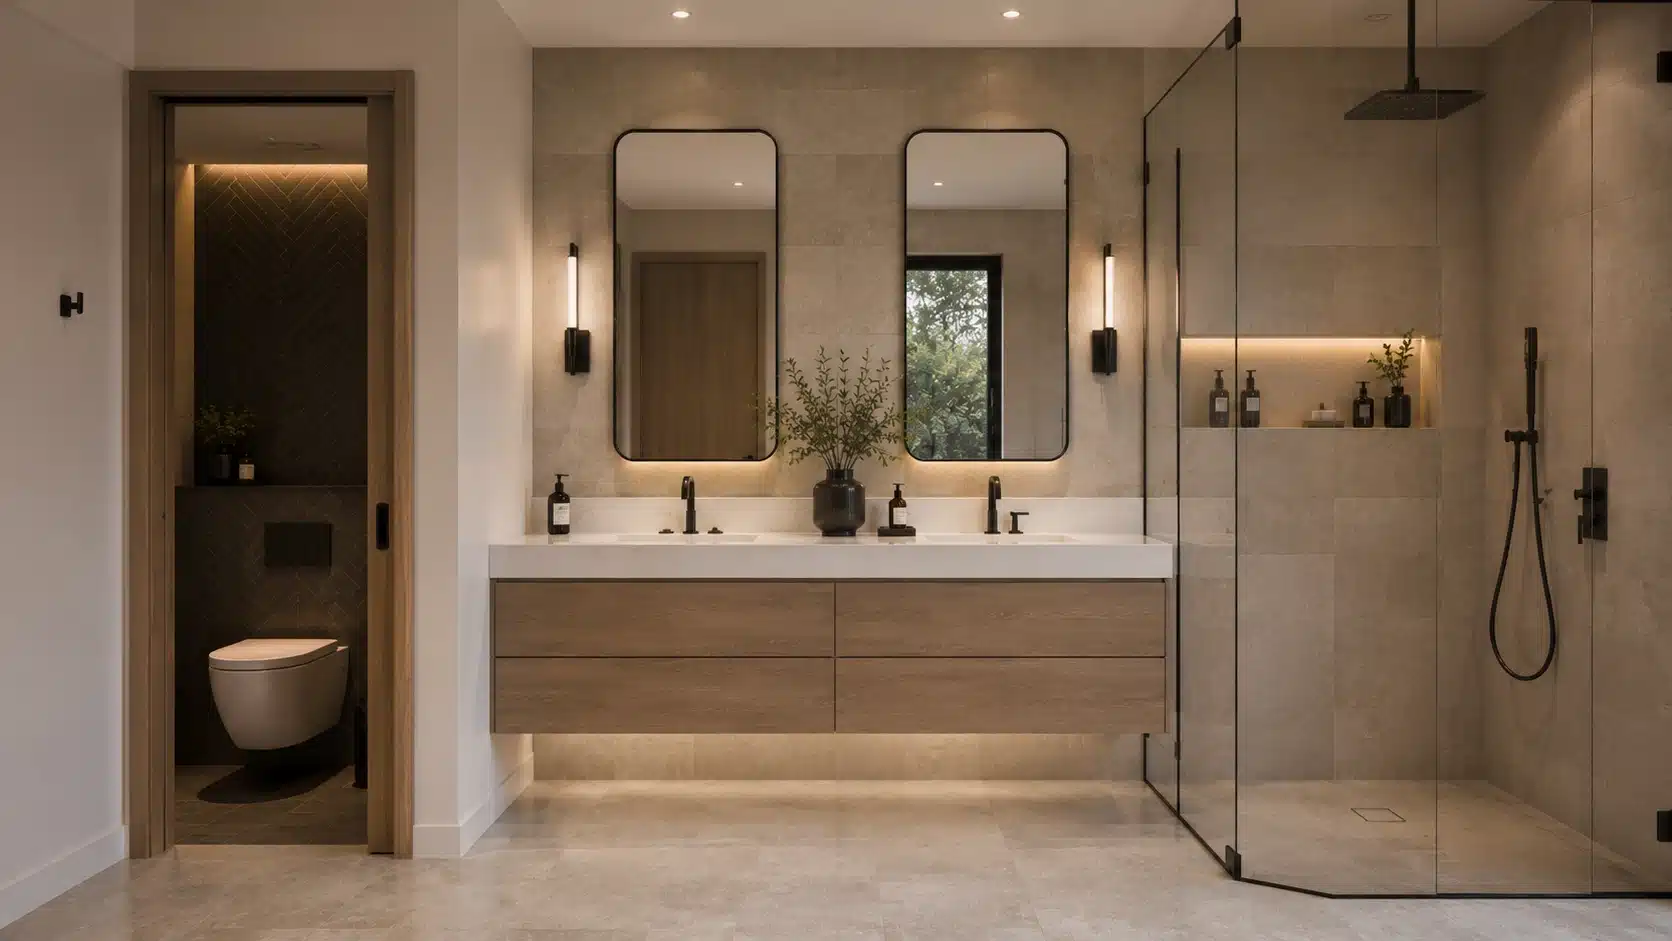
Move the toilet into its own enclosed water closet, minimum 36 by 66 inches, with a pocket door that disappears into the wall.
No door swing, no clearance penalty, and complete privacy when someone else uses the vanity. Finish the interior in a contrasting tile to make the enclosure feel deliberate. Plan a duct fan before the walls close.
6. Open-Concept Bedroom-Bath Suite Integration
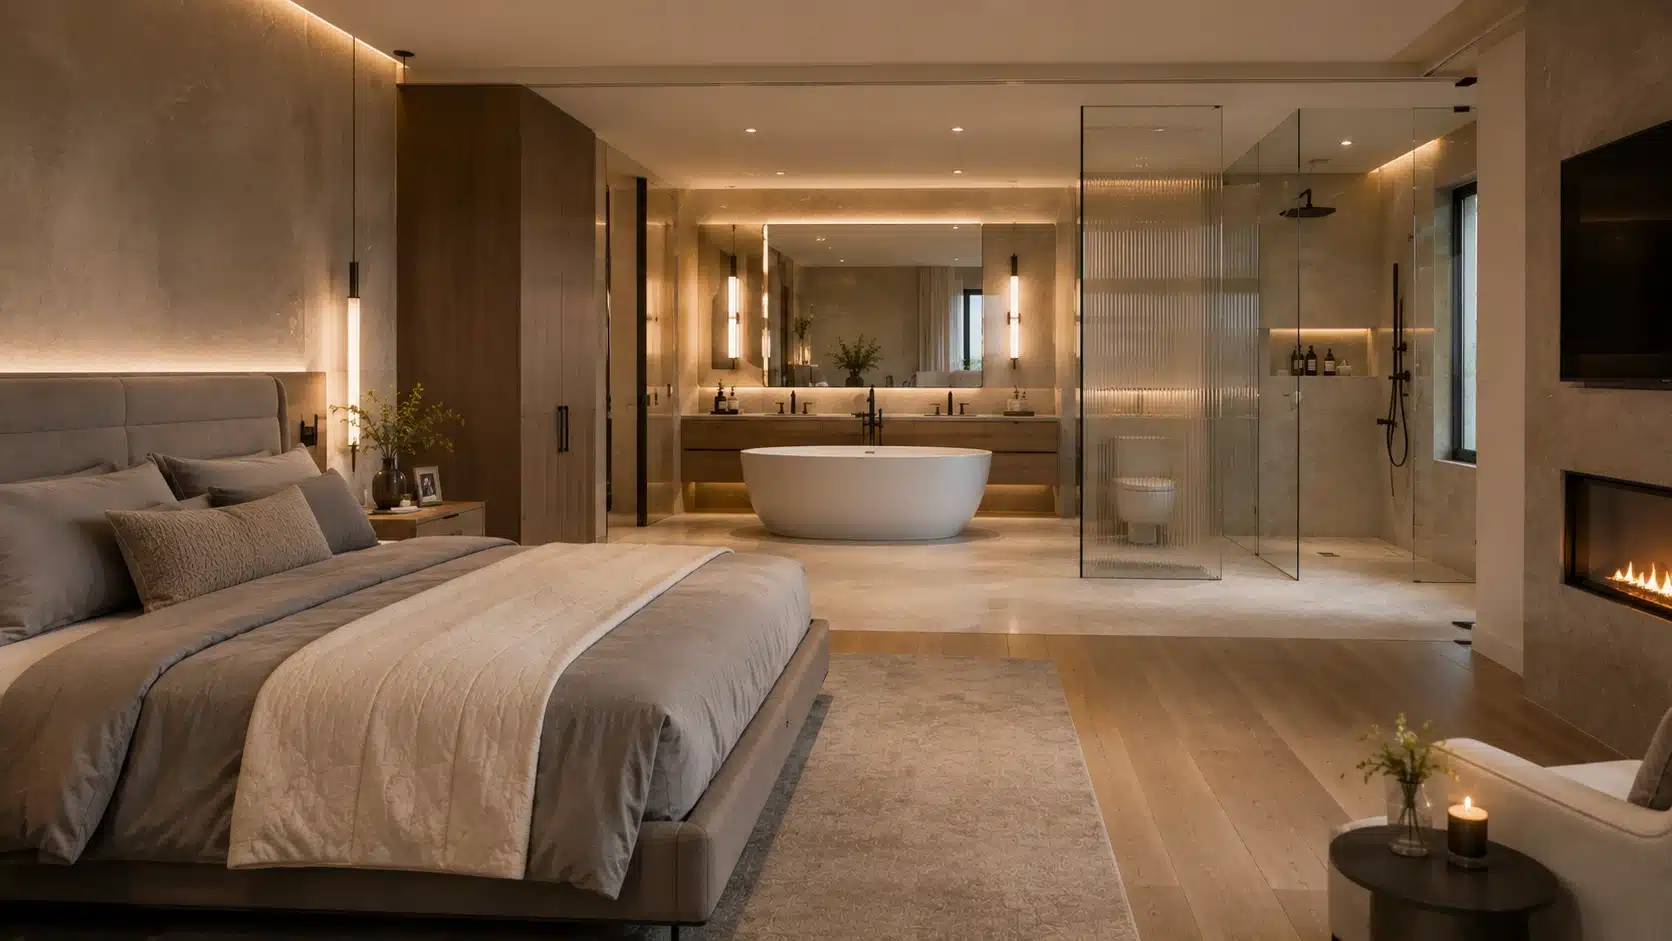
Remove the wall between the bedroom and bathroom. The shower and toilet sit at the far end behind a low glass privacy screen. The vanity and tub face the bedroom with no door between them.
A ducted exhaust fan rated at 110 CFM prevents moisture from entering bedroom walls. This layout delivers a hotel-suite quality that closed-off bathrooms never achieve.
7. Walk-In Shower with Built-In Bench and Dual Showerheads
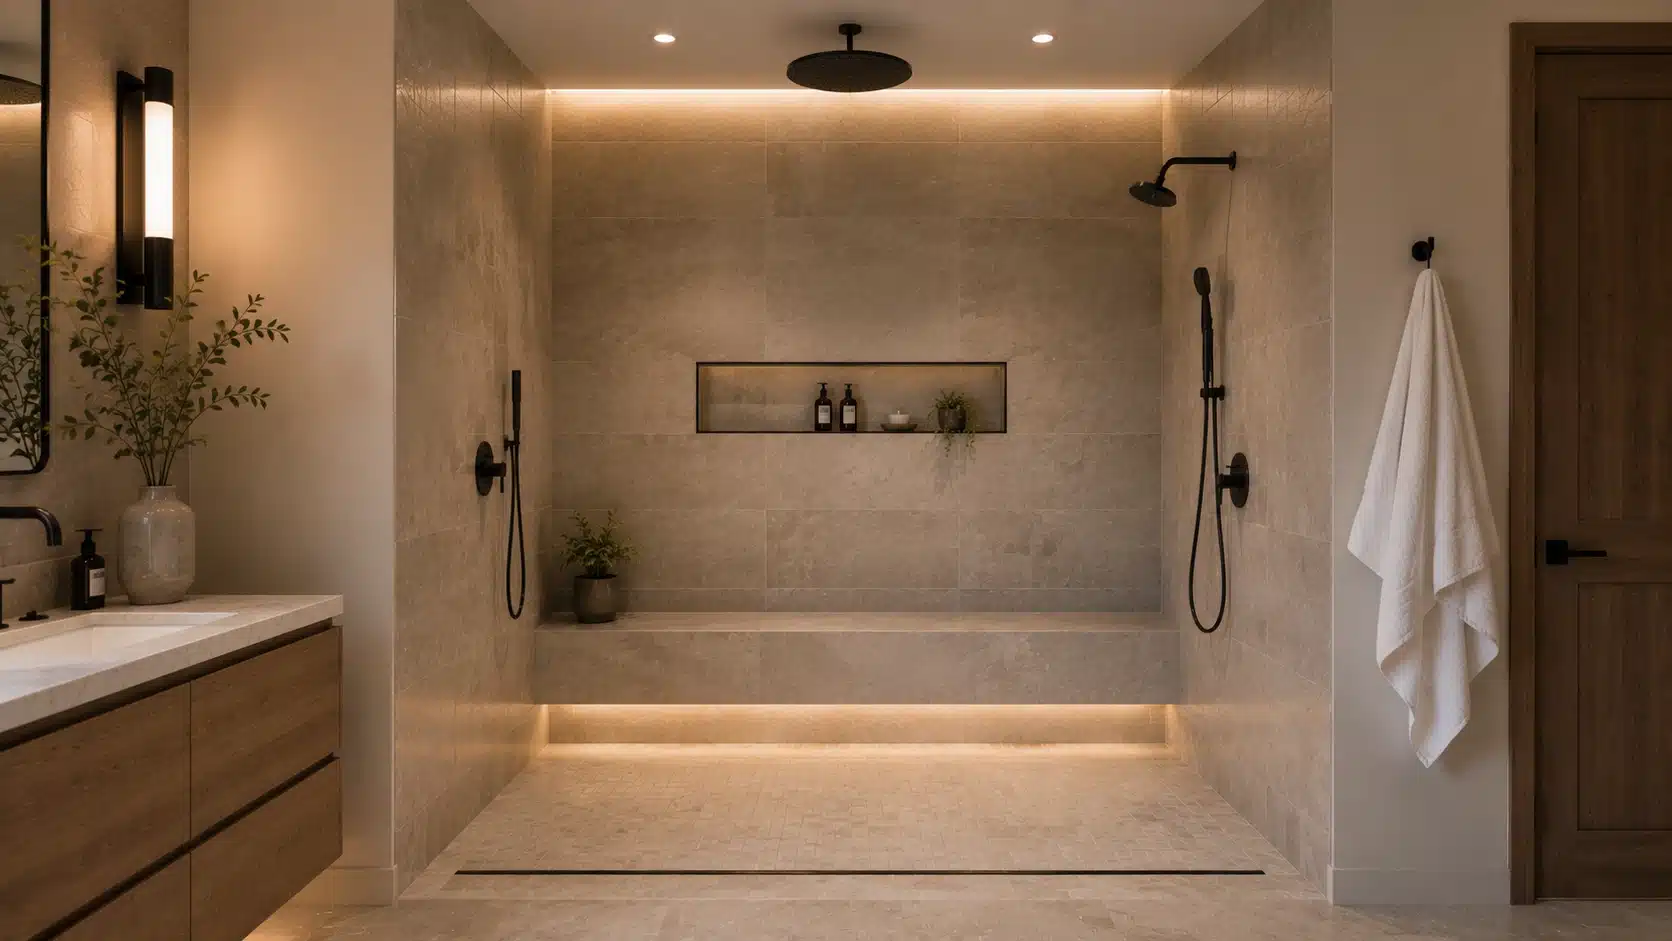
A large curbless walk-in shower with a tiled bench on one side and two showerheads, a fixed rain head above and a handheld on the opposite wall, handles both quick rinses and longer sessions.
Thermostatic valves let each head run independently. A linear drain along the back wall keeps the floor clean. No door is needed in showers wider than 36 inches.
8. U-Shaped Three-Wall Fixture Layout
Vanity on the entry wall, shower and tub on the back wall, toilet on the third. The center of the room stays fully open, no fixture breaks the floor space.
A tall linen tower at the corner junction between the vanity and toilet walls handles shared storage without intruding on the open center. Best suited for near-square bathroom floor plans.
9. Platform Tub Alcove with Built-In Surround Storage

Set the tub into a tiled platform alcove built into a corner or recess. Open shelving on both sides holds towels and bath products at arm’s reach. A deck-mounted tub filler sits centered on the platform edge.
This gives the tub a defined home without needing the floor space a freestanding model requires. Pair with a separate walk-in shower on the opposite wall.
10. Full Wet Room with No Enclosure and Linear Drain
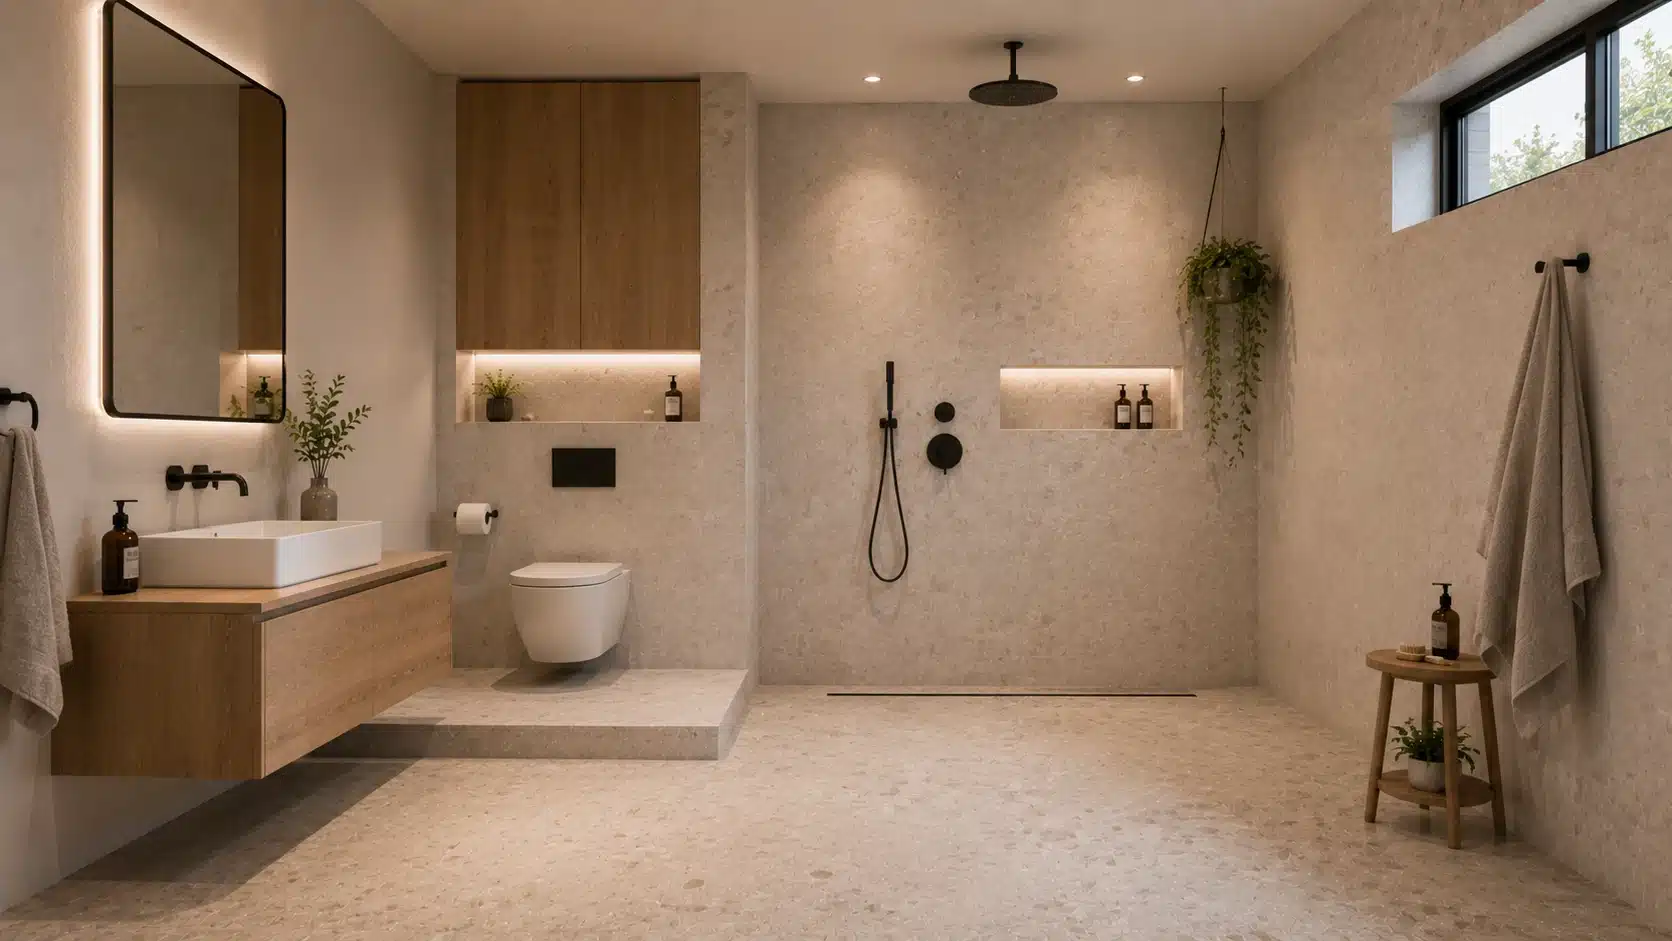
Waterproof the entire floor and slope it toward a linear wall drain on one side. There is no enclosure, the whole room is the shower. A wall-mounted rain head and handheld wand are the only wet fixtures.
The vanity and toilet sit outside the sloped zone on a raised dry platform. Large-format tiles across the full floor keep the space looking continuous.
11. Double Vanity with Central Tower Cabinet
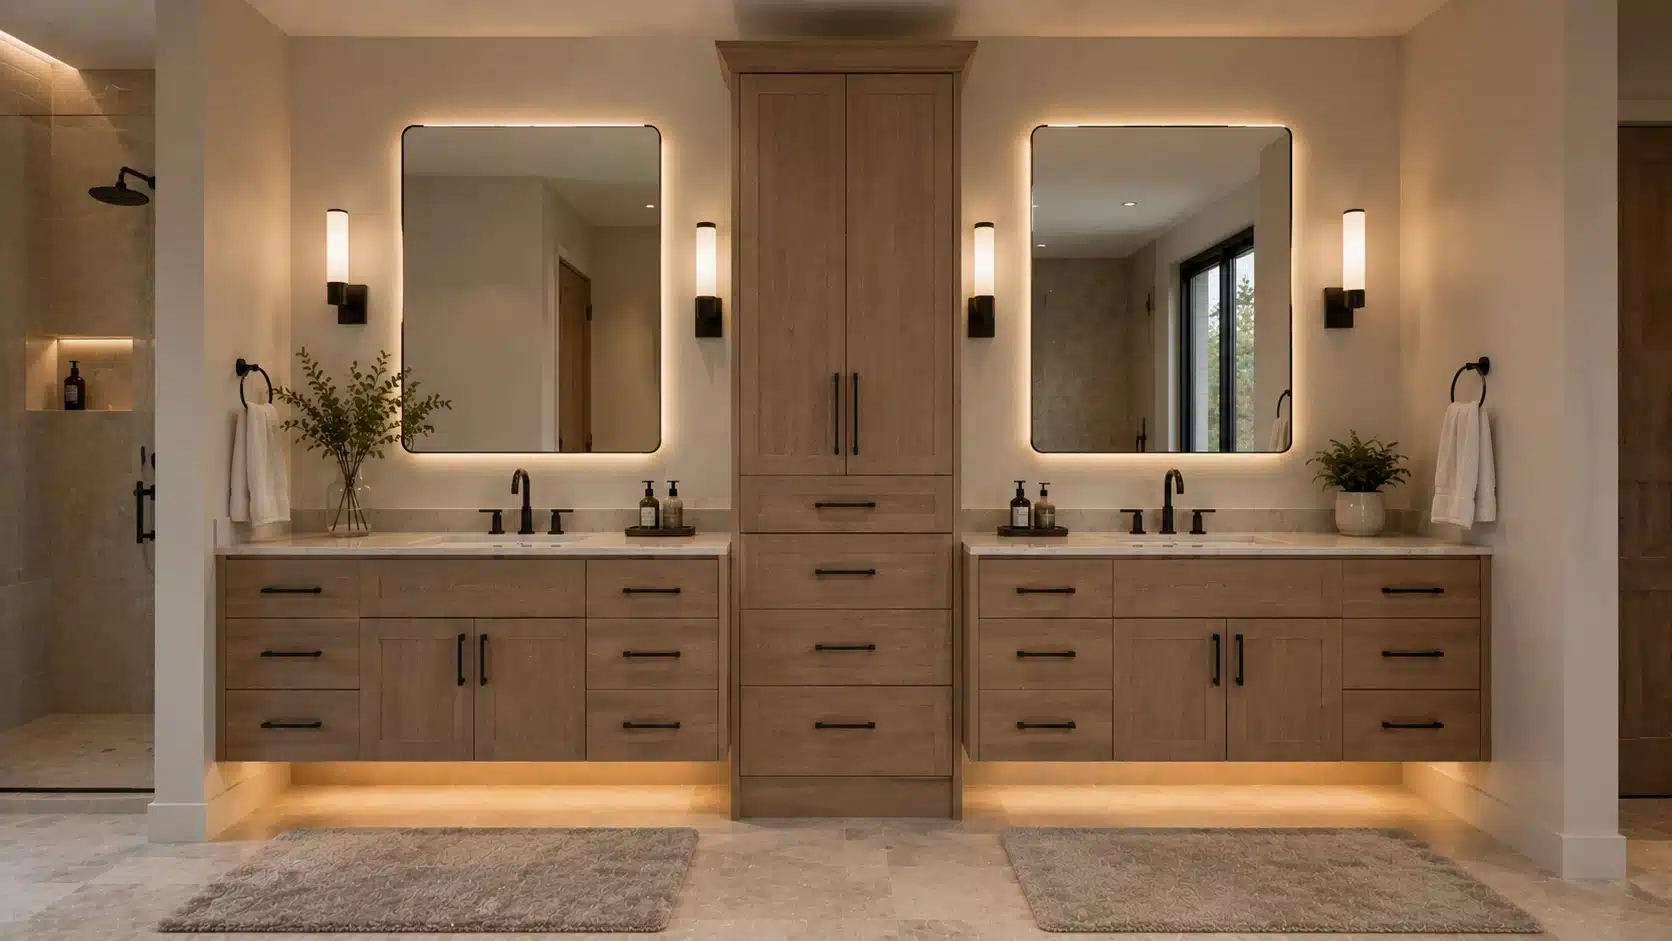
Two individual vanity units, each with its own sink and drawers, flank a tall center storage tower for shared items. Backlit mirrors above each sink provide task lighting without wall sconces eating into counter width.
This layout needs at least eight feet of uninterrupted wall length. Matte hardware throughout keeps the full vanity wall looking composed rather than assembled from separate pieces.
12. Walk-In Closet Connected as a Dressing Suite
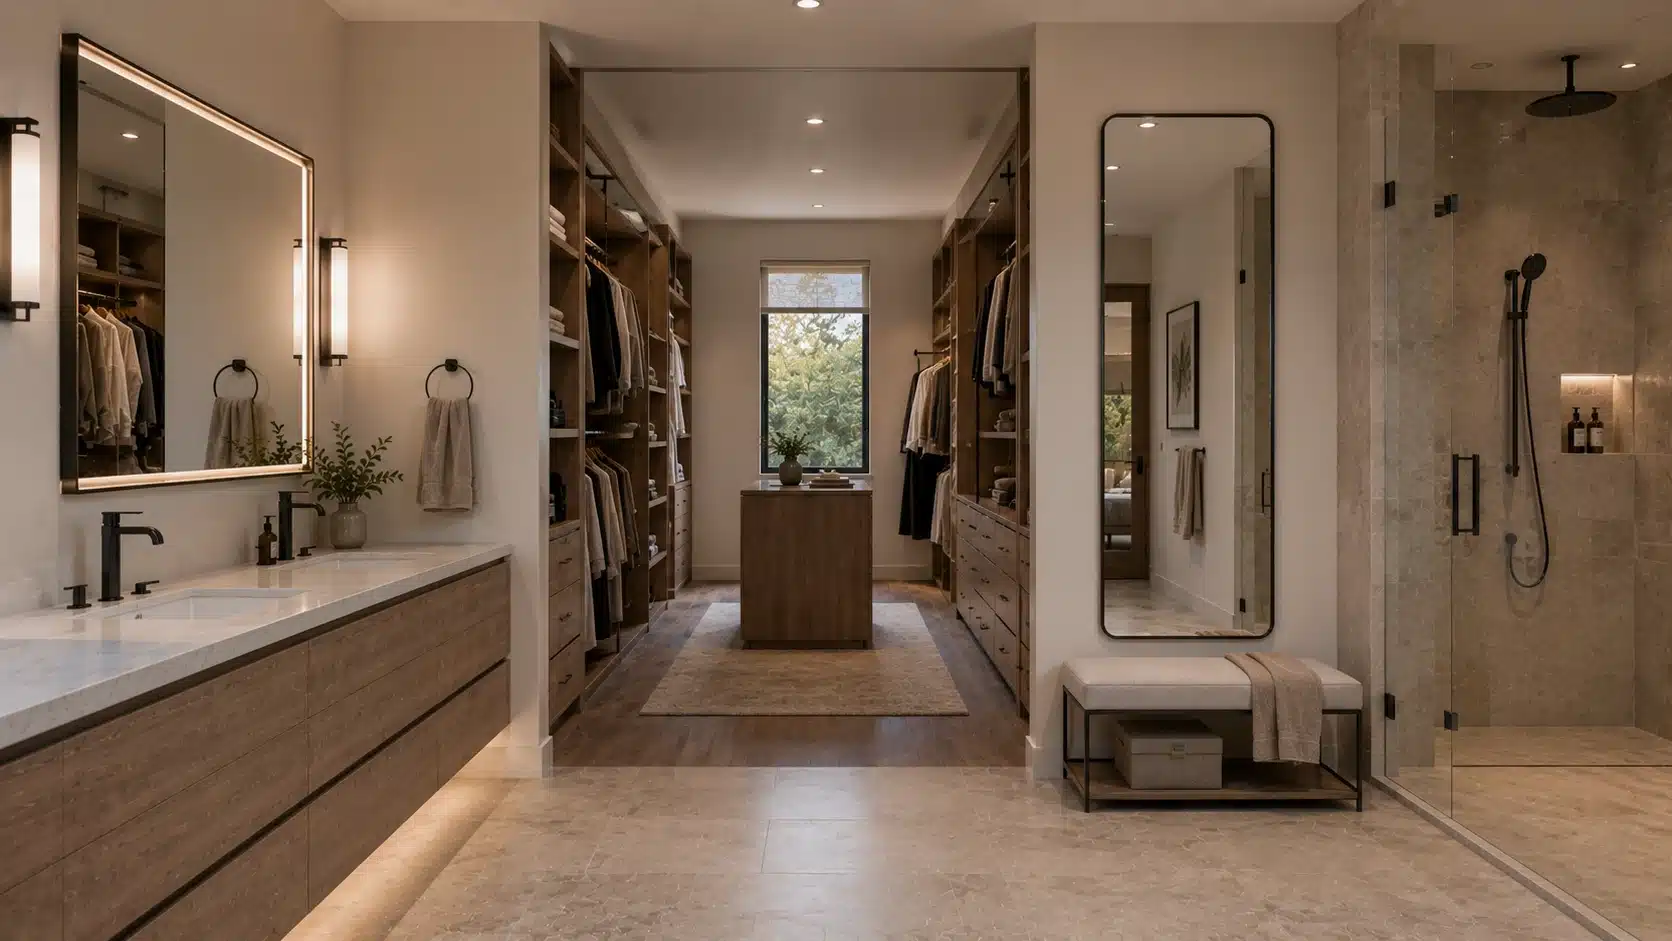
The bathroom opens directly into a walk-in closet with no door between them, just a threshold. Showering and dressing flow in one unbroken sequence. A full-length mirror and built-in bench sit at the transition point.
Both spaces share a wall so plumbing stays close. Strong overhead task lighting in both zones is non-negotiable, dim closet lighting defeats the purpose of this layout entirely.
13. Corner Frameless Shower with Diagonal Entry
Place a walk-in shower in the corner of the bathroom with the entry cut diagonally rather than through a flat wall. This opens the shower without a full glass panel dividing the room.
A ceiling-mounted rain head drops from directly above. The diagonal entry keeps floor clearance generous. Pair with a floating vanity on the adjacent wall and a soaking tub against the far wall.
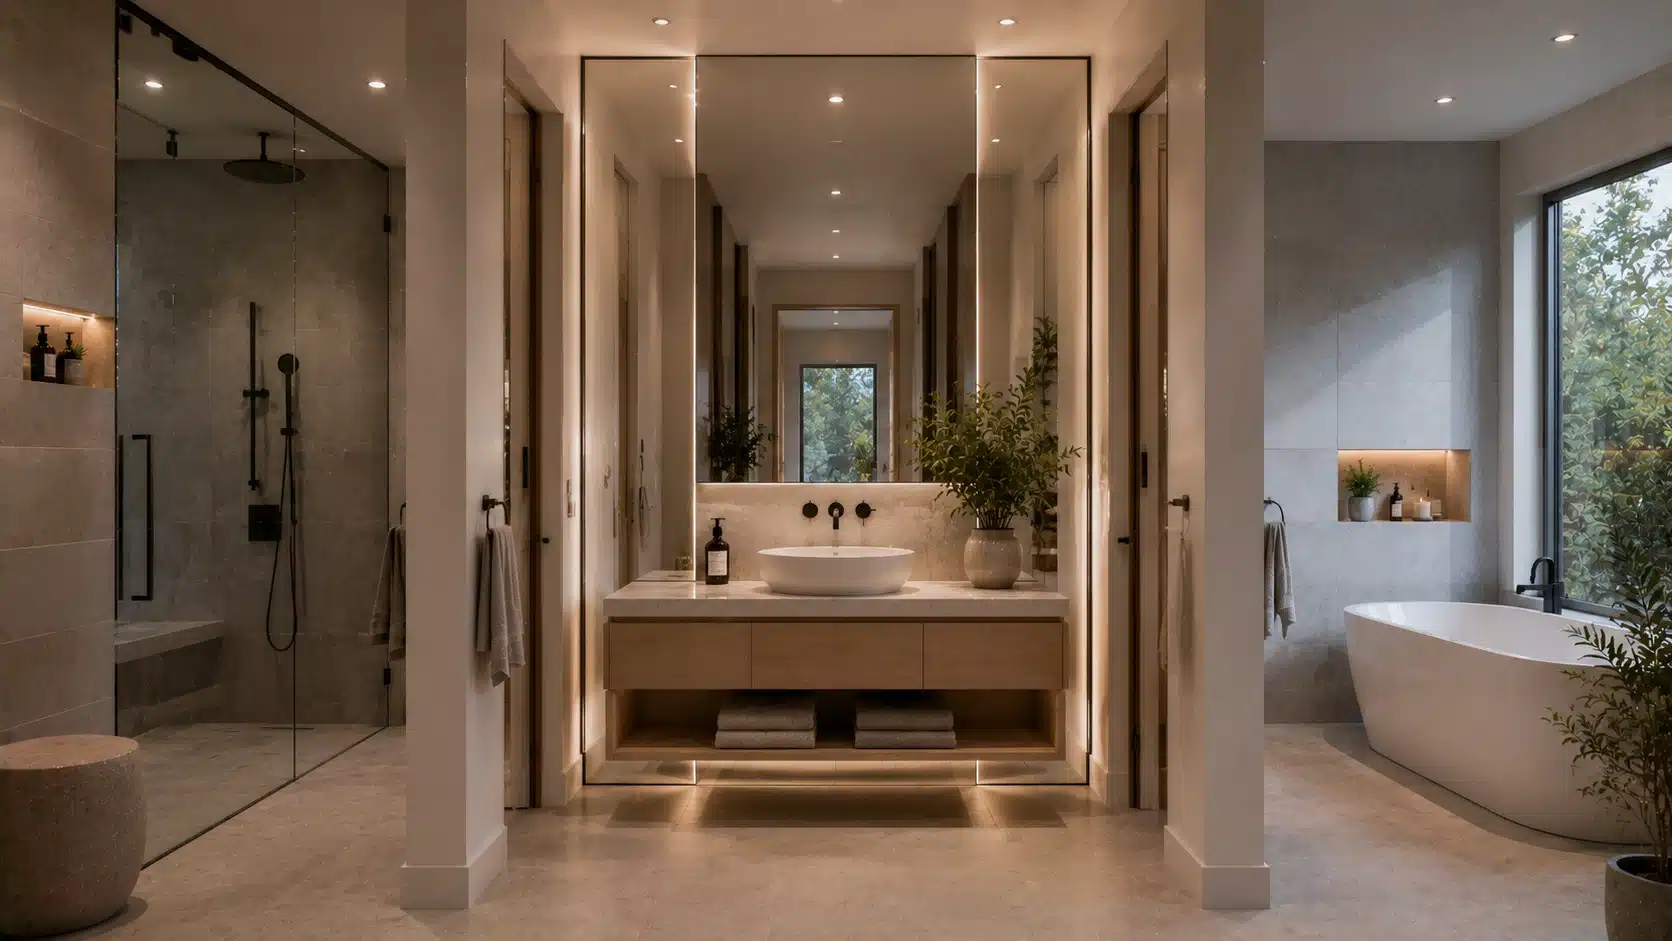
14. Galley One-Wall Layout for Narrow Spaces
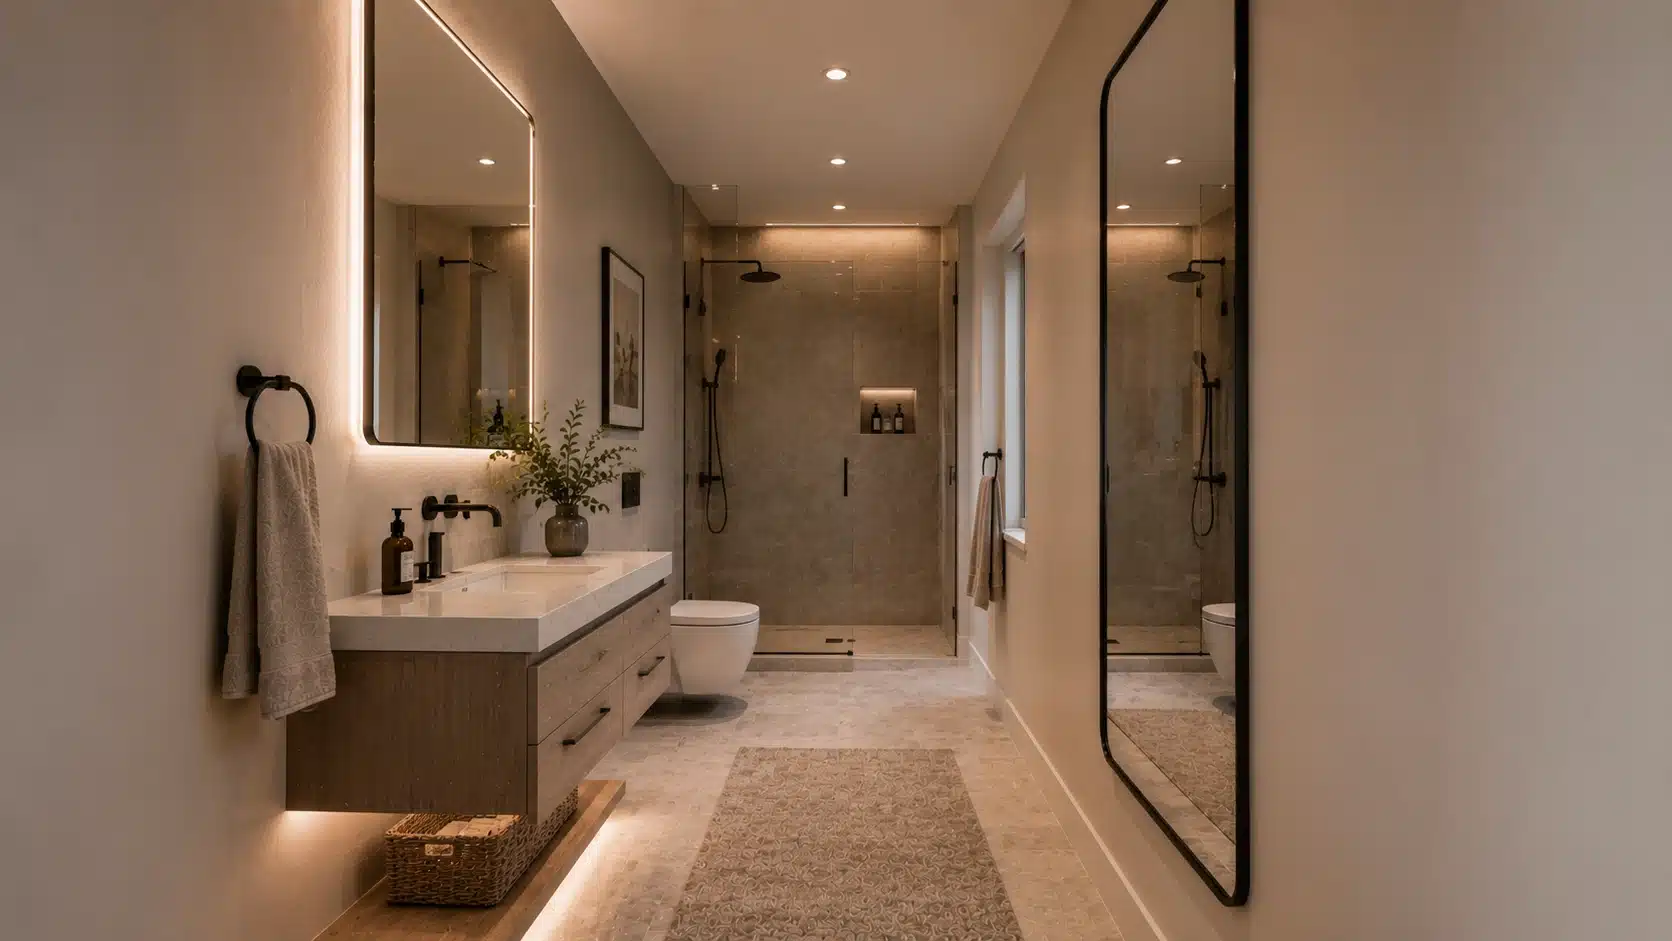
Run the vanity, toilet, and shower along one wall with a clear walkway down the center. Wall-mounted fixtures keep the floor open. A mirrored wall opposite doubles the perceived width without structural changes.
Recessed shower niches replace a caddy. All plumbing runs in a single straight service line, making this one of the most cost-effective layouts to build in a narrow master bathroom.
15. Steam Shower with Chromotherapy Lighting and Bench
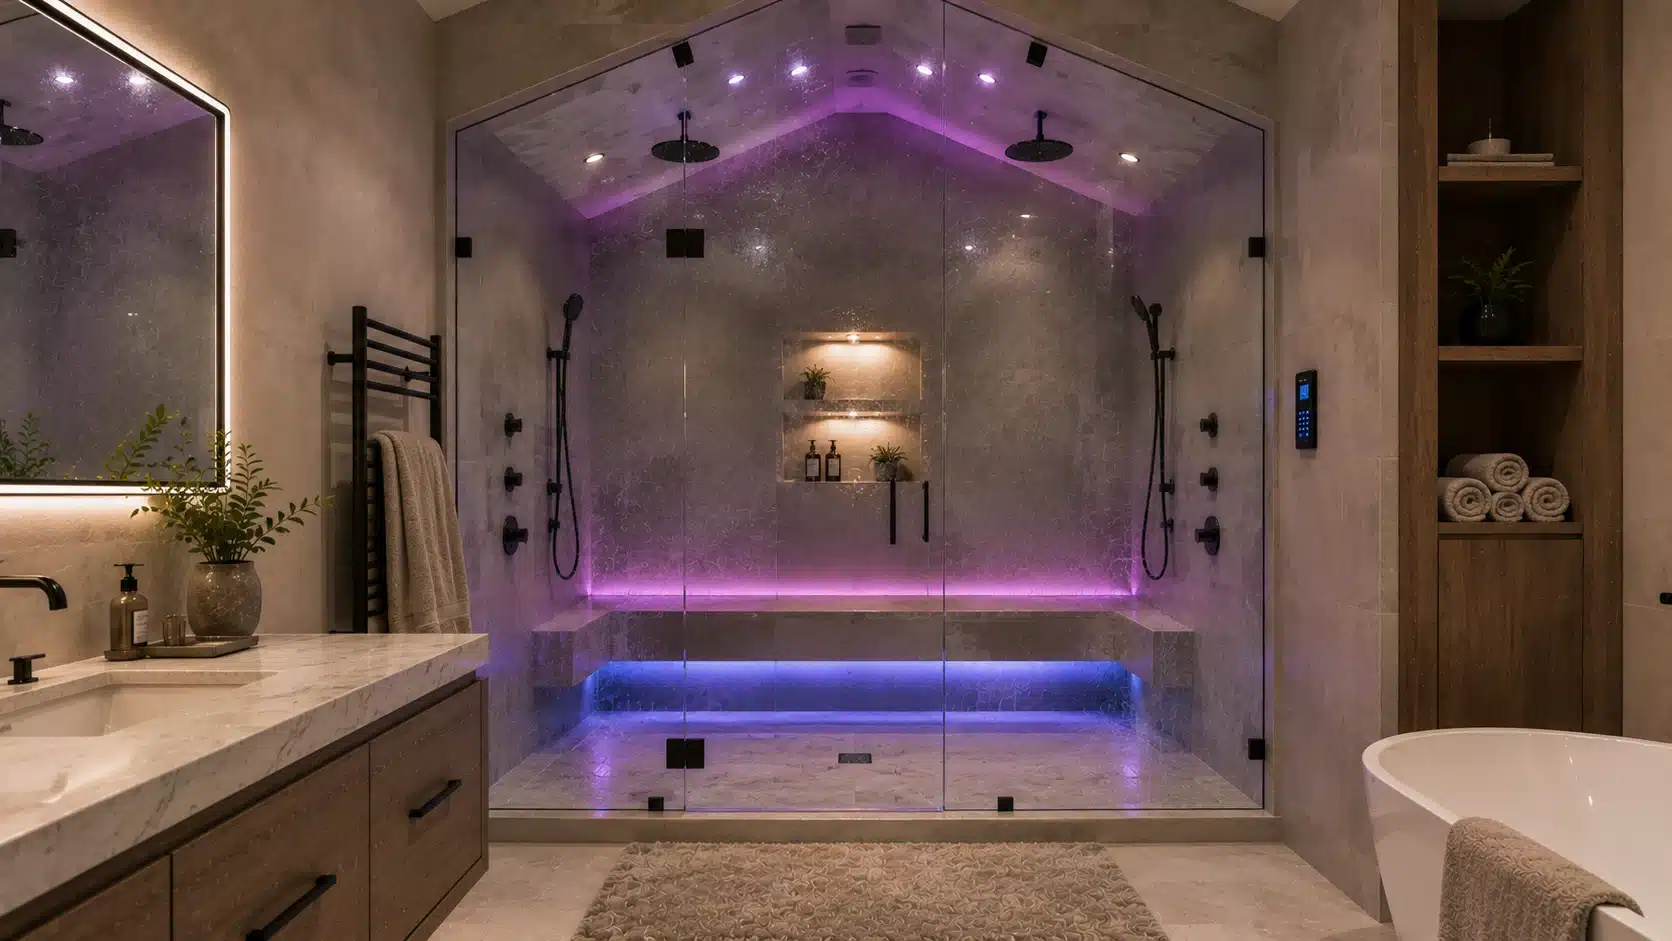
A fully enclosed steam shower with a tiled bench, a chromotherapy LED system, and an oil holder turns the shower into a daily spa setup. The ceiling must slope so condensation runs to the walls rather than dripping.
A standard nozzle stays active for quick rinses. Plan the steam generator in a nearby closet during construction, retrofitting it later costs significantly more.
16. Smart Tech Layout with Heated Floors and Thermostatic Controls
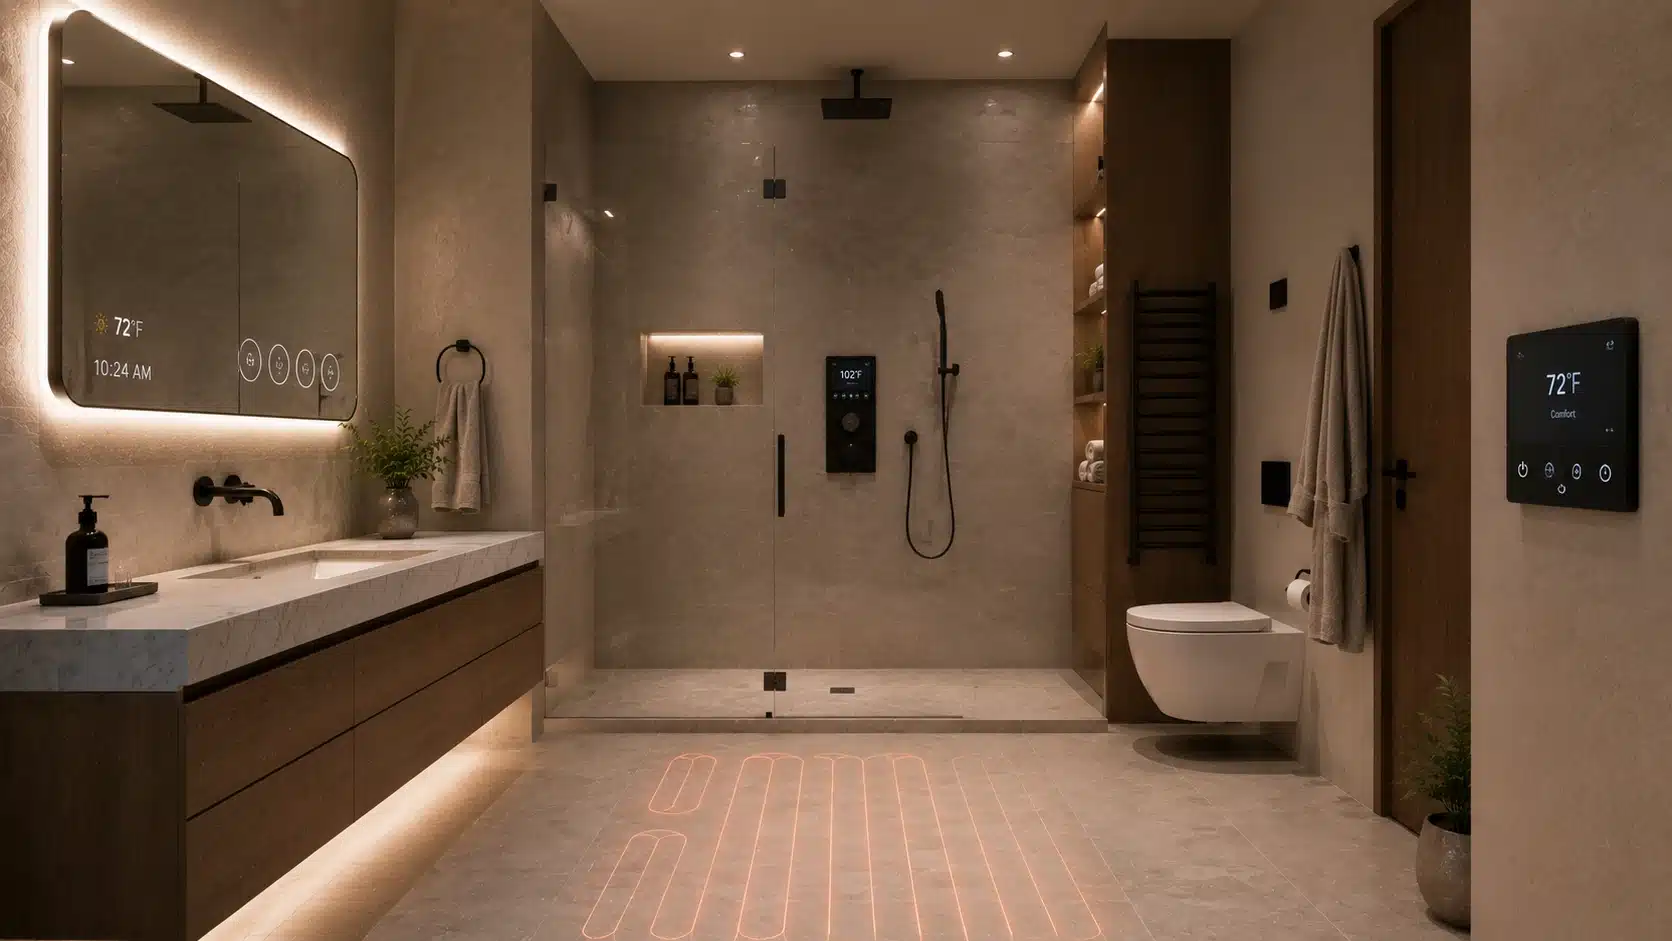
This layout centers on smart fixtures: heated tile floors on a phone app, a thermostatic shower system with digital temperature controls, and a smart mirror with adjustable lighting.
Motion sensors handle vanity lights. A built-in ceiling speaker keeps walls clean. All controls sit on one panel beside the shower entry. The layout is less about materials and more about daily function.
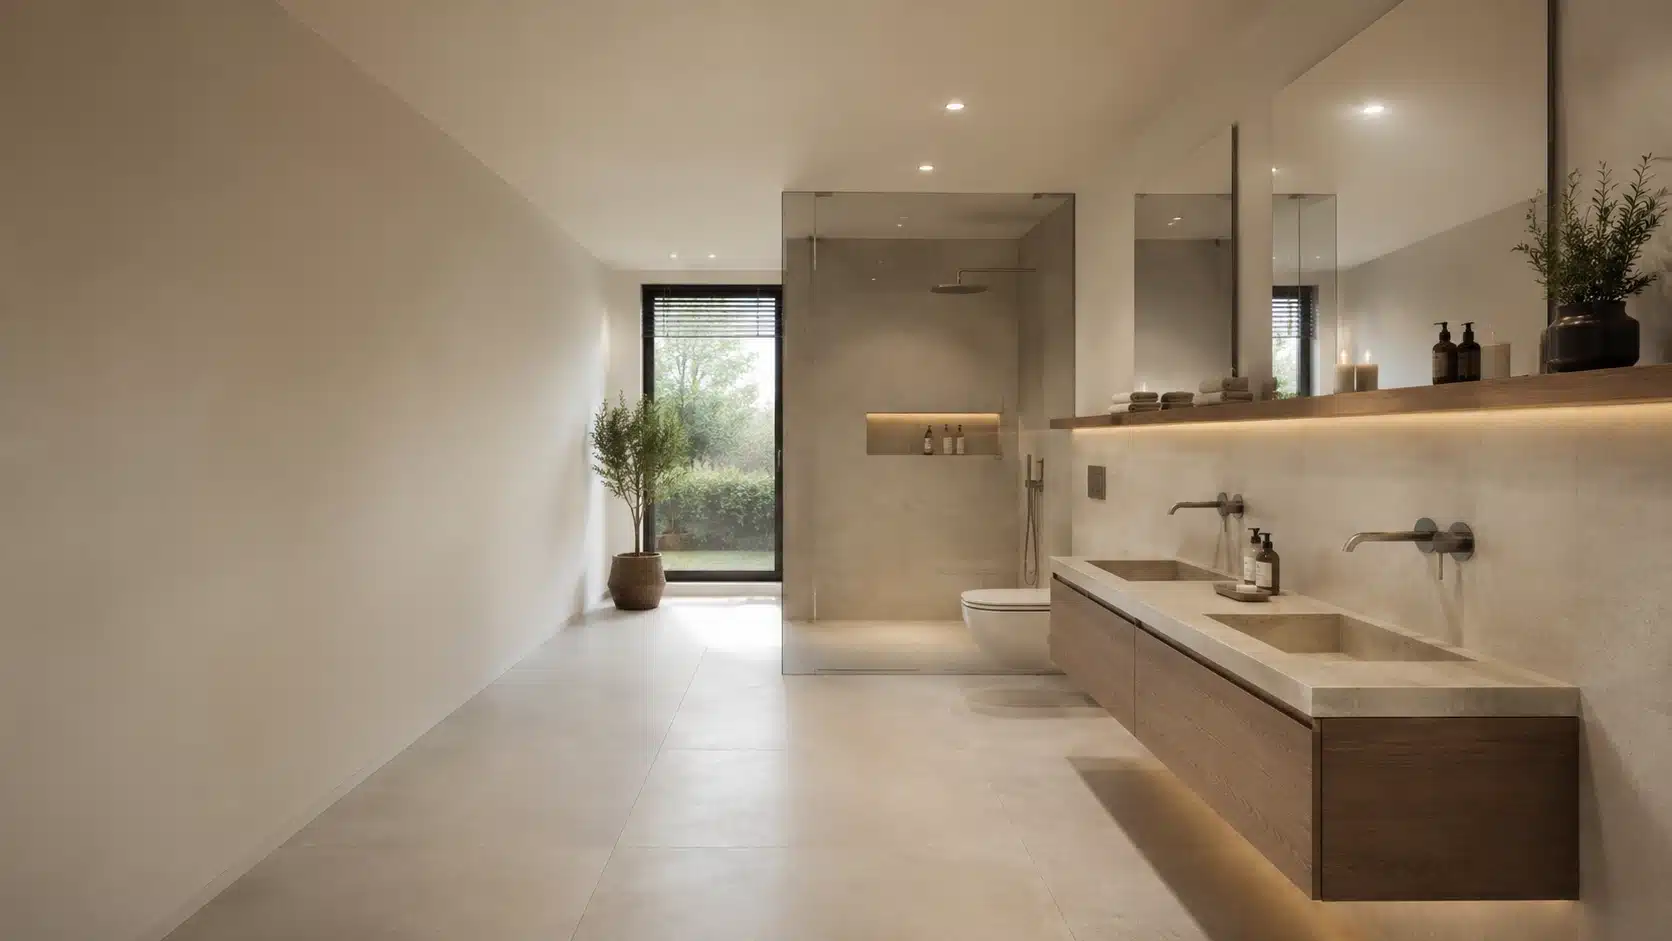
17. Dry Zone and Wet Zone Split with Glass Partition
A full-height frameless glass partition divides the bathroom into a wet side, shower and tub, and a dry side with the vanity, toilet, and storage. Water stays contained while sightlines remain open.
The wet zone floor is waterproofed and sloped; the dry zone uses standard tile. This works well for two people with different morning and evening schedules.
18. Soaking Tub Inside the Shower Enclosure
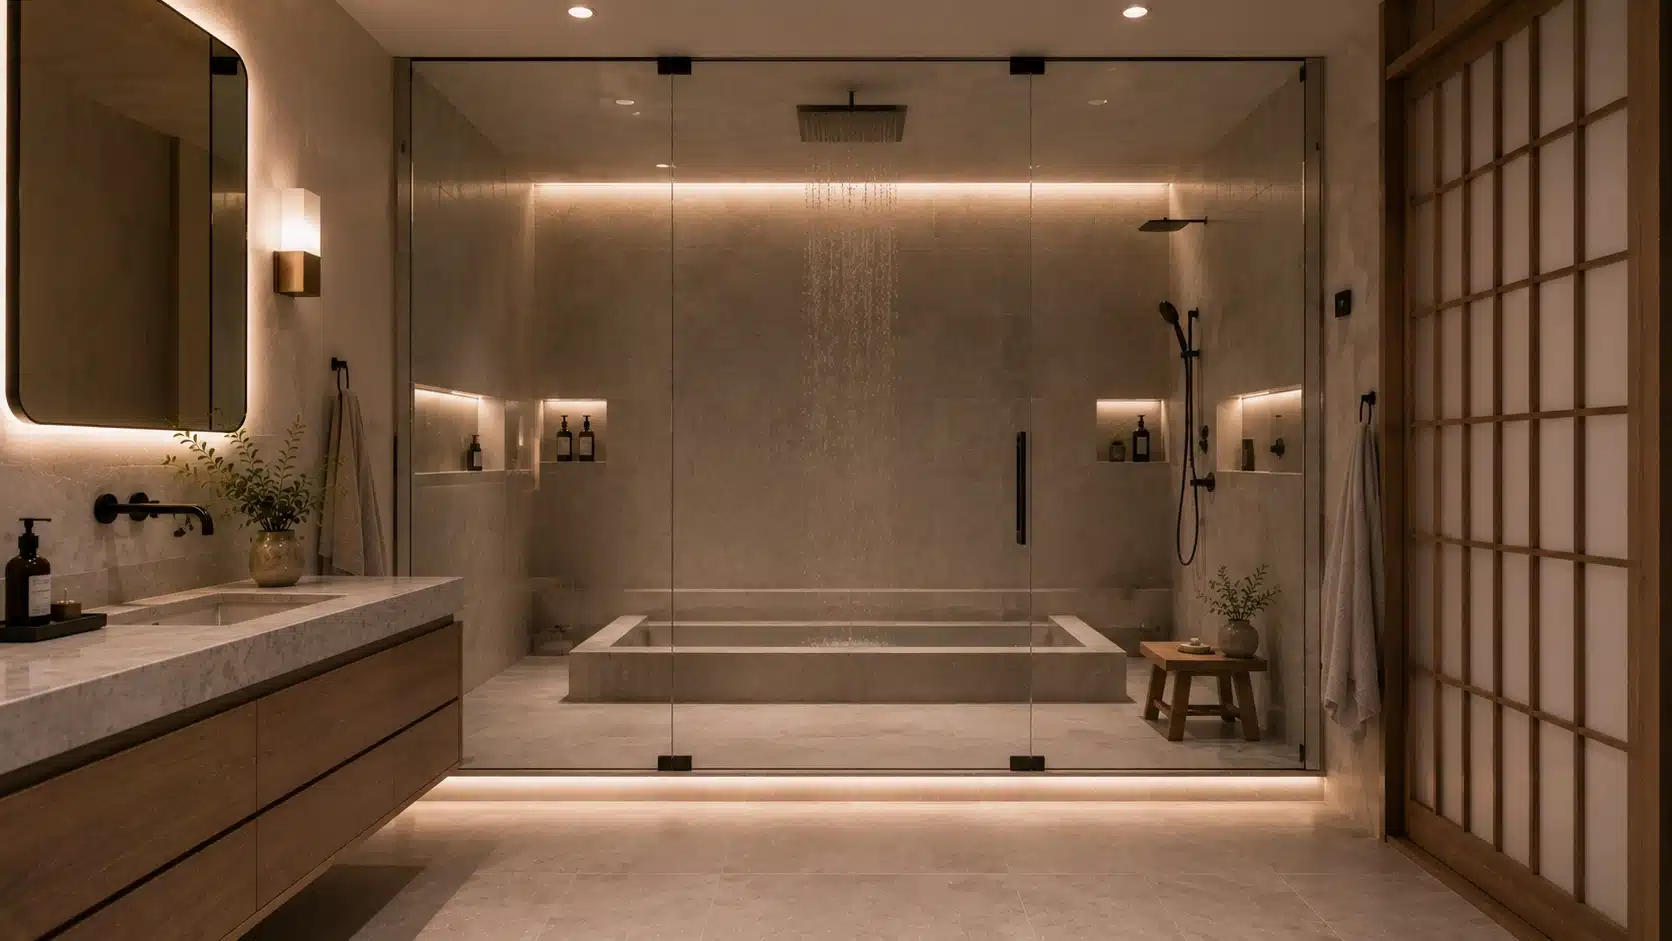
Set a deep soaking tub inside the walk-in shower, both fixtures share one large, continuous tiled area with a single linear drain. A rain head drops from the ceiling above the standing zone.
The tub sits at one end. No separate shower walls needed. This Japanese-influenced layout saves the floor space two separate fixtures require and gives the entire wet area a clean, uninterrupted finish.
19. Accessible Universal Design Layout
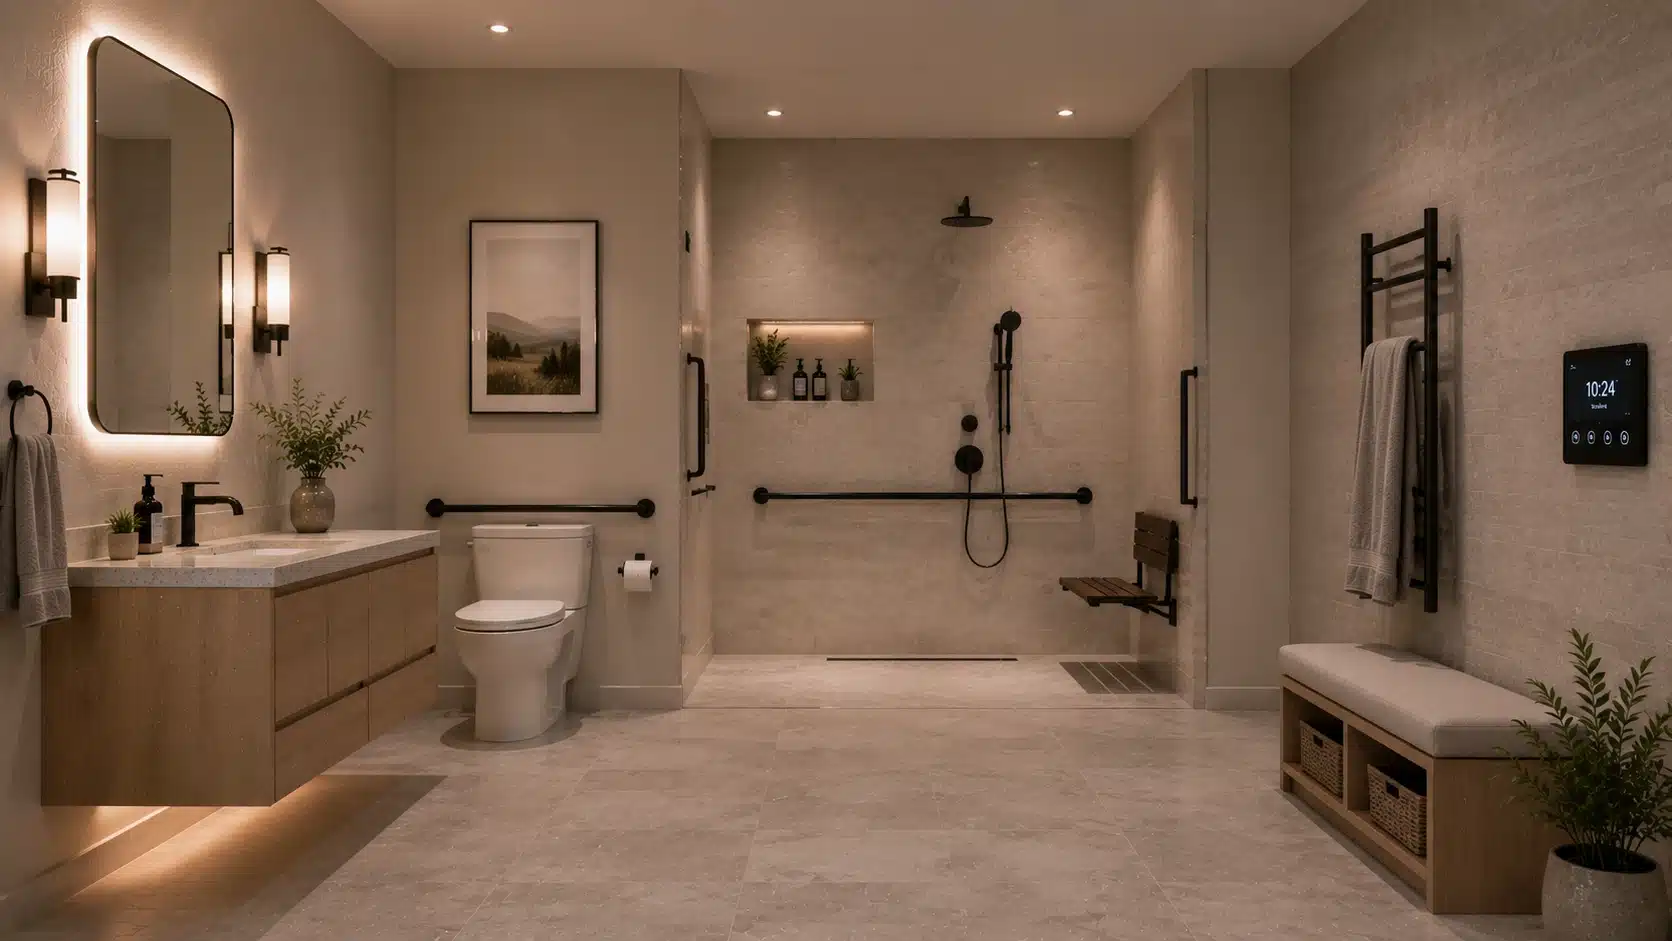
Plan for universal design principles from the start: a curbless shower with a 36-inch-wide opening, a comfort-height toilet with wall blocking for grab bars, and a floating vanity usable seated or standing.
Lever faucets throughout. Anti-scald thermostatic valves in the shower. Keep a 60-inch turning radius clear in the center of the floor. These features cost almost nothing during construction and significantly more to add later.
20. Half-Wall Toilet Privacy Partition
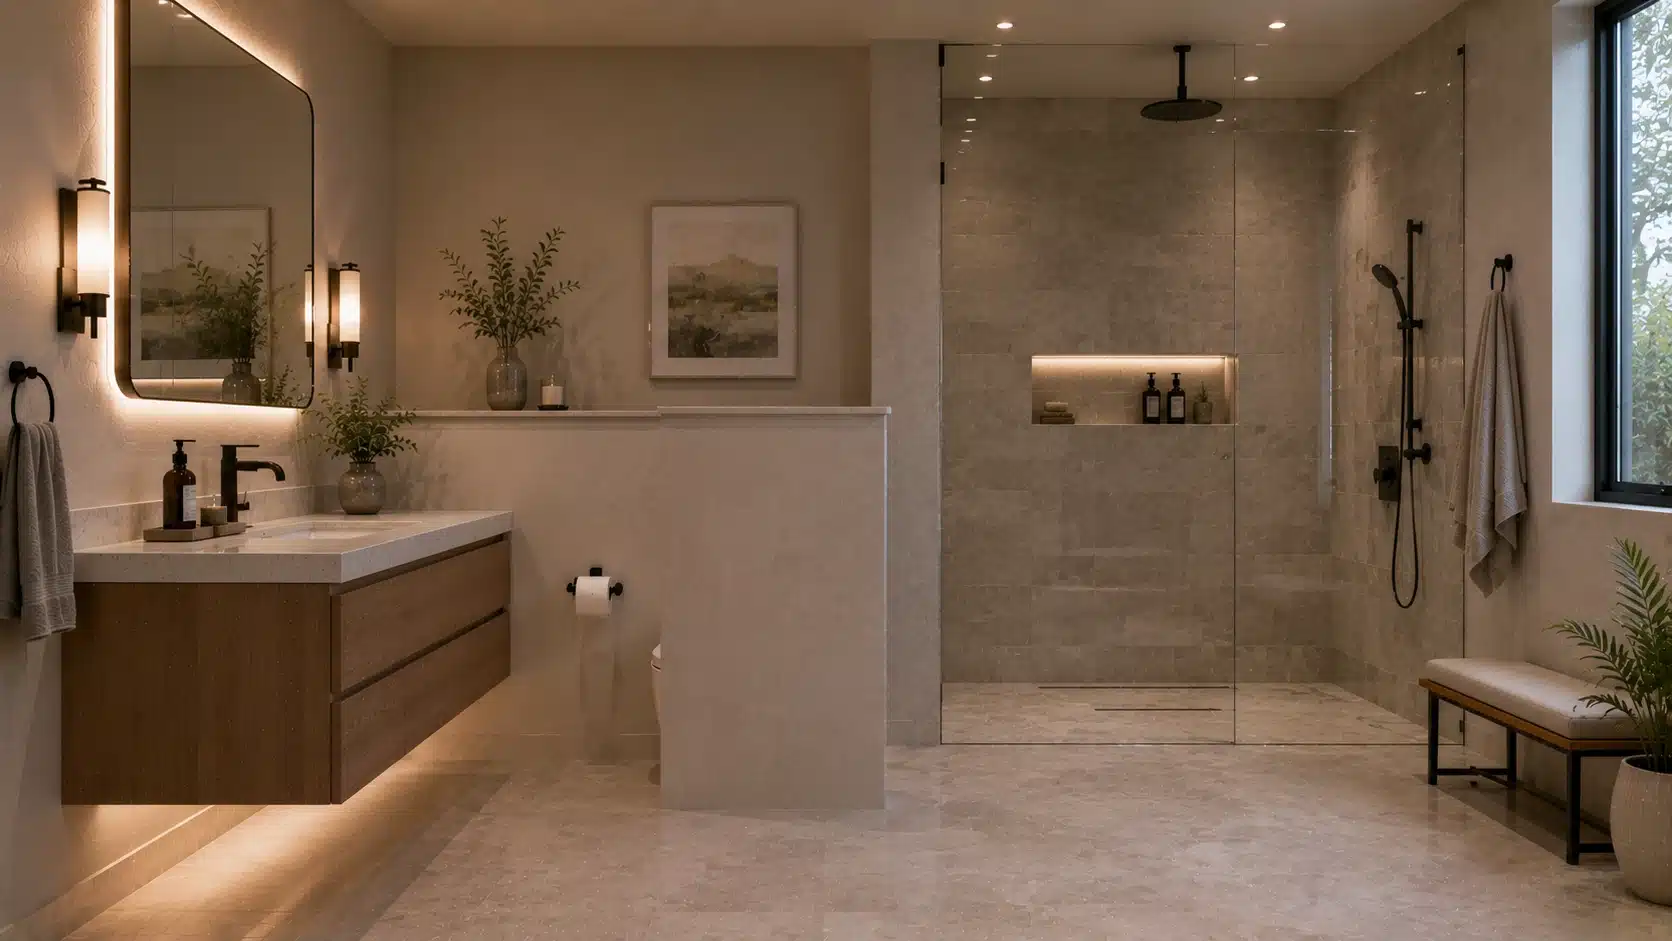
A shoulder-height partition wall separates the toilet from the rest of the bathroom without building a full water closet. The toilet disappears from the main sightline without the cost or floor space of an enclosed room.
The top of the partition doubles as a narrow display ledge. No door required. This works well in mid-size master bathrooms where a full enclosed water closet is not feasible.
21. Window-Facing Soaking Tub with Lower Privacy Glass
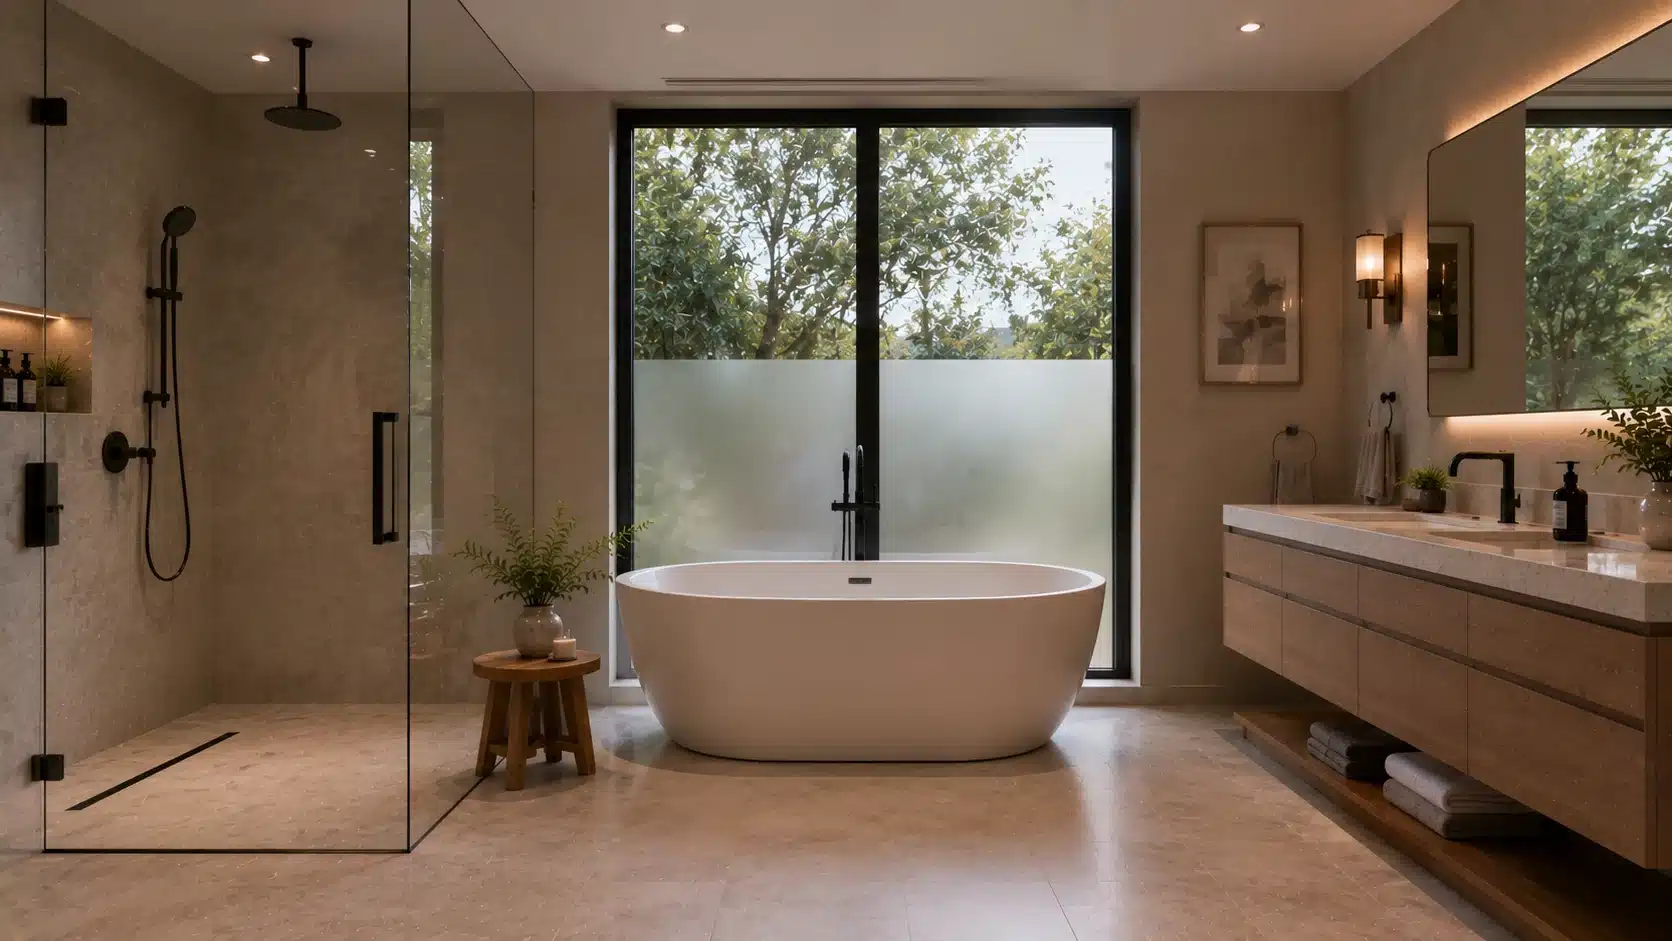
Place the freestanding tub directly in front of a large window so the view extends during a bath. Frost the lower two feet or install a bottom-up privacy shade. No overhead fixture is needed here, natural light handles it.
The shower, vanity, and toilet sit on the three remaining walls. Good fixture positioning does more work than any material choice.
22. Spa Wet Room with Multi-Function Shower System
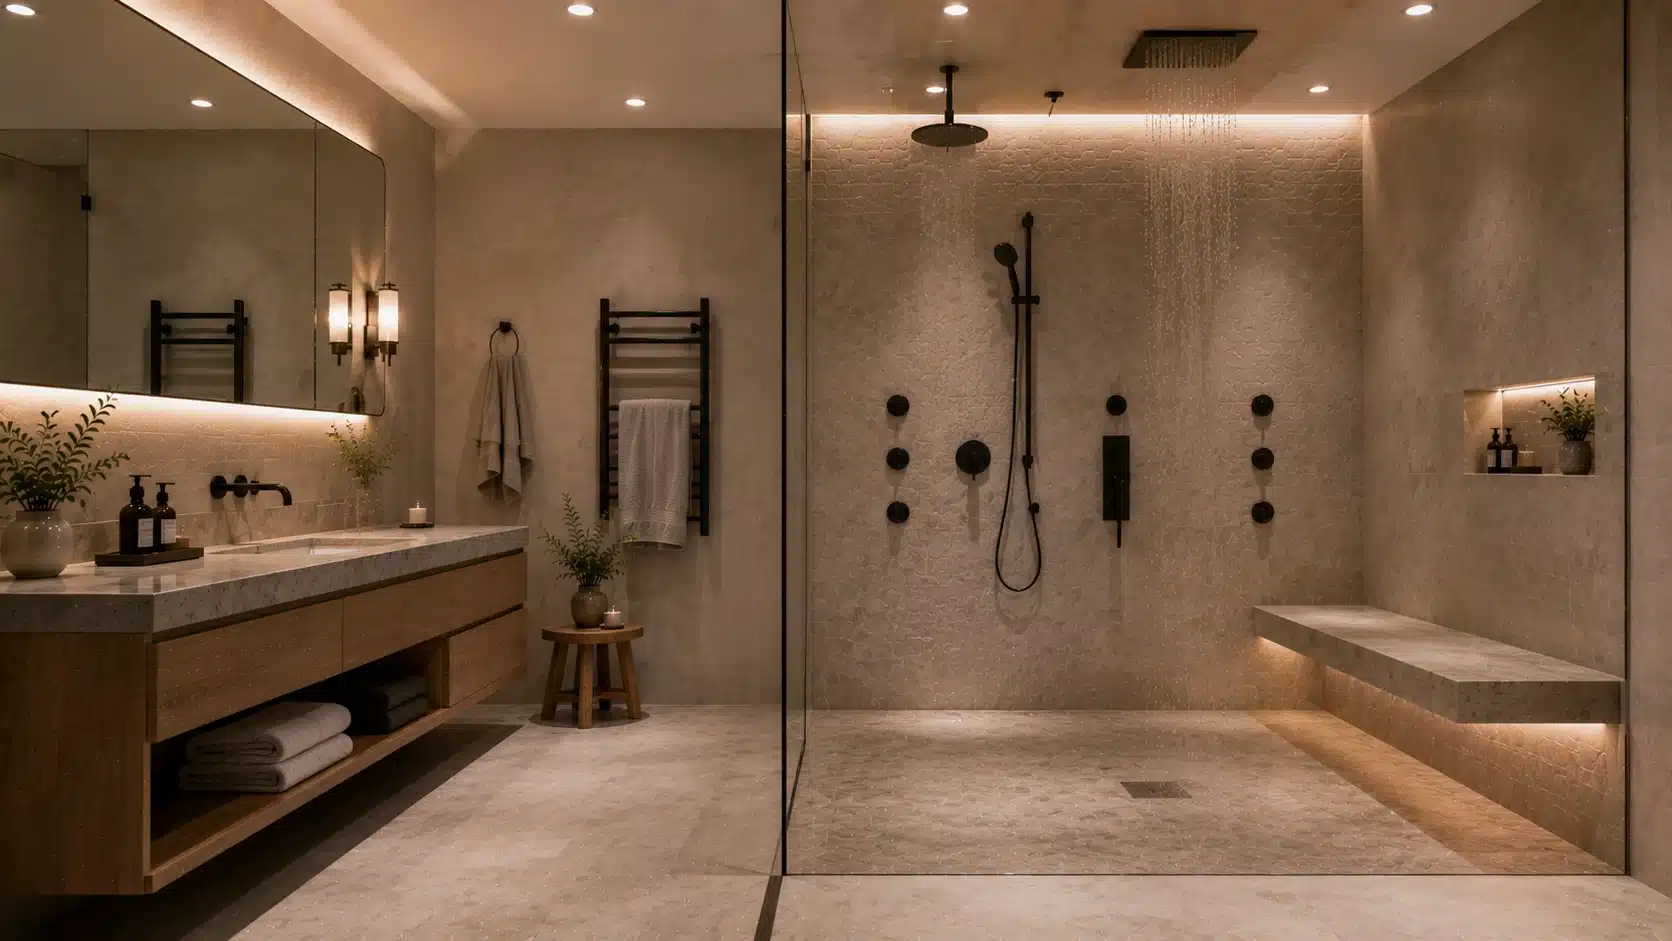
A waterproofed wet room with a multi-function shower system: ceiling rain head, wall-mounted body jets at torso height, and a handheld wand, all from one thermostatic valve.
A tiled bench runs along one wall. A linear drain sits flush at the far end. The vanity and toilet occupy a dry zone separated by a low glass panel. The shower is the entire point.
23. Floating Double Vanity with Vessel Sinks and Wide Mirror
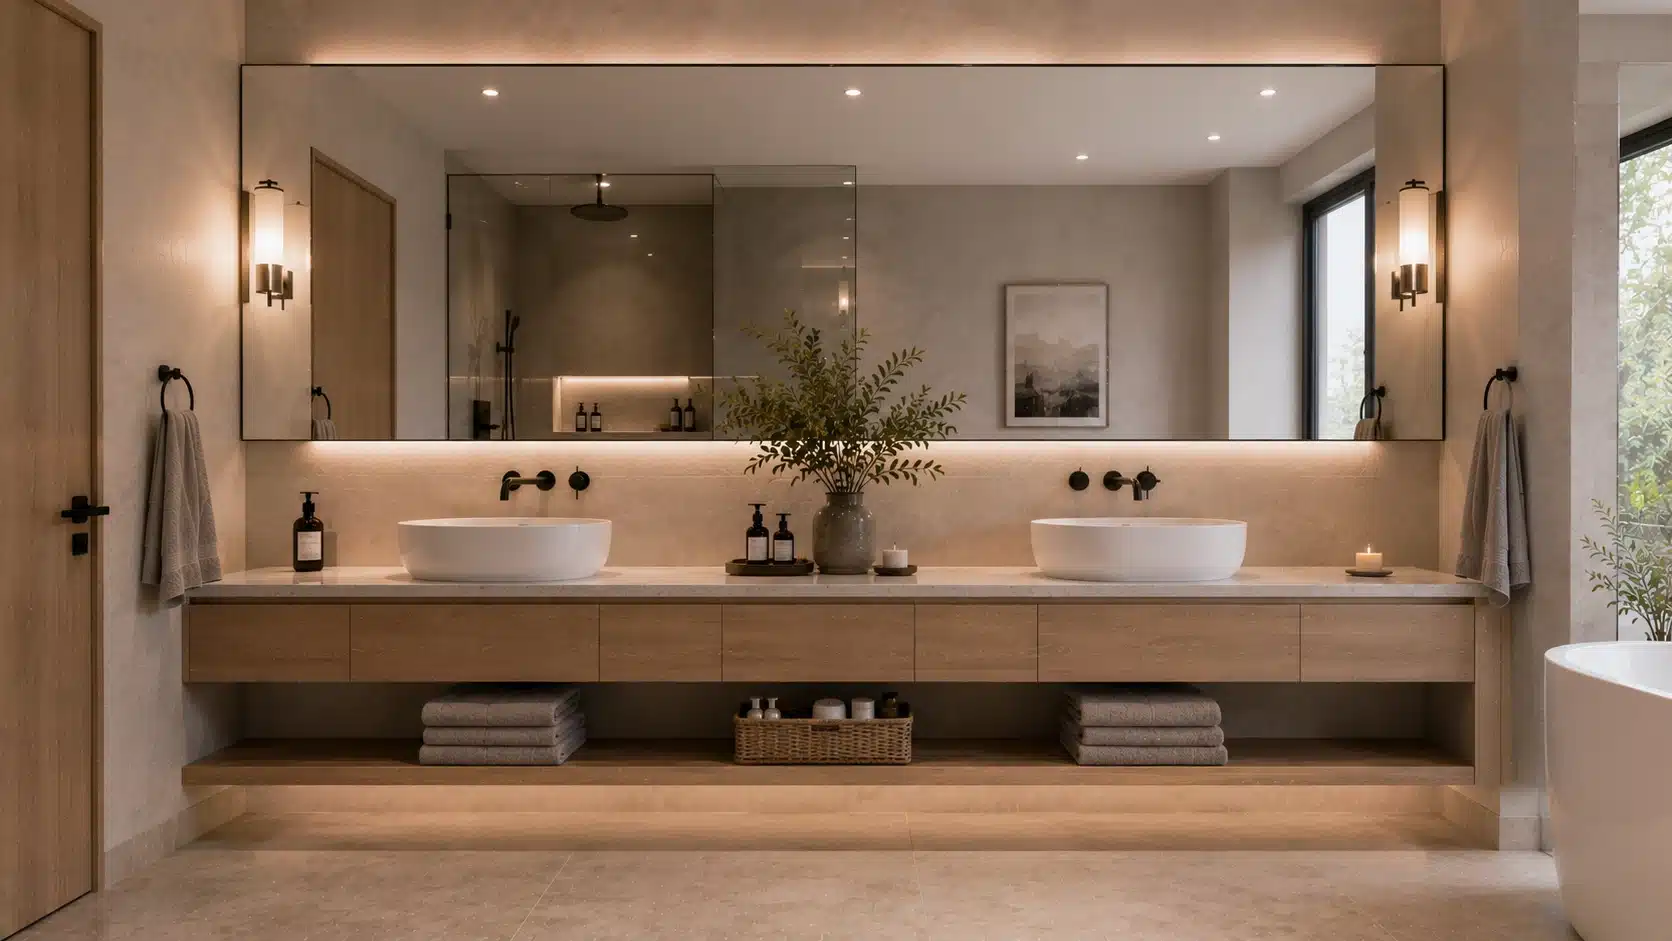
Two vessel sinks on a continuous floating counter. A single wide frameless mirror spans both sinks with no break in the middle. Wall-mounted faucets keep the counter clear.
Open shelving below holds baskets and towels. The counter sits low to accommodate the vessel height. This layout puts the entire vanity wall on display and works in both modern and transitional bathrooms.
24. T-Junction Layout with Full-Height Mirror Wall
In a T-shaped floor plan, place a full-height mirror wall at the T-junction, where the stem meets the crossbar. This position receives sightlines from both directions, making the room feel significantly larger.
The vanity runs along the stem; the shower and tub sit in the crossbar arms. A linear lighting strip along the top of the mirror wall provides even light across all zones.
25. His-and-Hers Separate Zones in One Bathroom
Split the bathroom into two clearly defined personal zones, one side per person, with shared access to the shower and toilet in the middle. Each zone has its own vanity, mirror, medicine cabinet, and electrical outlets.
A low partial wall or flooring change marks the boundary. This prevents counter and mirror conflicts entirely. A minimum of 12 feet of total floor width is needed.
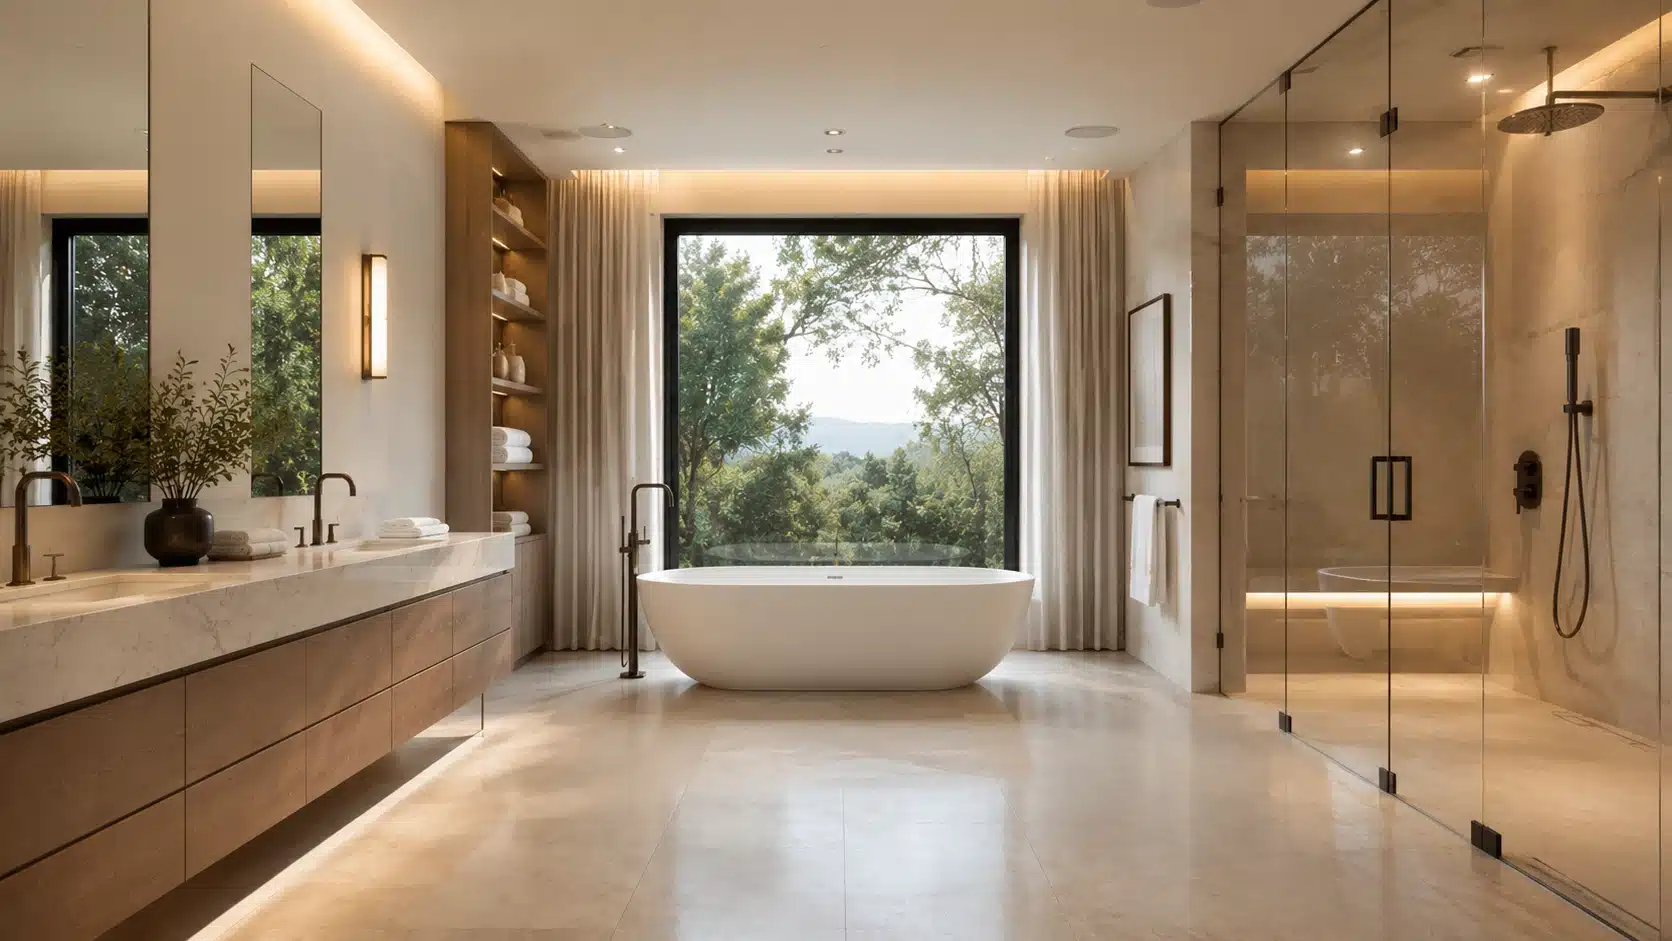
26. Hotel Suite Layout with Tub Opposite Double Vanity
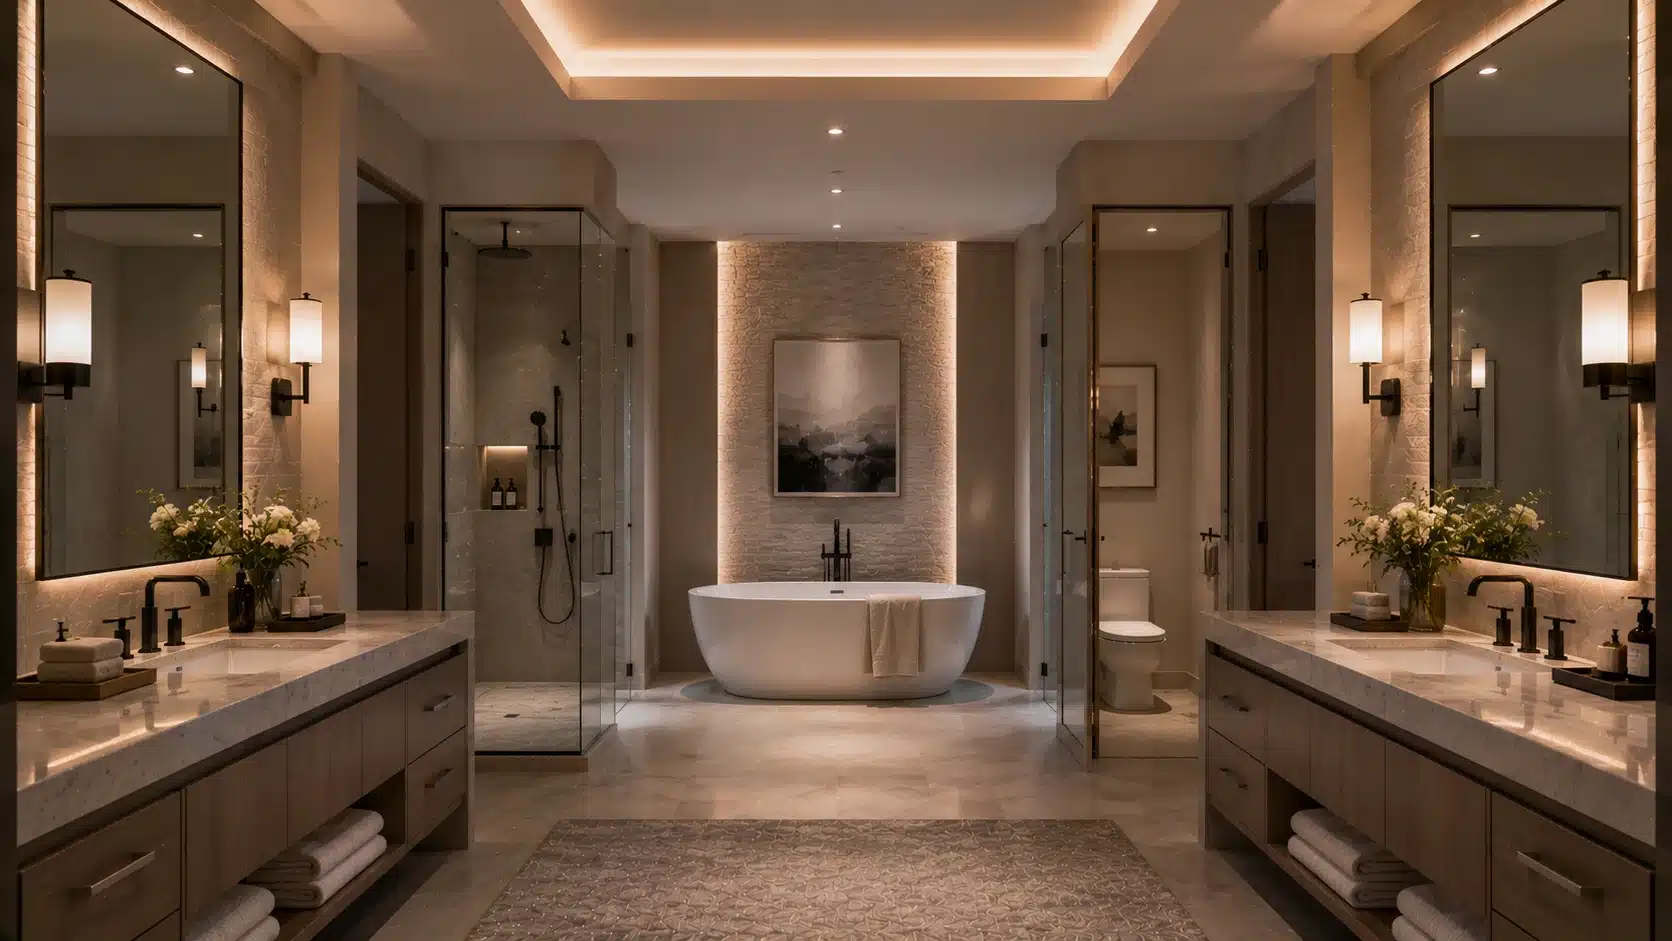
Place the double vanity on the entry wall and a freestanding soaking tub centered on the far wall directly opposite. The walk-in shower sits on one side; the enclosed toilet on the other.
This creates a direct line of sight from the door to the tub, how most luxury hotel suites are arranged. Matching floor-mounted tub fillers and a rain shower column tie it all together.
27. Freestanding Vanity Island in the Center of the Room
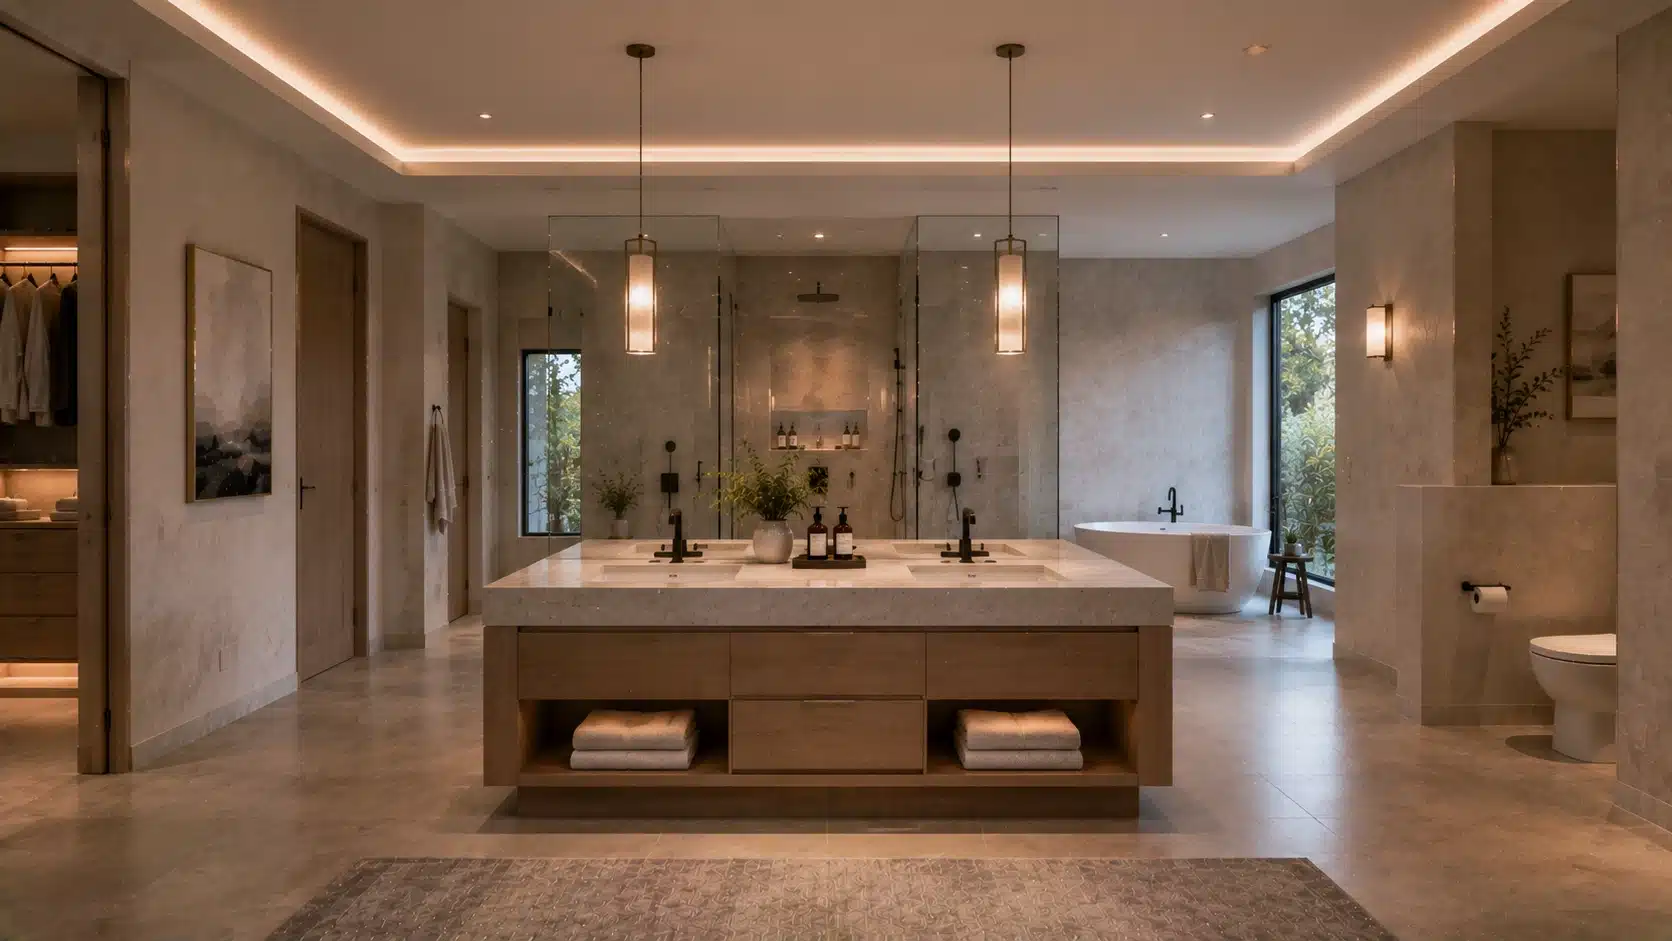
Float a freestanding vanity island in the center with a sink on each long side, one per person. The shower and tub sit against the far wall; the toilet is behind a partial wall in the corner.
Pendant lights drop from the ceiling above each sink rather than wall sconces. This layout requires at least 200 square feet and a ceiling height of at least 9 feet.
These layouts cover every floor plan size, budget, and daily routine. Some work best in compact spaces; others need room to breathe. Pick the one that fits how you actually use your bathroom, then build every other decision around that.
Common Mistakes to Avoid in Bathroom Layouts
Even the best design ideas fall short when basic planning is skipped. These are the most common mistakes homeowners make, and the easiest to prevent before work begins:
- Poor Clearance Planning: Leave at least 30 inches between the toilet and vanity for comfortable daily movement.
- Overcrowded Layout: Avoid squeezing too many features into limited space. Focus on what you’ll actually use.
- No Storage Plan: Add drawers, niches, and cabinets early to avoid cluttered counters later.
- Single Light Source: Combine overhead, vanity, and accent lighting for better visibility and balance.
- Ignoring Privacy: Simple additions like pocket doors or panels improve comfort in shared bathrooms.
- Skipping Accessibility: Plan curbless showers, grab bar support, and comfort-height fixtures during construction.
- Poor Ventilation Choices: Proper airflow helps prevent mold, peeling paint, and moisture damage over time.
A bathroom should feel practical long after the remodel is finished. Smart planning early on prevents costly changes later and makes the space easier, cleaner, and more comfortable to use every single day.
Tips for Planning Your Master Bathroom Layout
A well-planned bathroom feels easier to use, lasts longer, and avoids expensive fixes later. Small decisions during planning often make the biggest difference after construction ends. Here are some tips for your bathroom layout:
- Plan Around Daily Use: Build the layout around how the bathroom gets used each day.
- Finalize Plumbing Early: Changing pipe locations later increases costs quickly.
- Tape the Layout First: Mark fixture sizes on the floor to check spacing before construction begins.
- Spend More on Fixtures: Quality faucets and hardware hold up better with daily use.
- Choose Grout Carefully: Pick grout colors based on the maintenance level you can manage.
- Layer Your Lighting: Combine task, ambient, and accent lighting for better function.
- Add a Shower Niche: Built-in storage keeps the shower cleaner and more practical.
Per the EPA’s WaterSense program, upgrading fixtures during a remodel is also the best time to switch to low-flow options that cut water use without affecting pressure.
Final Verdict
Choosing the right layout for your bathroom comes down to understanding your space, your routines, and your priorities, and then making design decisions that serve all three well.
The master bathroom layout ideas covered here range from bold design statements to quiet, functional upgrades, giving you a practical starting point for whatever direction your remodel takes.
Primary bathroom layout ideas work best when the planning is specific to your life rather than drawn from a generic template. If any of these layouts resonated with you, the next step is mapping them against your actual floor plan.
A professional designer or remodeling consultant can help you refine the details from there. Drop a comment below and let me knwo which one do you prefer.