Have you ever felt like you’re wrestling with your own home just to boil an egg? I spent years dodging a fridge door that blocked the stove and digging through dark, cavernous cabinets for a single lid.
If your current space feels more like an obstacle course than a sanctuary, a kitchen renovation is the practical solution you need. I’ve lived through the layout fails and the “trendy” mistakes, so you don’t have to.
You’re about to learn how to prioritize functional zones, choose durable materials, and master the work triangle.
By the end, you’ll have a clear, actionable roadmap to transform your cluttered kitchen into a streamlined, high-performing hub that actually makes life easier.
What to Know Before You Start a Kitchen Renovation
Before diving into a kitchen renovation, proper planning is essential to avoid costly mistakes. Start by truly evaluating how you use your kitchen daily, your cooking habits, your storage needs, and how many people share the space, as these will shape every decision.
Next, set a clear, realistic budget early and always reserve an extra 10–15% for unexpected costs that almost always arise. Most importantly, prioritize function over aesthetics.
A well-planned layout and smart usability improvements will serve you far longer than trendy finishes. When your kitchen works efficiently, it saves time and effort every single day.
Getting these fundamentals right before touching a single cabinet ensures your renovation delivers lasting value, not just a pretty space.
How a Kitchen Renovation Improves Your Daily Life
A well-executed kitchen renovation does more than refresh the look; it transforms how you live at home every day. Here’s what you can expect:
- Easier cooking and cleaning with a smarter, more functional layout that cuts down on daily effort.
- More storage without clutter, keeping countertops clear, and everything you need is within reach.
- Improved lighting and visibility make the space safer and more enjoyable to work in.
- Greater comfort for family and guests, turning the kitchen into a welcoming hub of the home.
- Better home value and lower long-term maintenance, protecting your investment for years to come.
Simply put, a thoughtful renovation pays off not just in resale value, but in the quality of your everyday life.
Kitchen Renovation Ideas to Upgrade Your Space
Here are practical ideas from layout changes to finishing touches. Each idea is designed to help you make smarter choices, whether you’re doing a full remodel or a focused upgrade:
1. Add a Kitchen Island
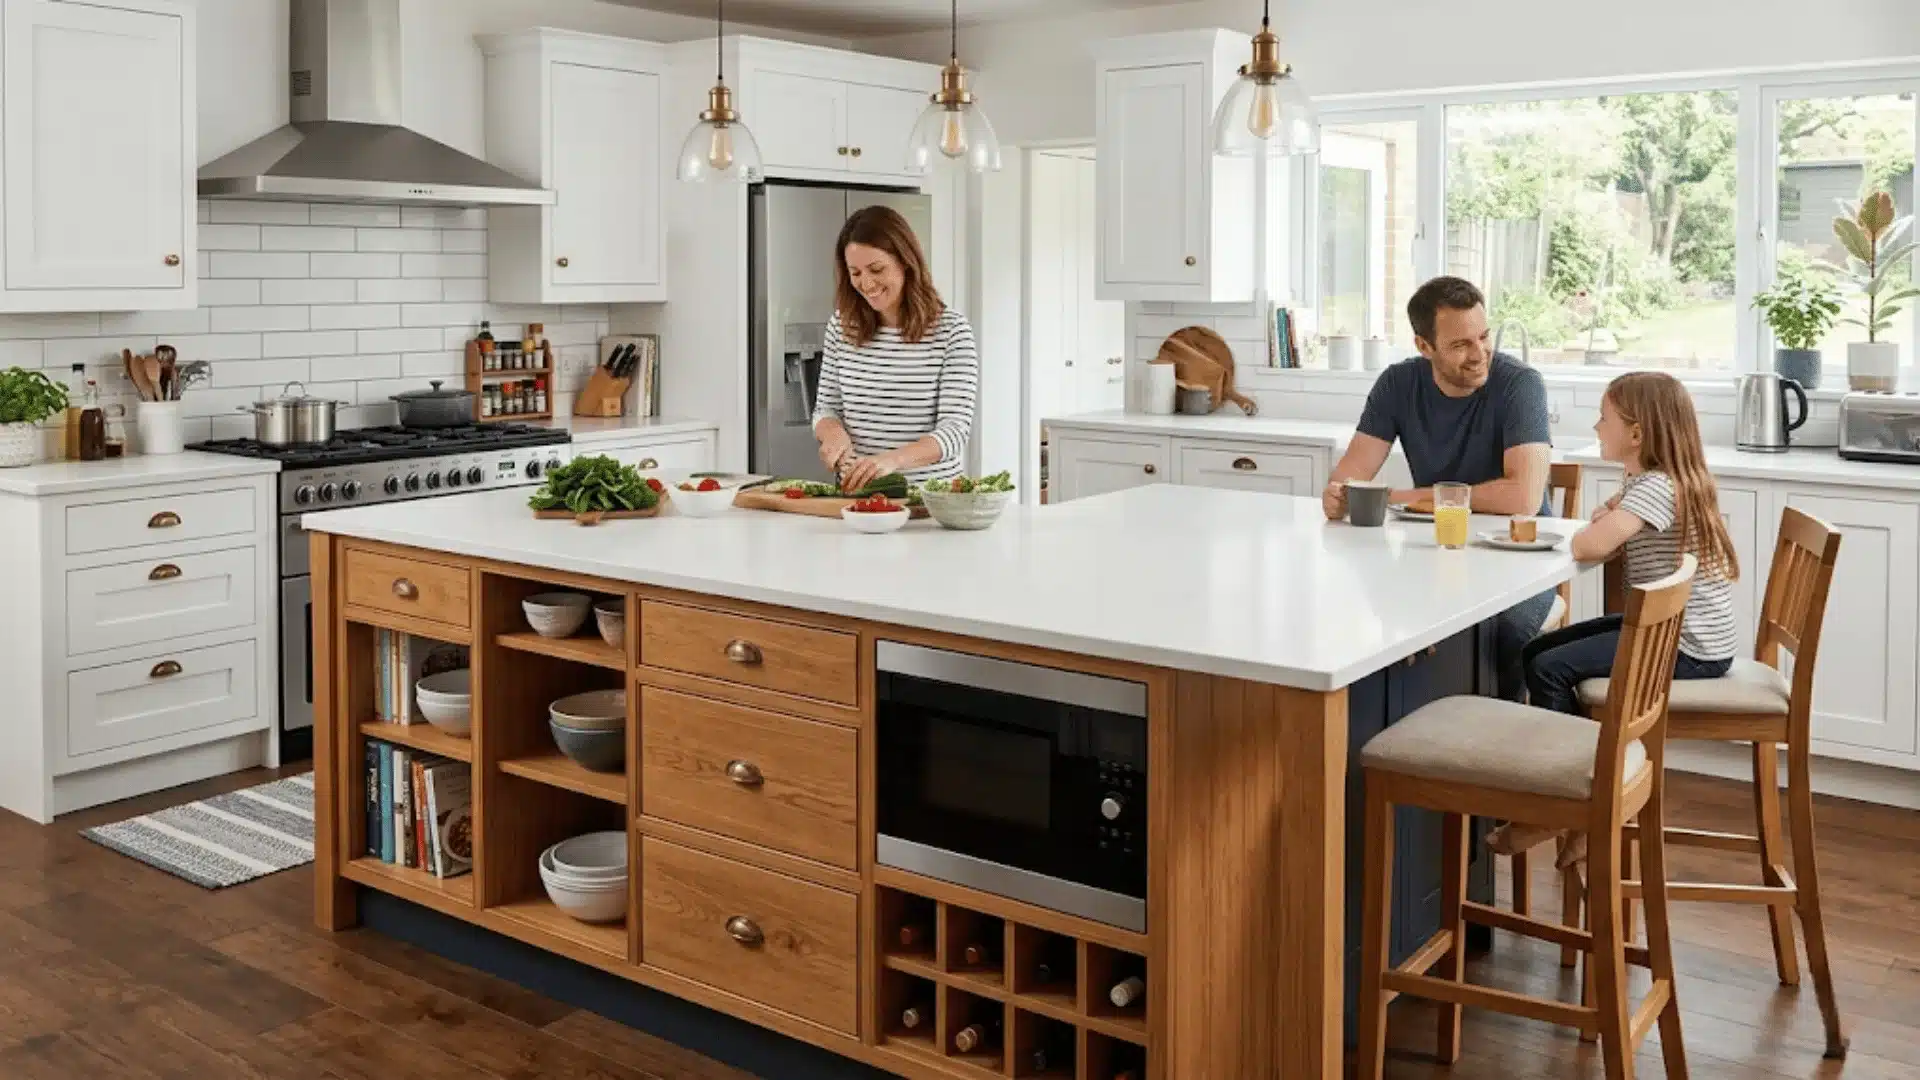
A kitchen island is one of the most transformative additions you can make during a renovation. It creates a defined prep zone that keeps your workflow organized while freeing up counter space elsewhere. Beyond cooking, it doubles as a casual dining spot or a gathering point for the family.
When planned correctly within your kitchen’s footprint, it dramatically improves circulation, adds concealed storage through base cabinets and drawers, and gives the entire space a more structured, purposeful layout.
- Design Integration: Plan the island’s size, shape, and finish to align with your existing cabinetry, flooring, and overall kitchen layout during the renovation design phase.
- Installation Consideration: Coordinate early with your contractor on plumbing, electrical outlets, or gas connections if the island requires any utility hookups.
- Cost Factor: Freestanding $300–$600 | Semi-custom $900–$1,800 | Fully custom with plumbing and stone top $3,000–$5,000+.
2. Open Up Walls for Better Flow

Opening up walls is a structural renovation decision that fundamentally changes how your kitchen connects with the rest of your home. It eliminates the boxed-in feeling of a closed kitchen, allowing natural light to travel freely across rooms.
The result is a more social, breathable environment where cooking no longer feels isolated. This change also allows you to reconfigure your entire layout, repositioning appliances, islands, or dining areas to better suit how your household actually moves and functions day to day.
- Installation Consideration: Always consult a structural engineer before demolition to identify load-bearing walls, hidden utilities, and required permit approvals.
- Cost Factor: Non-load-bearing removal $500–$1,500 | Load-bearing with beam $3,000–$8,000 | Full open-plan conversion $10,000–$20,000+.
3. Upgrade Cabinet Structure
Cabinets are the backbone of any kitchen renovation; they define the layout, set the visual tone, and determine how efficiently your space functions every single day. A well-planned cabinet structure accounts for the placement of every appliance, utensil, and pantry item, eliminating the chaos of an overcrowded kitchen.
Upgrading the structure means rethinking the entire framework, not just the doors, so that every cabinet serves a clear, deliberate purpose in your workflow and makes daily kitchen use noticeably smoother.
- Installation Consideration: Confirm wall strength and stud positioning before mounting upper cabinets, and ensure base cabinets are level before countertop installation begins.
- Cost Factor: Stock modular $60–$200 per linear ft. | Semi-custom $150–$400 per linear ft. | Fully bespoke $500–$1,200+ per linear ft.
4. Change Countertop Material
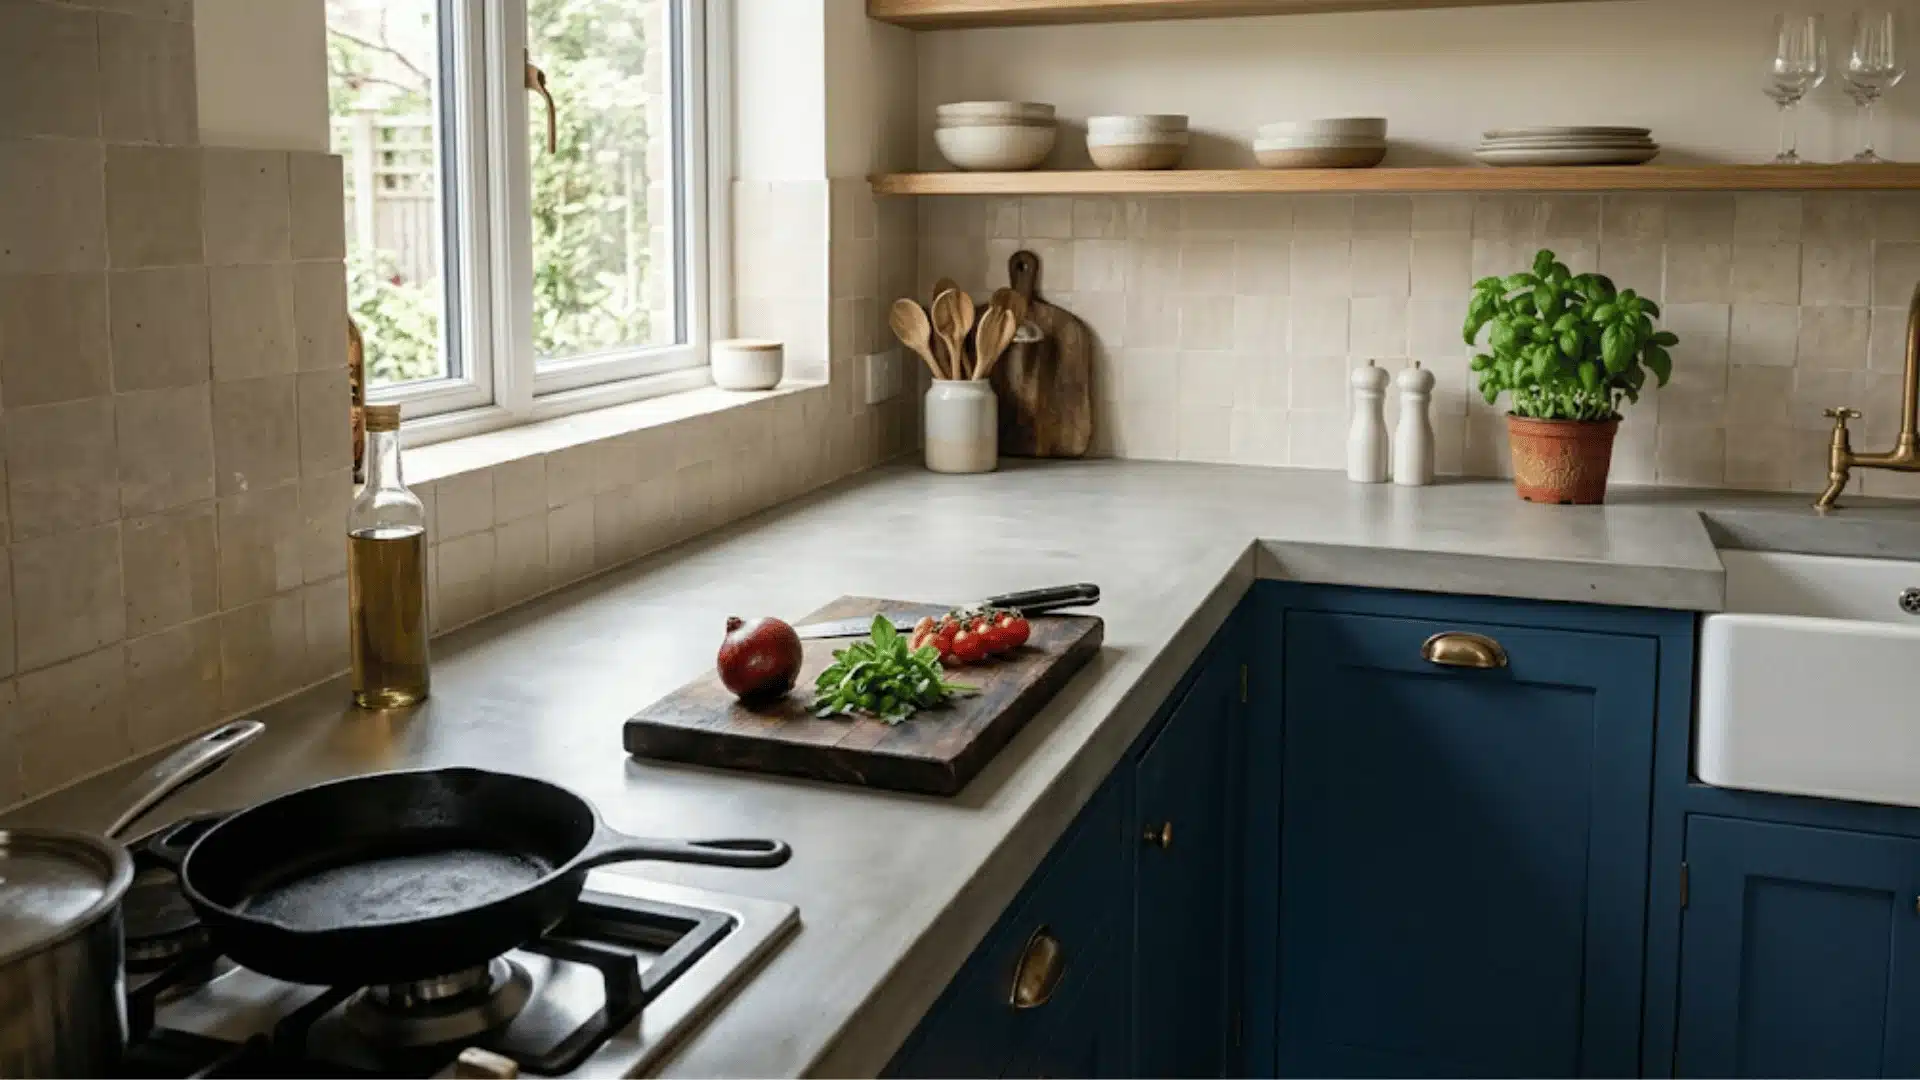
It absorbs the impact of daily chopping, hot pans, spilled liquids, and constant cleaning. Selecting the right material during your renovation means balancing long-term durability against the level of upkeep you are realistically prepared to commit to.
The right choice also anchors the visual identity of your kitchen, tying the cabinets below and the backsplash above into a cohesive, well-considered surface that holds the entire design together for years to come.
- Installation Consideration: Ensure base cabinets are fully installed and leveled before countertop templating begins, as any misalignment will affect the final fit and finish
- Cost Factor: Granite $40–$100 per sq. ft. | Quartz $60–$150 per sq. ft. | Imported marble or Dekton $150–$400+ per sq. ft. installed.
5. Install a Backsplash Design

A backsplash plays a dual role in any kitchen renovation; it is both a protective surface and a key design statement. Installed behind your cooktop and sink, it takes the brunt of daily splatter, steam, and grease, protecting your walls from long-term moisture damage.
At the same time, it is one of the most visible surfaces in the kitchen, offering a strong opportunity to introduce texture, pattern, or color that elevates the entire space without requiring a major structural or layout change to achieve impact.
- Installation Consideration: Complete all plumbing, electrical, and countertop work before tiling begins to avoid rework, and use proper waterproof adhesive behind sink and cooktop zones.
- Cost Factor: Ceramic tile $10–$30 per sq. ft. | Porcelain or glass $35–$80 per sq. ft. | Handcrafted or imported designer tile $100–$250+ per sq. ft. installed.
6. Plan a Complete Lighting System

Lighting is one of the most underestimated elements in a kitchen renovation, yet it directly affects how safe, functional, and enjoyable the space feels every day. A single overhead fitting is rarely sufficient; a well-designed kitchen requires multiple light sources working together across different zones.
The right system ensures your prep areas are shadow-free, your dining zone is warm and inviting, and your cabinetry or architectural details are subtly highlighted, giving the kitchen a finished, intentional look that transforms the atmosphere after dark.
- Installation Consideration: Rough-in all electrical work before wall finishing and cabinet installation, as retrofitting wiring afterward significantly increases labor time and cost.
- Cost Factor: Basic single-layer setup $500–$1,500 | Mid-range layered system $2,000–$5,000 | Full smart lighting with premium fixtures $7,000–$15,000+.
7. Install a Ventilation Hood
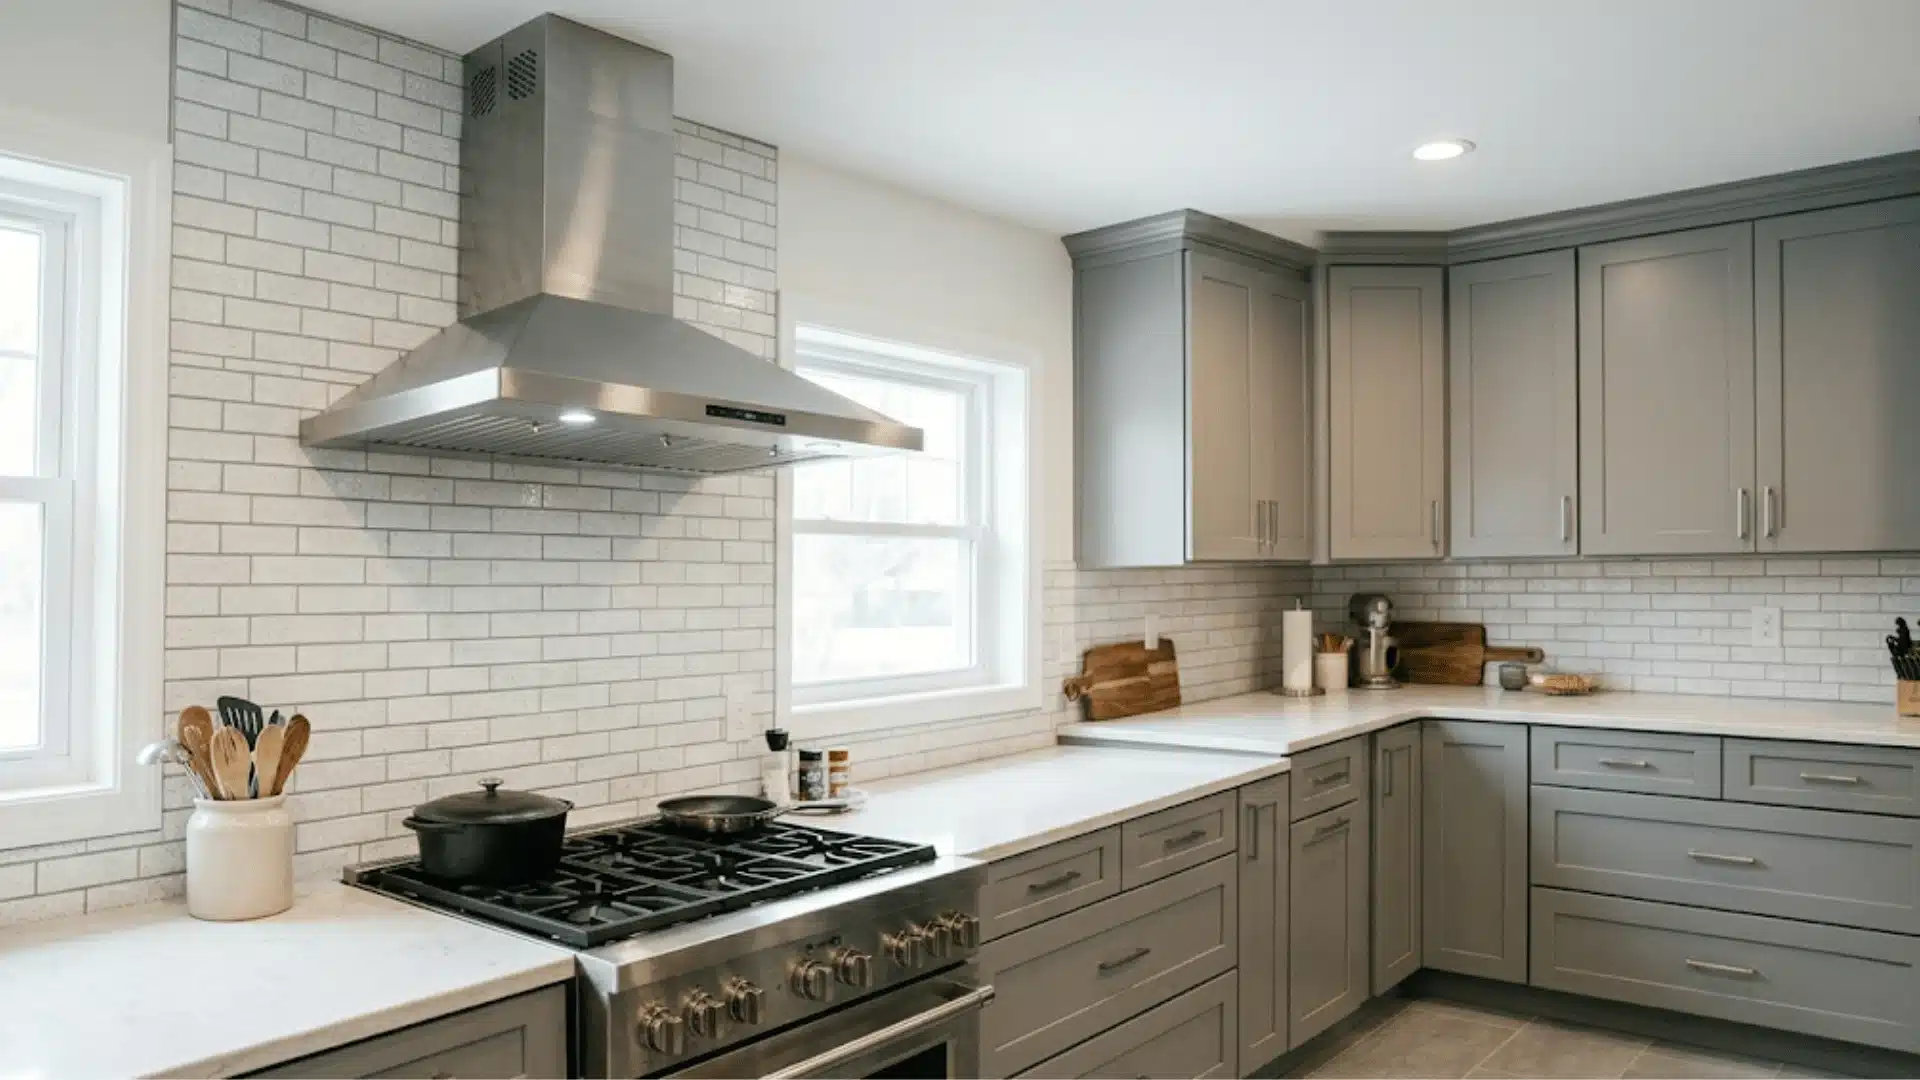
A ventilation hood is a non-negotiable functional element in any serious kitchen renovation. Without proper extraction, cooking fumes, airborne grease, and excess moisture accumulate gradually, damaging your cabinets, discoloring your walls, and reducing indoor air quality.
A correctly specified and installed hood removes these pollutants at the source, keeping your kitchen fresher and your surfaces cleaner for longer. It also significantly reduces the frequency of deep cleaning required across your cabinetry, backsplash, and ceiling, making it a highly practical long-term investment.
- Installation Consideration: Plan the duct routing to the exterior wall during the renovation framing stage to avoid cutting through finished walls or ceilings later.
- Cost Factor: Entry-level chimney hood $200–$600 | Mid-range stainless steel $700–$2,000 | Professional island-mounted with ducting $3,500–$10,000+.
8. Replace Kitchen Flooring
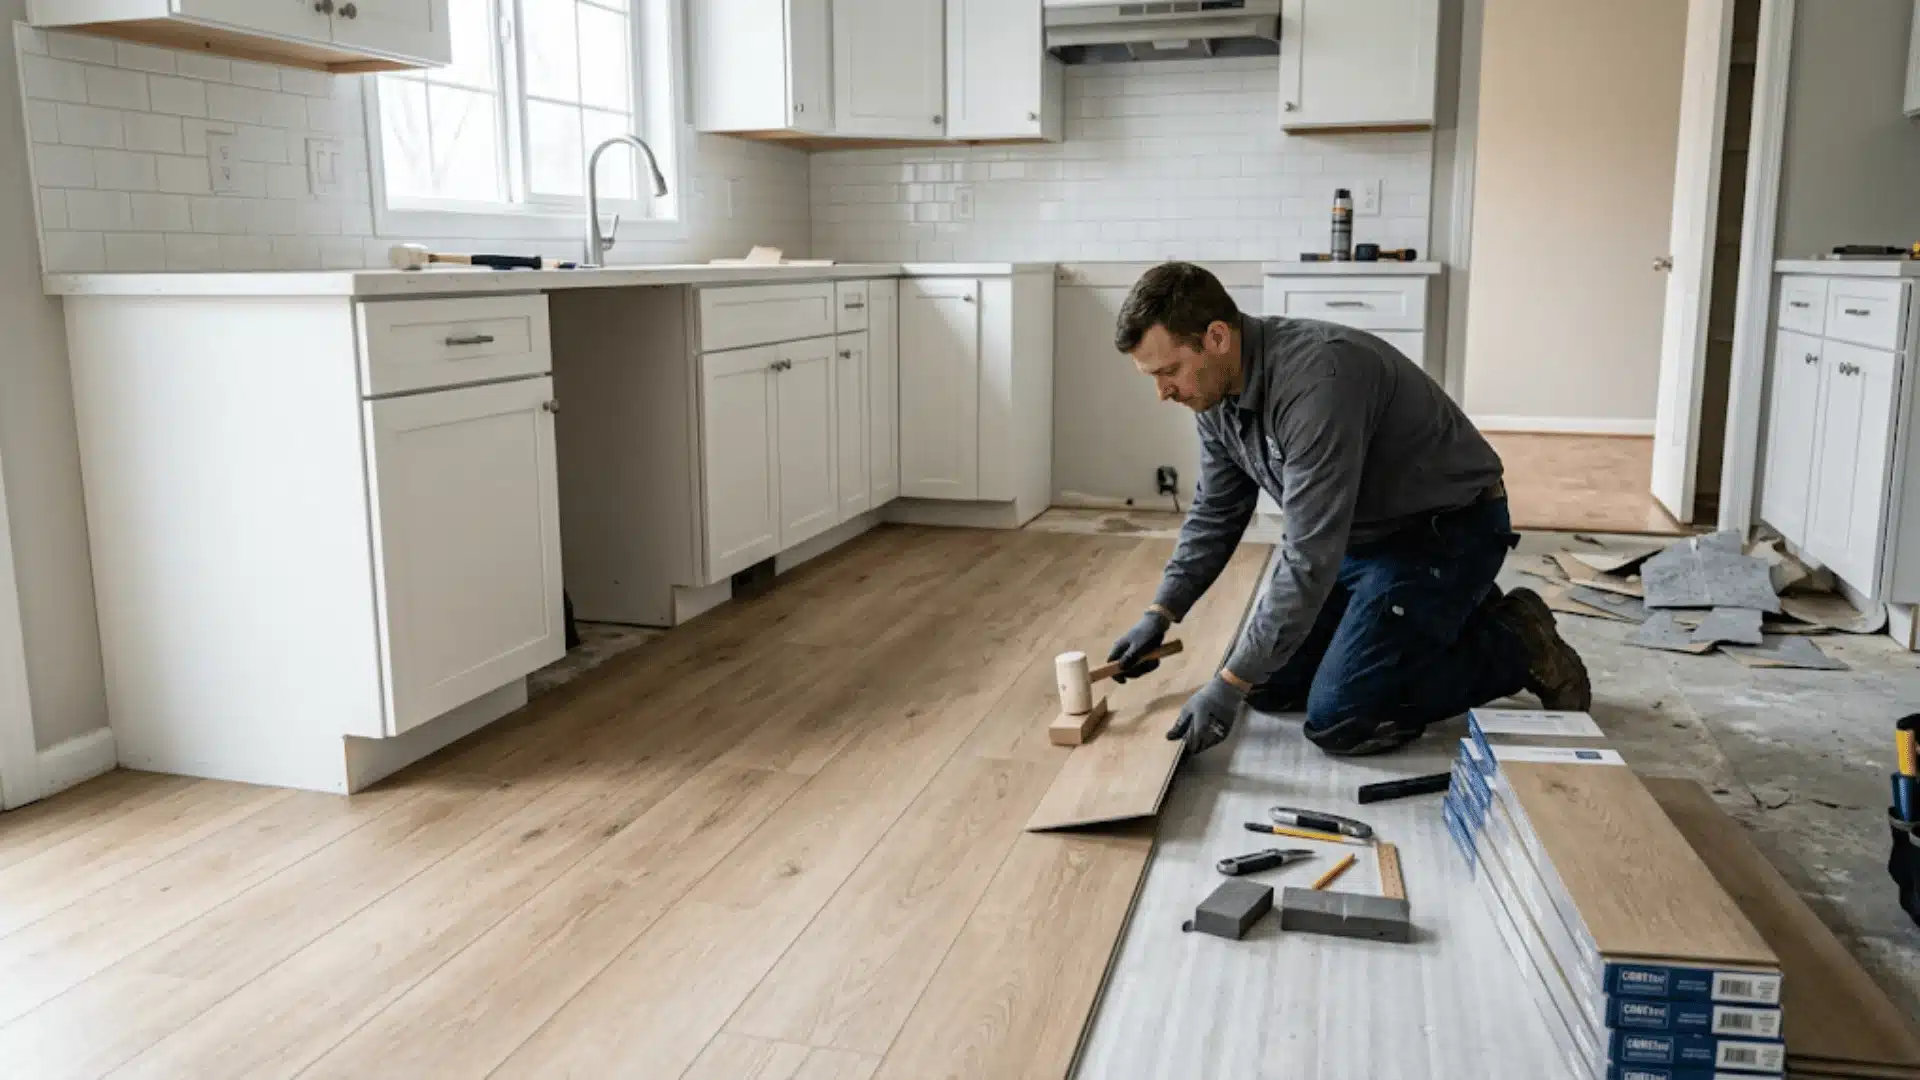
Flooring is one of the most impactful yet often overlooked decisions in a kitchen renovation. The right material must withstand constant foot traffic, frequent spills, dropped utensils, and the weight of heavy appliances, all while remaining comfortable to stand on for extended periods.
It also sets the visual foundation for your entire kitchen, tying together your cabinetry, countertops, and walls into a cohesive finish. Choosing wisely at the renovation stage saves you from premature replacement, costly repairs, and ongoing maintenance frustration down the line.
- Installation Consideration: Lay flooring after all heavy appliances are positioned and plumbing is confirmed, but before kickboards and toe plinths are fixed, to ensure a clean, seamless finish.
- Cost Factor: Ceramic or vinyl $3–$10 per sq. ft. | Porcelain or engineered wood $12–$25 per sq. ft. | Natural stone or wide-format tile $30–$80+ per sq. ft. installed.
9. Upgrade to a Modern Sink
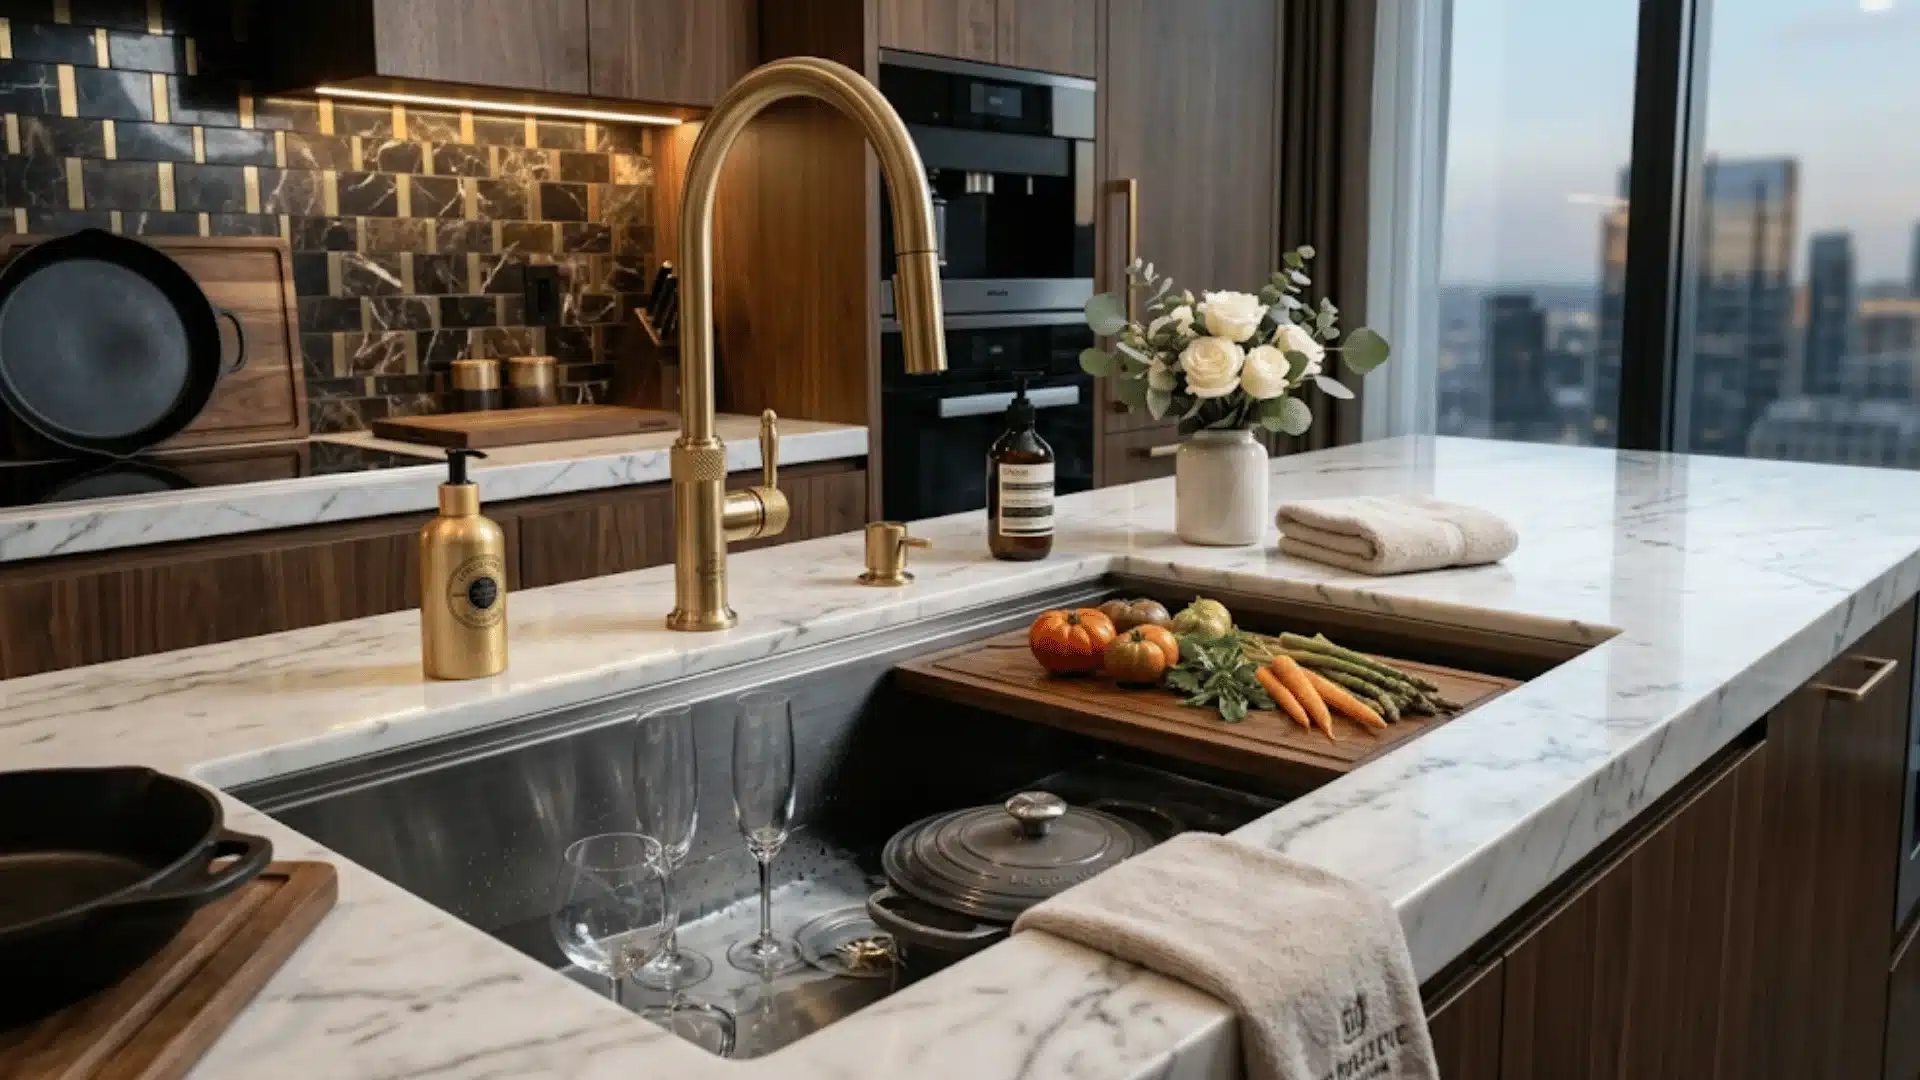
The kitchen sink is one of the most used fixtures in the entire home. Upgrading to a deeper, wider, or more ergonomically designed sink can fundamentally change how efficiently you work in the kitchen, making washing large cookware, prepping vegetables, and managing daily cleanup noticeably faster and less strenuous.
The right sink also contributes meaningfully to the kitchen’s aesthetic, especially when paired with a complementary faucet and countertop material that reinforces the overall design direction.
- Installation Consideration: Confirm countertop cutout dimensions, cabinet base width, and plumbing rough-in positions before ordering the sink to avoid expensive modifications during installation.
- Cost Factor: Stainless steel $100–$400 | Composite or ceramic undermount $500–$1,200 | Fireclay or cast iron farmhouse $1,500–$4,000+, including installation.
10. Integrate Built-In Appliances
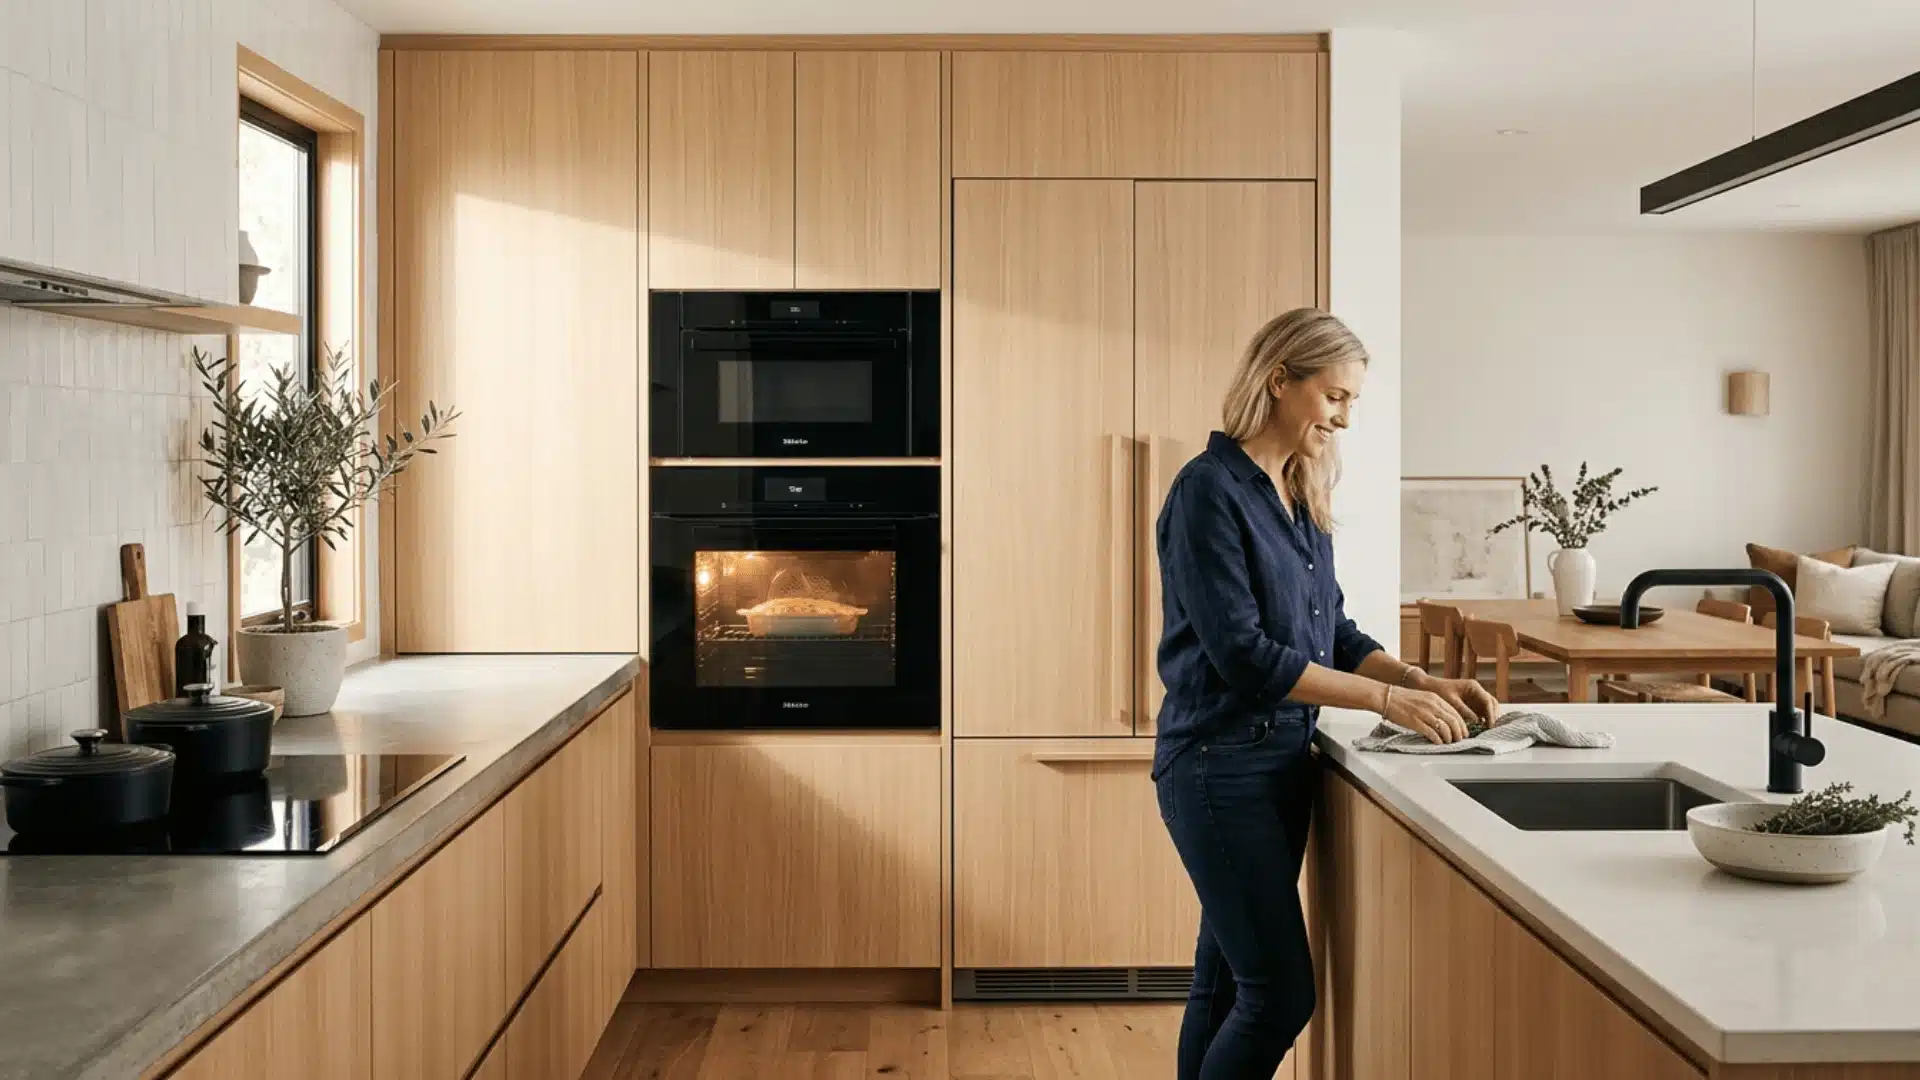
Built-in appliances represent a significant shift in how a kitchen looks, functions, and feels after a renovation. Unlike freestanding units, integrated appliances sit flush within your cabinetry, eliminating visual clutter, creating a seamless wall of joinery, and making the kitchen appear larger and more considered.
This approach is especially valuable in compact kitchens where every centimeter matters. Beyond aesthetics, built-in placement also improves ergonomics, allowing you to position appliances at heights and locations that genuinely suit your daily cooking workflow.
- Installation Consideration: Confirm ventilation clearances, electrical load requirements, and service access panels for each built-in appliance before finalizing cabinet configurations with your contractor
- Cost Factor: Entry-level package $2,000–$5,000 | Mid-range integrated set $7,000–$15,000 | Fully bespoke with premium European appliances $20,000–$50,000+
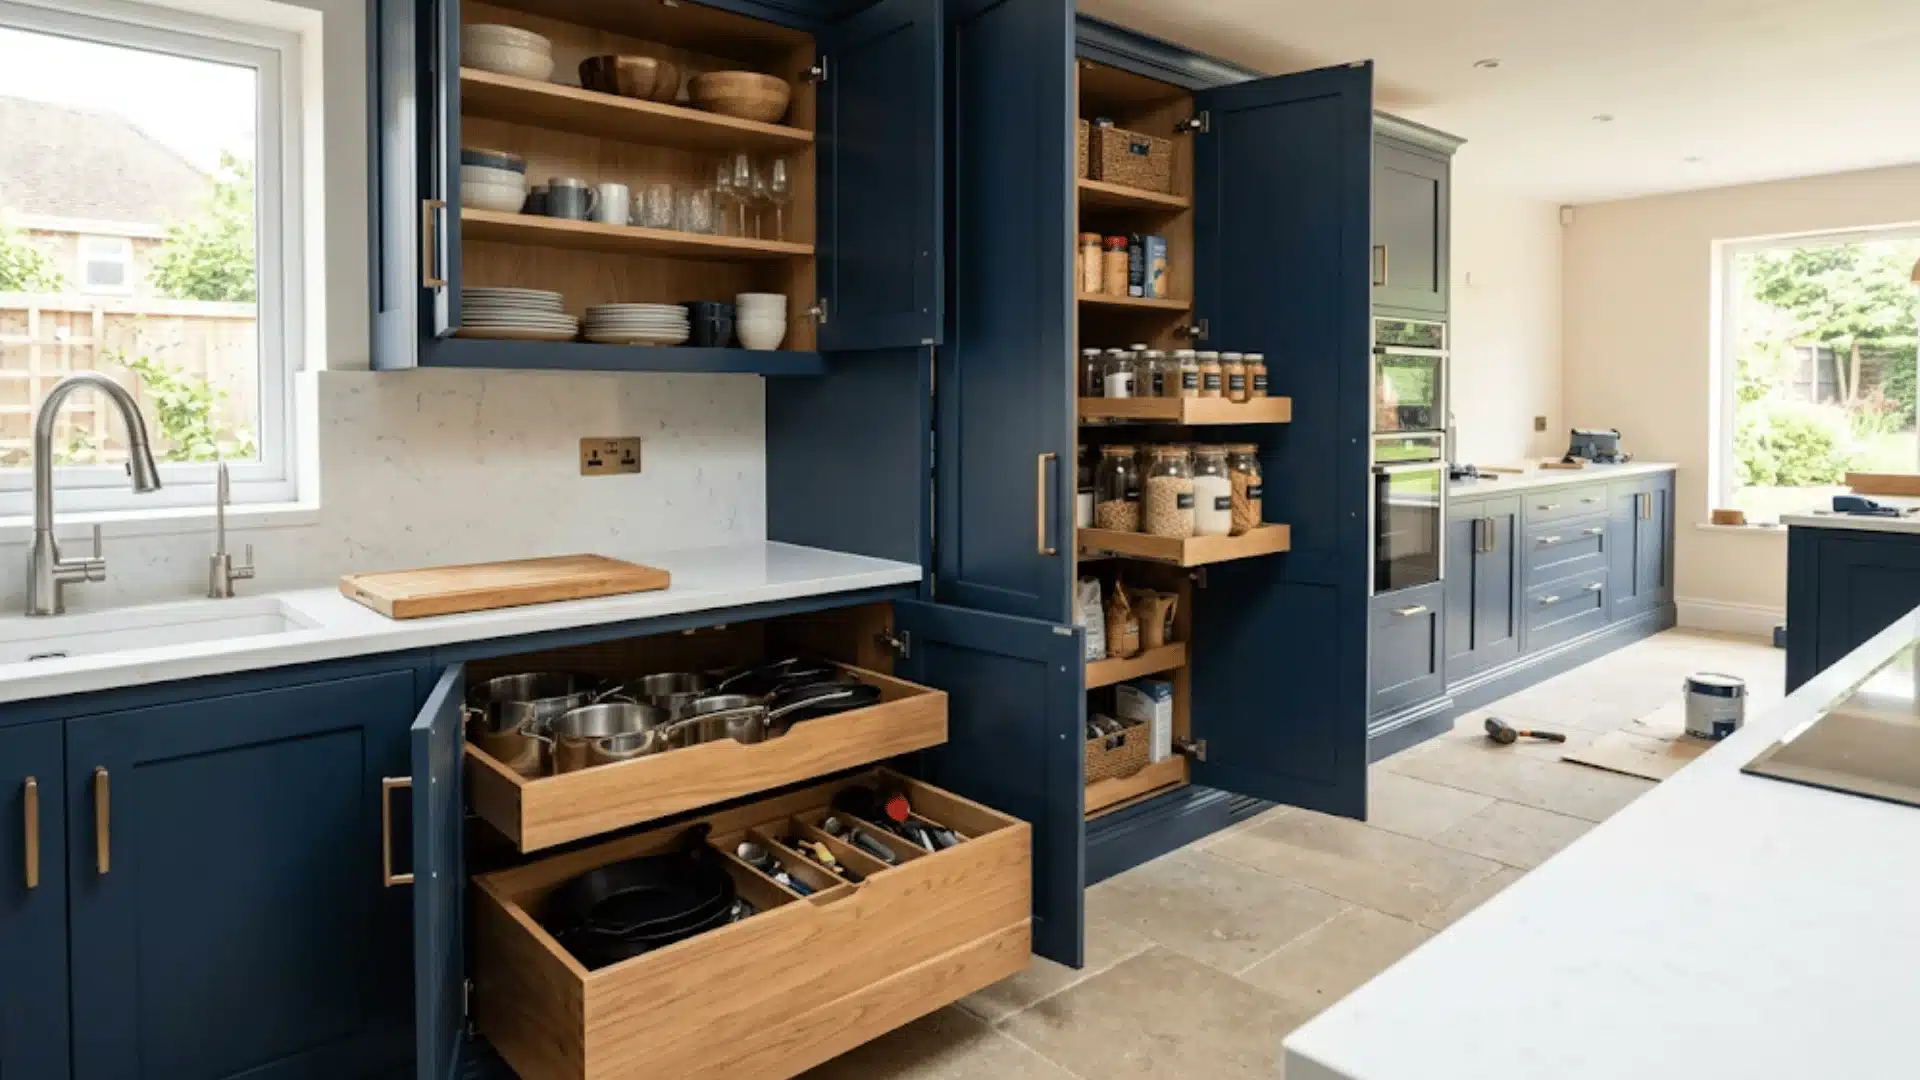
11. Design a Smart Storage Layout
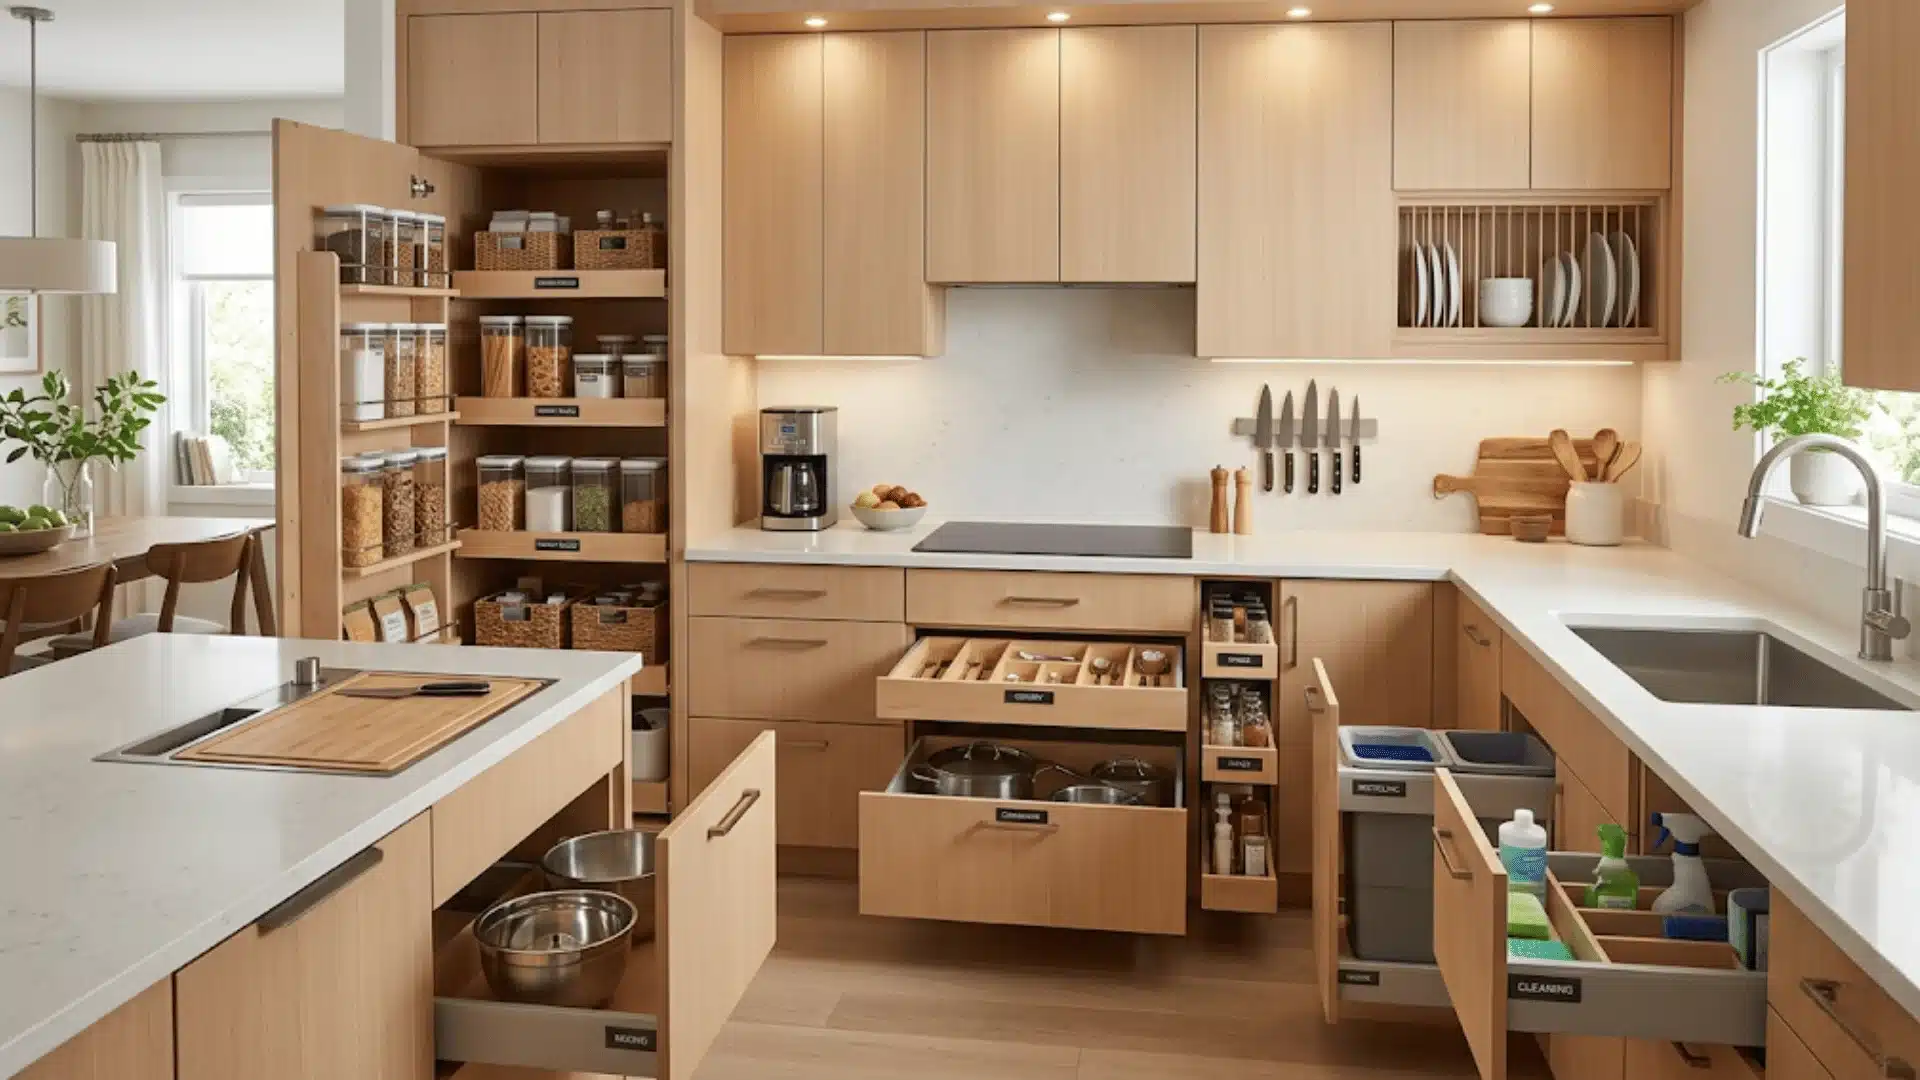
A smart storage layout is the difference between a kitchen that looks renovated and one that genuinely works better every day. Poor storage planning forces workarounds, items piled on countertops, overcrowded cabinets, and constant searching for everyday essentials.
A well-thought-out storage system assigns a specific, accessible place to everything, from daily utensils to bulk pantry items. When designed at the renovation stage, it eliminates clutter before it starts, keeps your surfaces clear, and ensures the kitchen remains functional and organized long after the renovation is complete.
- Installation Consideration: Specify internal fittings such as pull-out drawers, corner carousels, and tall unit pantry systems before cabinet manufacturing begins, as retrofitting these after installation significantly increases cost and complexity.
- Cost Factor: Basic modular fittings $500–$1,500 | Mid-range pull-out and drawer systems $2,000–$5,000 | Fully custom layout with premium hardware $7,000–$15,000+
12. Set Up a Coffee or Breakfast Zone
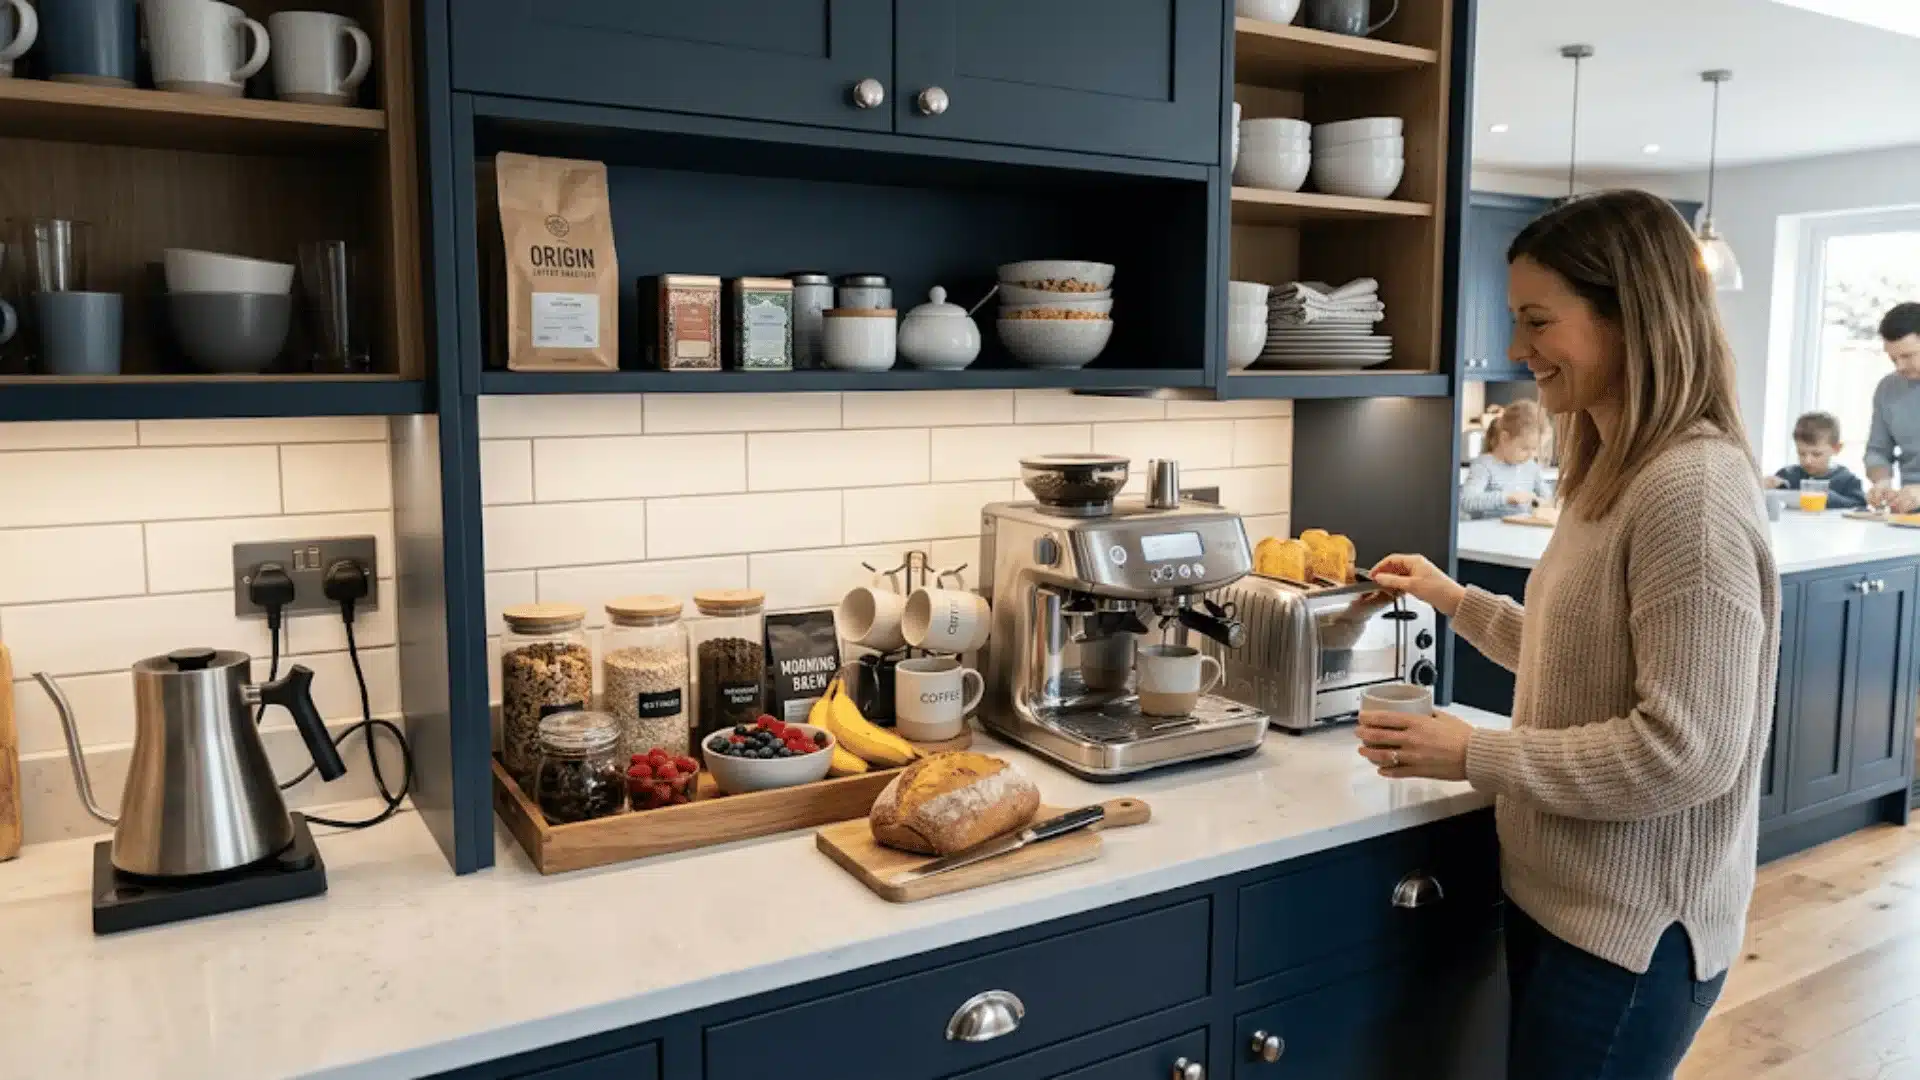
A dedicated coffee or breakfast zone is a practical renovation addition that significantly reduces morning congestion in the kitchen. Rather than competing for the same counter space for multiple tasks at once, a designated zone consolidates your kettle, coffee machine, toaster, and breakfast essentials into one self-contained area.
When planned into the renovation from the start, it can be fitted with its own power outlets, storage, and task lighting for maximum everyday convenience.
- Installation Consideration: Ensure dedicated electrical outlets with sufficient load capacity are roughed in at this zone during the renovation’s electrical phase to avoid overloading shared circuits with multiple small appliances.
- Cost Factor: Basic zone with shelving and outlets $300–$800 | Fitted zone with storage and task lighting $1,200–$3,000 | Fully built-in coffee station with custom joinery $4,000–$10,000+
13. Refresh the Kitchen Color Scheme
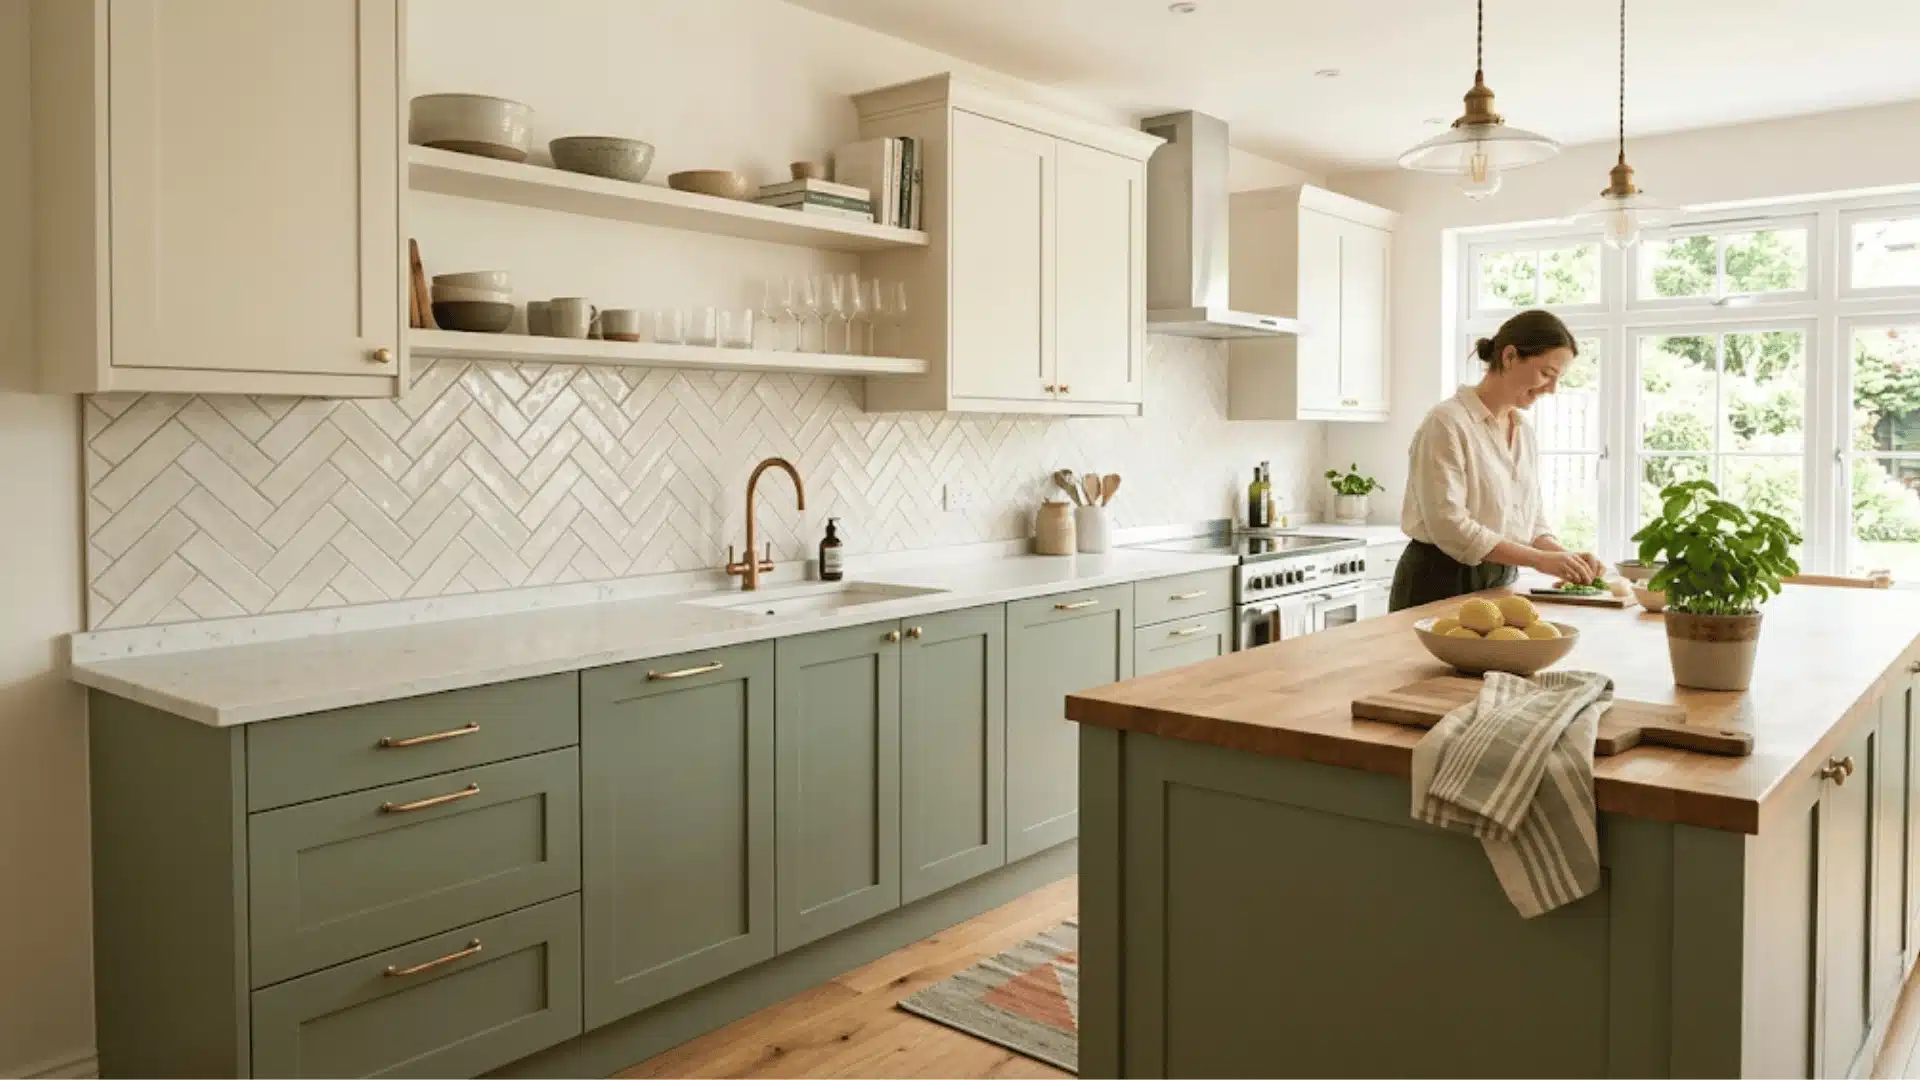
Color is one of the most powerful and cost-effective tools available during a kitchen renovation. The right palette can make a compact kitchen feel significantly more open, give a dated space a completely contemporary character, or bring warmth and personality to a previously clinical layout.
Color decisions span every surface, including cabinets, walls, countertops, backsplash, and even flooring, meaning a cohesive scheme must be planned holistically rather than surface by surface.
- Installation Consideration: Apply wall paint and cabinet finishes only after all dusty trades, including tiling, flooring, and carpentry, are fully complete to prevent contamination, scuffing, or color inconsistency in the final finish
- Cost Factor: Repaint with new handles $300–$800 | Cabinet repainting with new backsplash $1,500–$4,000 | Full color overhaul with new doors and countertop $6,000–$15,000+
14. Install Space-Saving Doors
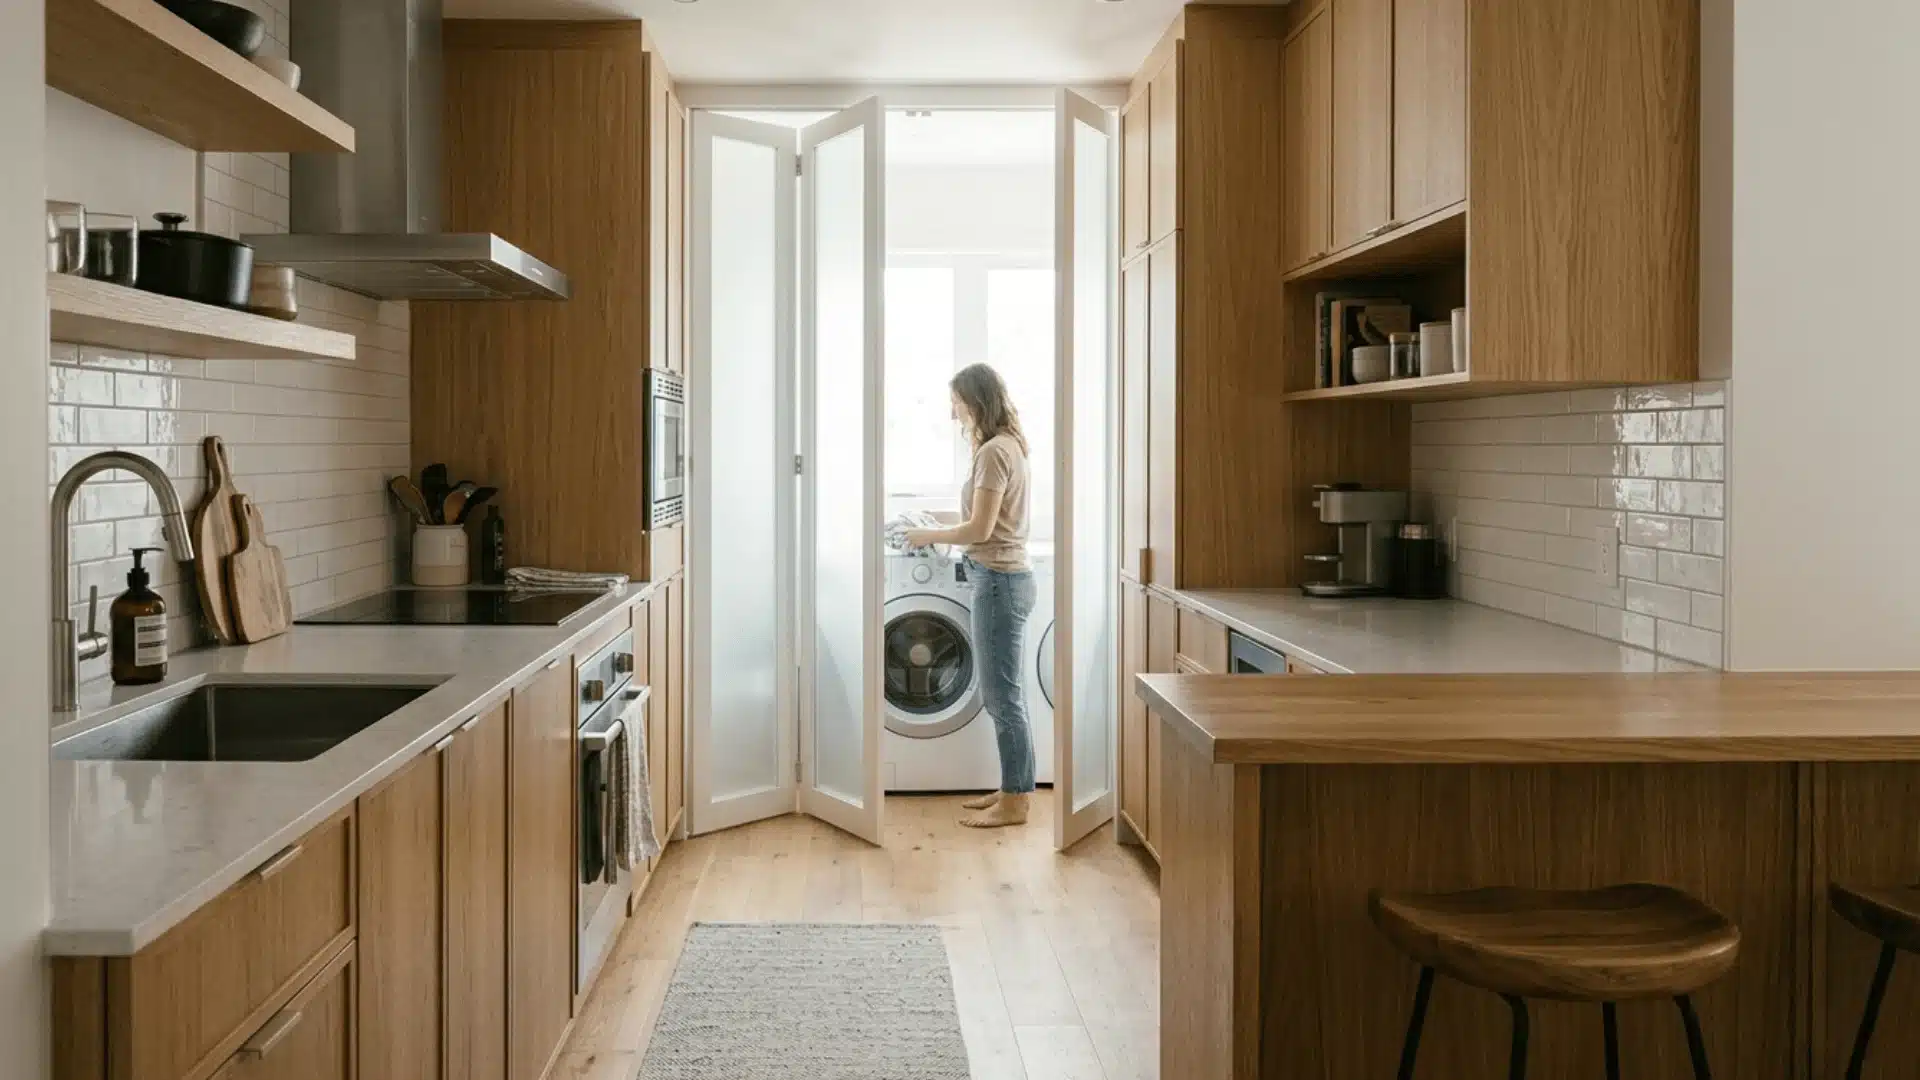
Door choices have a direct and measurable impact on how a kitchen functions, particularly in compact or galley-style layouts where every centimeter of clearance matters. Traditional swing doors consume significant floor area when open, creating bottlenecks in high-traffic zones.
Replacing them with sliding, pocket, or bifold alternatives during a renovation immediately recovers that lost space, improving circulation and making the kitchen feel noticeably larger and more accessible.
- Installation Consideration: Confirm wall thickness, ceiling height clearance, and floor track routing before ordering sliding or pocket door systems, as structural constraints can significantly limit options once construction has progressed
- Cost Factor: Basic sliding door set $300–$800 | Pocket or bifold with quality hardware $1,000–$3,000 | Frameless glass or fully concealed pocket system $4,000–$10,000+
15. Add Natural Light Sources
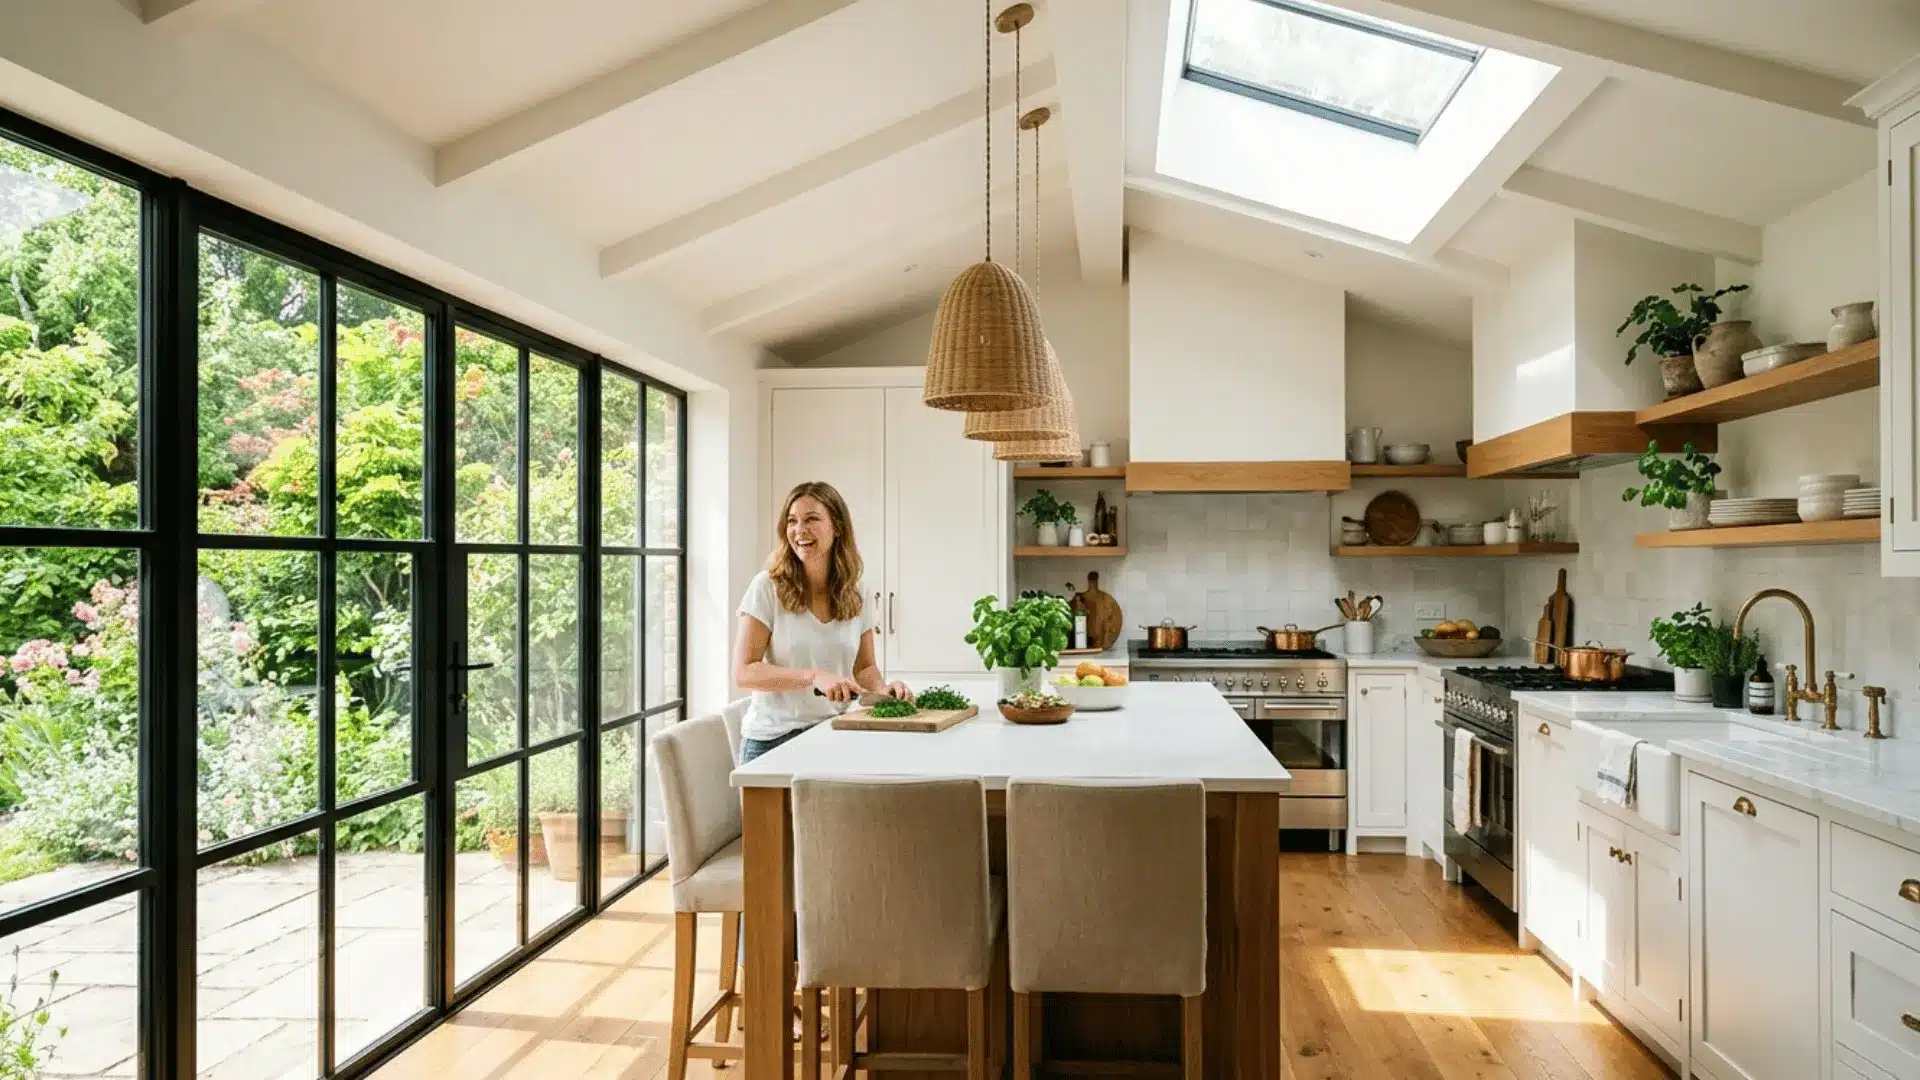
Natural light is one of the most valuable and transformative upgrades available during a kitchen renovation. A well-lit kitchen feels larger, more welcoming, and more pleasant to spend time in without relying entirely on artificial fixtures throughout the day.
Adding windows, enlarging existing openings, or introducing a skylight above the cooking or dining zone fundamentally changes the atmosphere of the space.
It also reduces daytime energy consumption, improves ventilation when windows are operable, and creates a direct visual connection between your kitchen and the outdoors.
- Installation Consideration: Coordinate glazing installation with your framing, roofing, and waterproofing trades early in the renovation sequence to prevent weather exposure delays or structural complications mid-project.
- Cost Factor: New window installation $1,000–$3,000 | Enlarged or picture window $3,500–$7,000 | Skylight with flashing and finishing $5,000–$15,000+
16. Upgrade Electrical Layout

Modern kitchens rely on an increasing number of high-draw appliances from built-in ovens and induction cooktops to coffee machines and refrigeration units, all of which require dedicated, correctly rated circuits.
An outdated or undersized electrical plan creates safety risks, frequent tripping, and the frustrating inability to run multiple appliances simultaneously. Replanning the electrical layout during renovation ensures your kitchen is safe, fully functional, and built to accommodate future appliances without costly retrofitting.
- Installation Consideration: Complete all electrical rough-in work, including new circuits, consumer unit upgrades, and conduit runs, before plastering, tiling, or cabinet installation begins to avoid expensive and disruptive rework
- Cost Factor: Basic outlet additions $500–$1,500 | Circuit upgrades and panel work $2,000–$5,000 | Full electrical replanning with dedicated appliance circuits $6,000–$15,000+
17. Improve Water Fixtures

Water fixtures are among the most frequently used elements in any kitchen, making them a high-impact renovation upgrade that directly affects daily comfort and efficiency. A well-chosen tap with the right spout height, reach, and flow control makes filling large pots, rinsing produce, and cleaning the sink significantly easier.
Beyond function, fixtures also contribute to the kitchen’s overall aesthetic, anchoring the sink zone with a finish and style that reinforces your broader design direction.
- Installation Consideration: Confirm the number of pre-drilled sink holes and their spacing before purchasing fixtures, as tap configuration must match exactly to avoid additional countertop or sink modifications during installation
- Cost Factor: Standard single-lever tap $80–$250 | Pull-down or dual-function faucet $300–$800 | Premium designer or pot-filler fixture $900–$3,000+ including installation
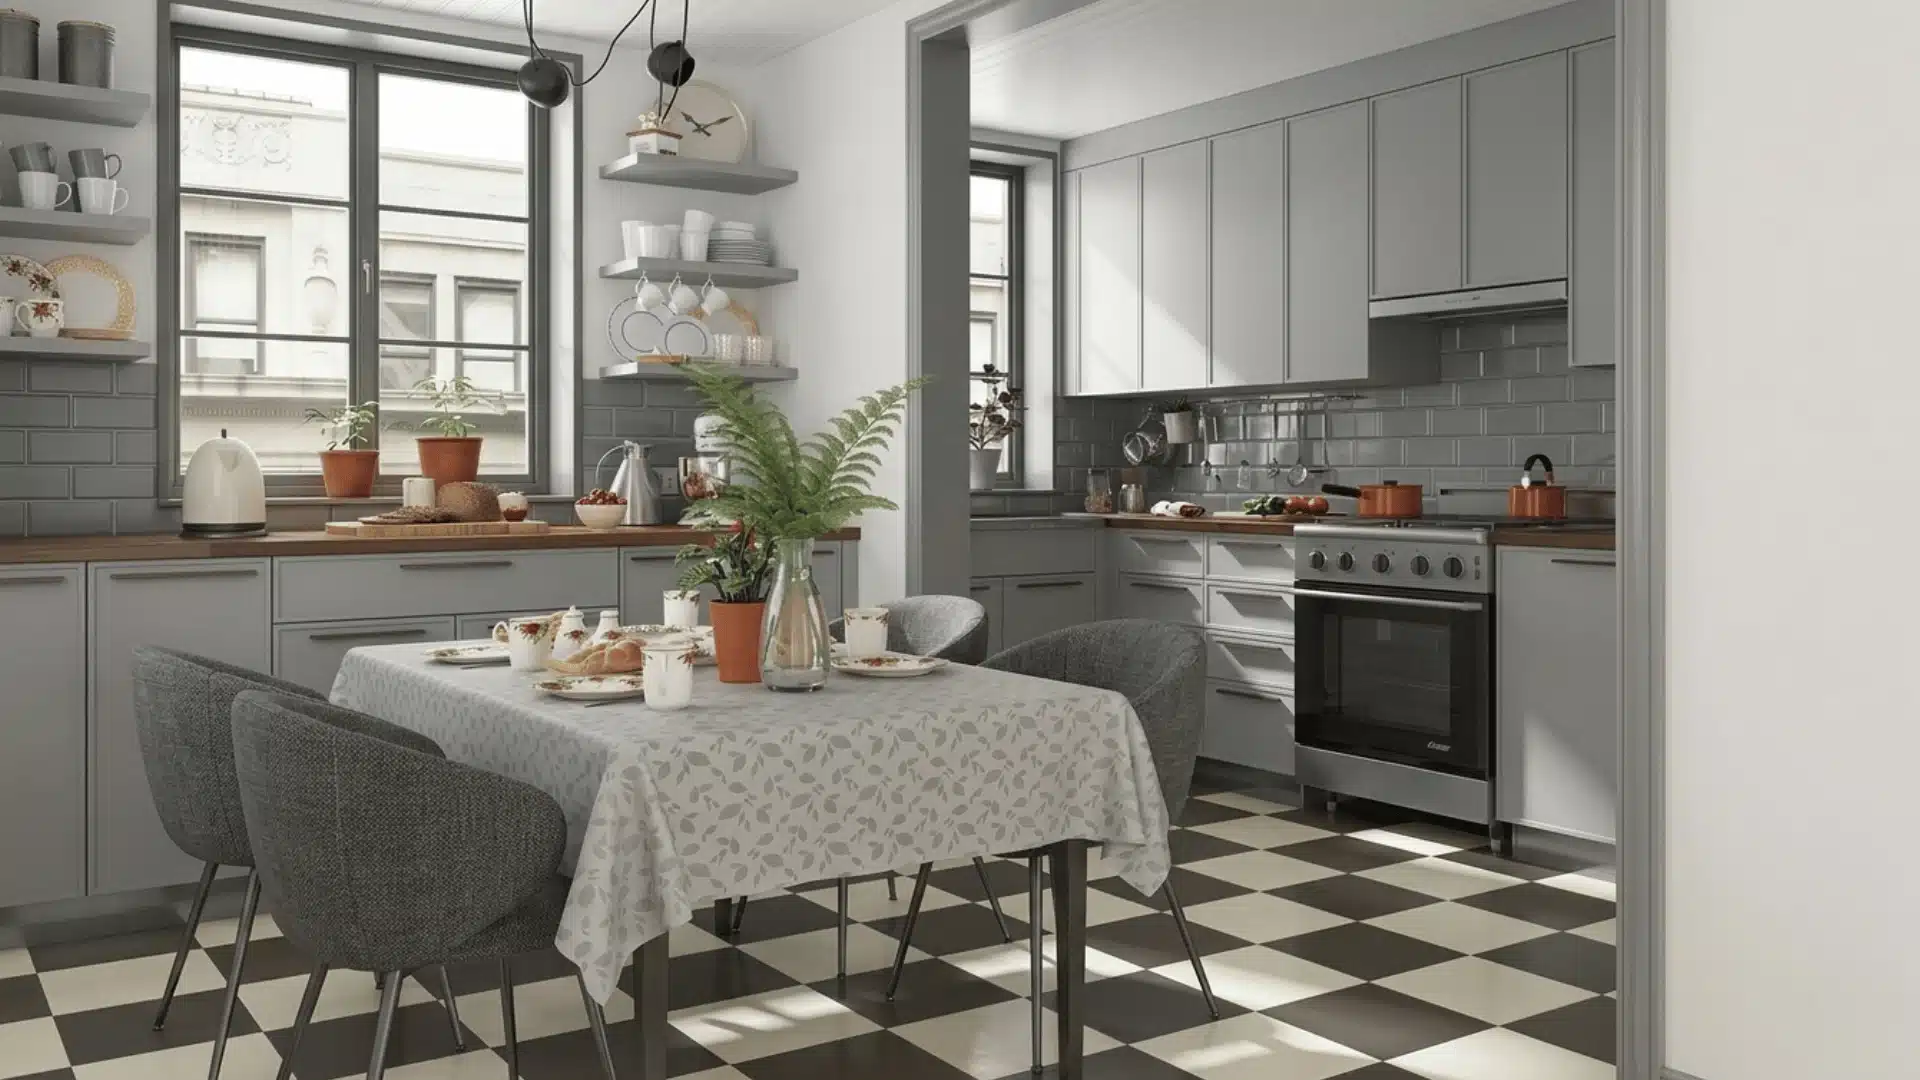
18. Create a Dining or Seating Spot
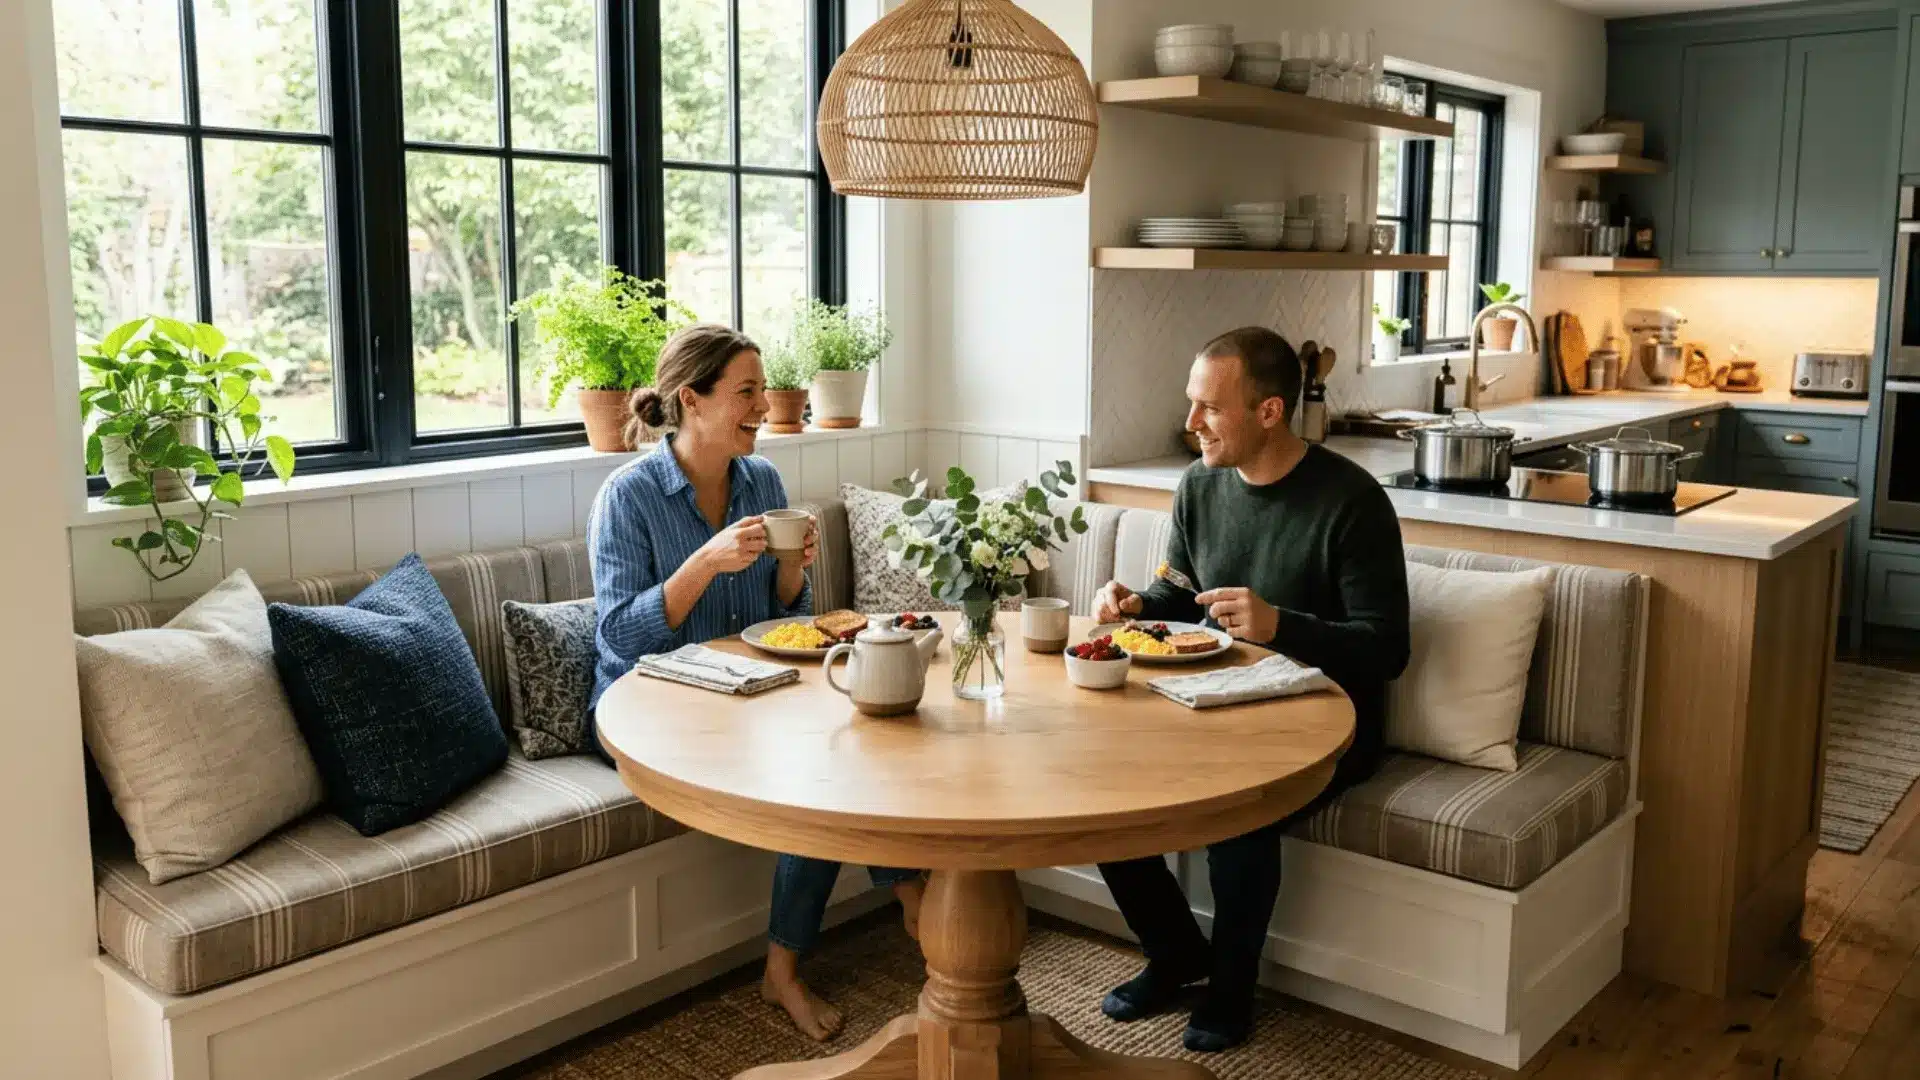
Incorporating a dedicated dining or seating area within the kitchen is a renovation decision that transforms the room from a purely functional workspace into a genuine hub of daily home life.
Whether it takes the form of a built-in banquette, a peninsula with bar stools, or a compact breakfast nook, a seating area encourages informal meals, socializing during cooking, and a more relaxed kitchen experience overall.
- Installation Consideration: Account for knee clearance, overhang depth, and stool height during the countertop and cabinet design phase to ensure the seating area is ergonomically correct and structurally supported before fabrication begins
- Cost Factor: Bar stools with counter overhang $400–$1,200 | Built-in banquette seating $2,000–$5,000 | Custom dining nook with joinery and upholstery $6,000–$15,000+
19. Build a Waste Management System
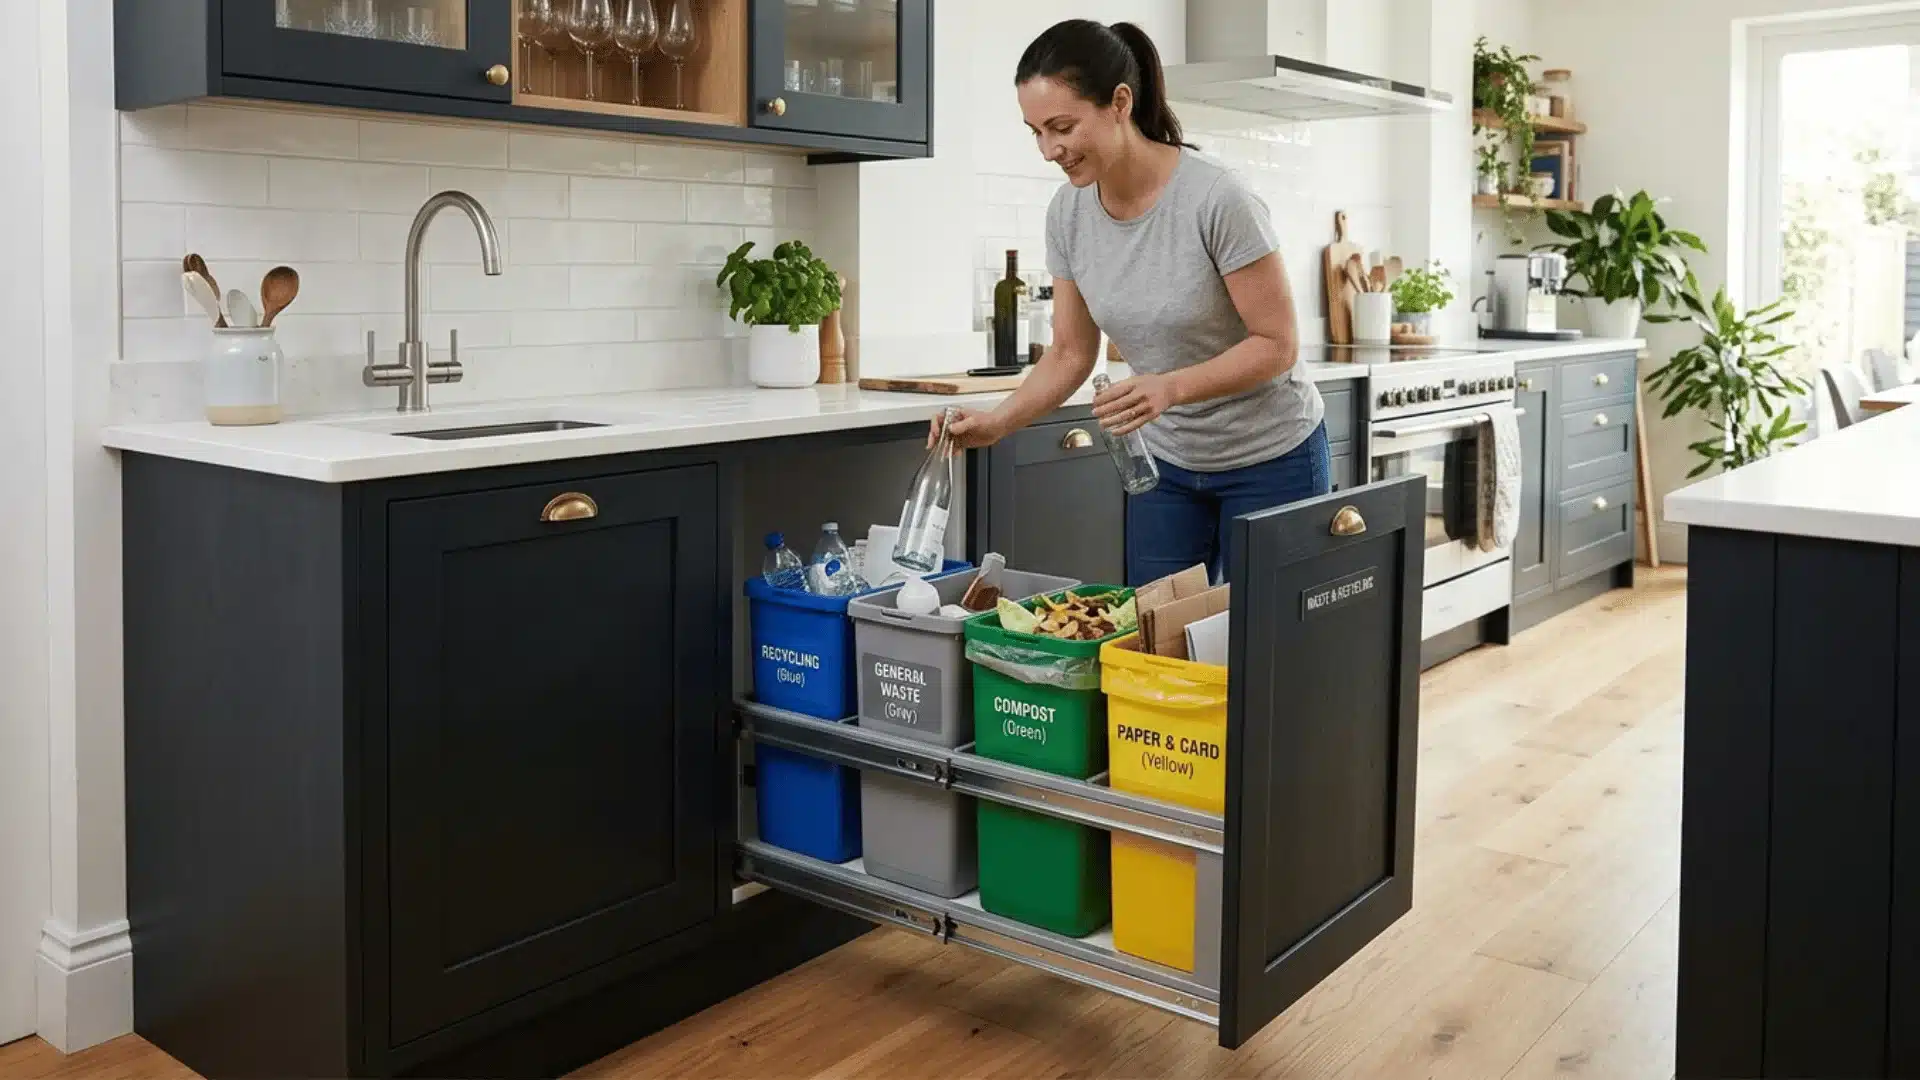
A well-designed waste management system is one of the most practical yet consistently underplanned elements of a kitchen renovation. Without a dedicated, built-in solution, bins occupy valuable floor space, create unpleasant odors, and make recycling sorting an afterthought rather than a habit.
Integrating waste and recycling into your cabinetry during the renovation keeps the kitchen visibly clean, supports sustainable household practices, and eliminates the daily inconvenience of exposed bins in a high-traffic area.
- Installation Consideration: Specify pull-out bin frame dimensions and compartment configuration before cabinet manufacturing begins, as internal fittings must be built into the carcass structure and cannot be easily retrofitted afterward
- Cost Factor: Basic pull-out bin unit $150–$400 | Multi-compartment recycling cabinet $500–$1,200 | Fully integrated waste system with compost and sensor lid $1,500–$4,000+
20. Add a Decorative Feature Element
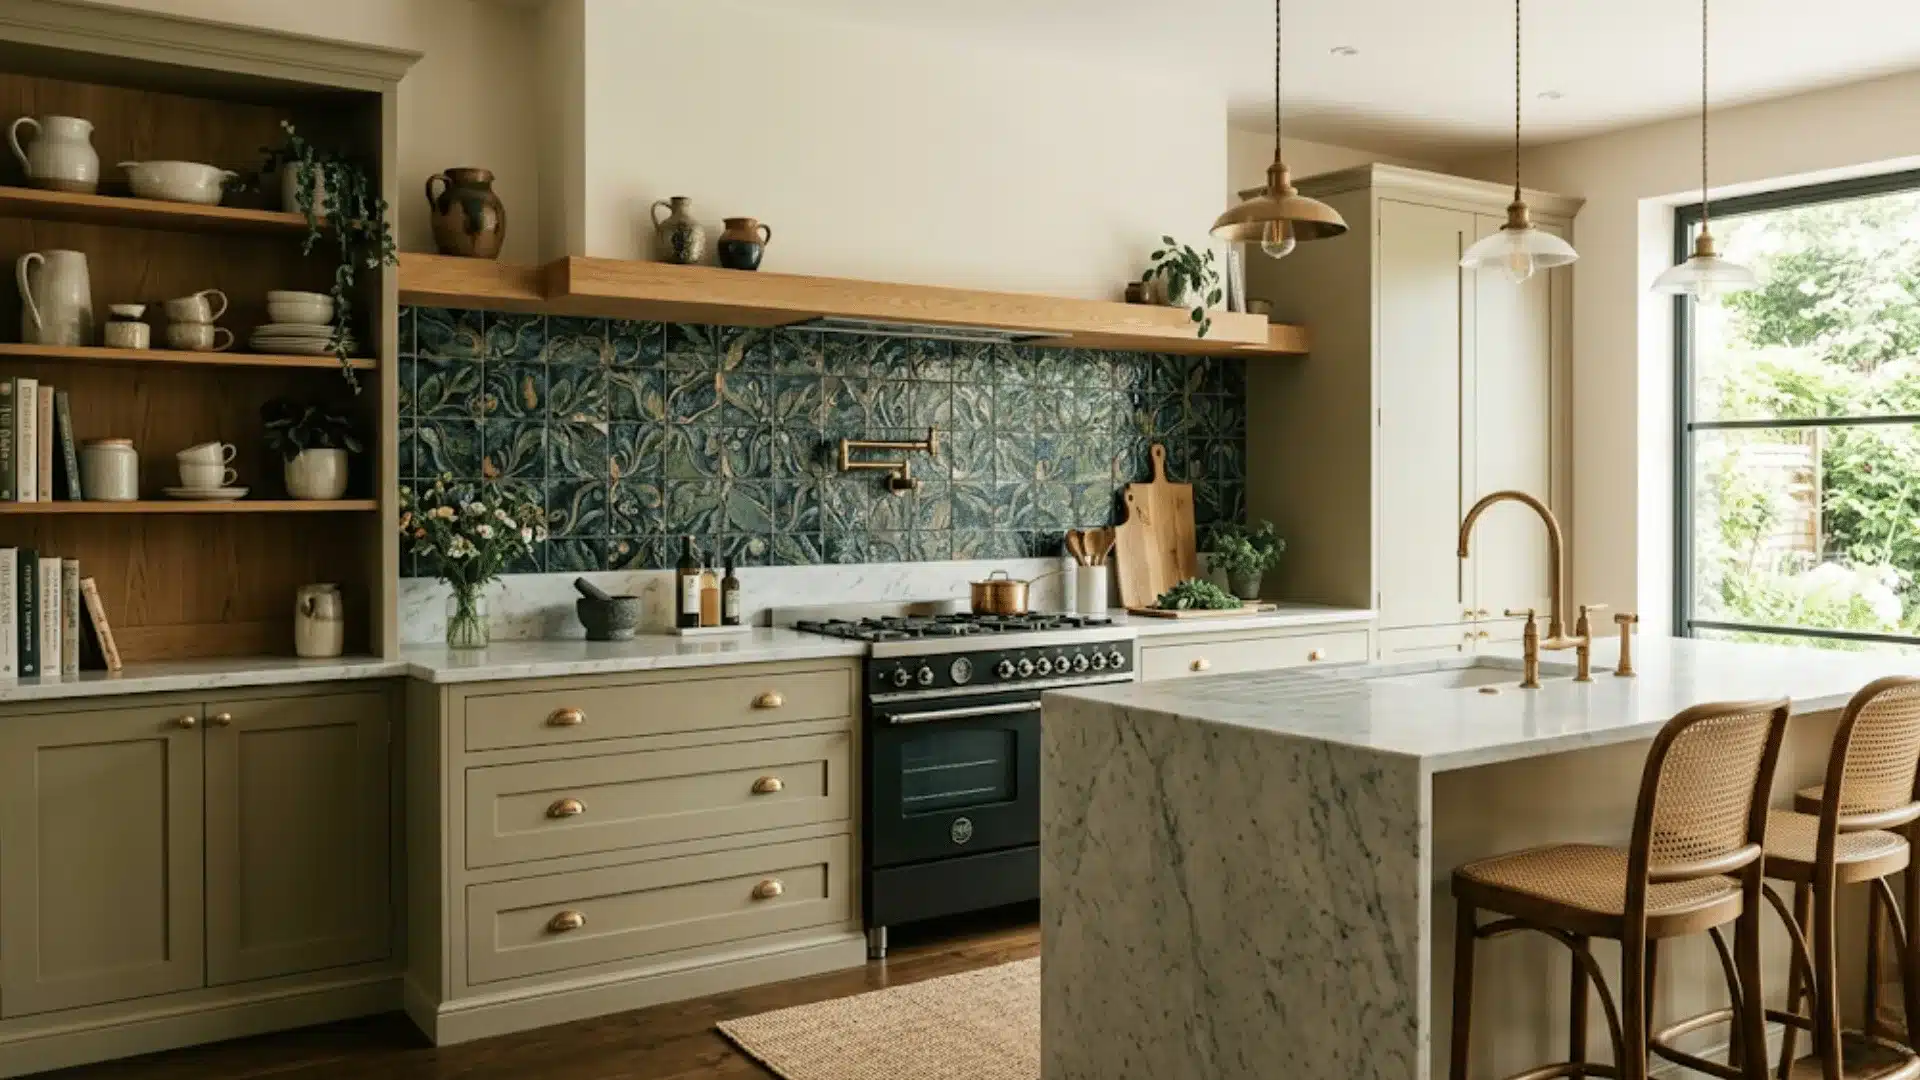
A well-placed decorative feature element gives your kitchen a distinct visual identity that elevates it beyond a purely functional space. Whether it is a statement splashback, an exposed brick section, open display shelving, or a boldly finished ceiling, a single focal point anchors the entire room and communicates intentional design thinking.
The key during renovation is selecting one surface or zone to celebrate rather than decorating everywhere equally; restraint creates impact. Planned early, a feature element shapes every surrounding finish decision and ensures the overall aesthetic feels considered, layered, and genuinely personal.
- Installation Consideration: Sequence the feature element installation after all structural, electrical, and work is complete, but before final painting, ensuring the surface is clean, fully prepared, and protected from subsequent trade damage.
- Cost Factor: Open shelving or painted feature wall $300–$1,000 | Statement tile or textured panel $1,500–$4,500 | Custom brickwork, plaster finish, or designer surface cladding $5,000–$15,000+
21. Optimize the Work Triangle

The work triangle, the relationship between your sink, cooktop, and refrigerator, is the foundational principle of efficient kitchen design and the most important layout decision made during any renovation. When these three points are poorly positioned, every cooking session involves unnecessary steps, awkward crossovers, and wasted time.
Optimizing the triangle during renovation means rethinking appliance placement, plumbing rough-ins, and cabinetry layout before a single fixture is fixed, ensuring that daily cooking flows naturally, safely, and with the least possible physical effort across every meal prepared in the space.
- Installation Consideration: Confirm final appliance positions and plumbing rough-in locations with your contractor before floor and wall trades begin, as relocating sink or cooktop connections after tiling is complete adds significant time and cost to the renovation.
- Cost Factor: Layout replanning within existing footprint $500–$2,000 | Appliance and plumbing repositioning $3,000–$8,000 | Full layout reconfiguration with structural changes $10,000–$25,000+
How to Choose the Right Kitchen Remodel Ideas for Your Space
Not every renovation idea suits every kitchen. Smart planning means choosing upgrades that align with your specific space, habits, and priorities:
- Match ideas to your kitchen size: Large kitchens benefit from islands and open layouts, while compact spaces gain more from smart storage, built-in appliances, and space-saving doors.
- Anchor decisions to your daily routine: Identify the tasks you perform most frequently and prioritize upgrades that directly reduce friction, effort, or time in those specific moments.
- Target upgrades that solve real problems: Avoid chasing trends, choose improvements that address genuine pain points such as poor lighting, insufficient storage, or an inefficient work triangle.
- Sequence your ideas by impact and budget: Rank your shortlist by the value each upgrade adds to daily function, then align the execution order with your available budget and renovation timeline.
The right renovation is not the most extensive one; it is the one most precisely tailored to how you actually live and cook.
Common Kitchen Renovation Mistakes to Avoid
A successful kitchen renovation is as much about what you avoid as what you add. Steer clear of these costly and frequently made errors:
- Ignoring layout and workflow: Finalizing cabinet and appliance positions without first mapping your work triangle results in a kitchen that looks upgraded but functions poorly every single day.
- Underestimating storage needs: Focusing the budget on visible surfaces while neglecting internal fittings, pull-outs, and pantry solutions results in cluttered countertops within weeks of completion.
- Prioritizing appearance over usability: Selecting materials, finishes, and layouts solely for aesthetics, without considering maintenance, durability, and everyday practicality, can lead to long-term frustration and regret.
- Skipping a proper lighting plan: Relying on a single overhead source without task, accent, or under-cabinet lighting leaves critical work zones shadowed and the overall atmosphere flat and uninviting.
Avoiding these mistakes from the very start of your planning process protects your budget, your timeline, and the long-term quality of your finished kitchen.
Final Understanding
Building a kitchen that actually supports your life is about making every square inch work for you.
You’ve explored how layout optimization, smarter storage, and layered lighting turn a chaotic room into a streamlined workspace.
You now know that choosing durable materials and integrating appliances isn’t just about the “wow” factor; it’s about reducing daily stress. This kitchen renovation ideas journey succeeds when you stop following trends and start solving your specific pain points.
Real value comes from a space that feels as good to use as it looks. I’d love to know which of these ideas solved a problem for you. Tell me about your renovation wins or challenges in the comments.