

Getting chicken tenders right starts long before they hit the pan. And most people skip the one step that actually makes the difference: cutting the chicken breast into tenders before cooking.
I’ll be upfront: the first time I tried this, my strips came out uneven, and some turned chewy no matter how carefully I cooked them. Turns out, the knife angle and direction matter more than I’d expected.
Here, you’ll find a simple, step-by-step breakdown of how to slice chicken breast into clean, even tenders at home. From what tools to use, to cutting against the grain, to avoiding the most common slip-ups, it’s all covered.
From frying to grilling, getting the cut right can change the final result more than most people think.
Why Cut Chicken Breast Into Tenders at Home?
To cut chicken breast into tenders, remove the natural tenderloin first, then slice the remaining breast against the grain into even strips about ½–1 inch thick. Use a sharp knife and cut on a stable surface to ensure clean, uniform pieces that cook evenly.
Store-bought tenders are convenient, sure. But they come with a cost, literally. Packed chicken strips are priced higher, and the quality isn’t always consistent. Cutting tenders at home puts that control back in the kitchen.
Freshly sliced chicken breast at home means knowing exactly what’s going into the meal. The thickness can be adjusted based on the recipe, thicker for frying, thinner for air frying. There’s no mystery marinade, no added fillers, and no guessing about freshness.
It also goes further. One large chicken breast can yield 4 to 6 strips easily, making it a smart, budget-friendly option for weekly meal prep or a quick weeknight dinner.
Should You Wash Chicken Before Cutting?
No, you should not wash raw chicken before cutting it. Washing chicken can actually spread bacteria around your kitchen instead of removing it.
When you rinse raw chicken under running water, tiny droplets can splash onto your sink, countertops, utensils, and even nearby food. This process is called cross-contamination, and it increases the risk of foodborne illness.
Cooking chicken to the proper internal temperature of 165°F (74°C) is what safely kills harmful bacteria, not rinsing it. If you notice excess moisture on the surface, simply pat the chicken dry with paper towels before cutting.
Discard the towels immediately and wash your hands, knife, and cutting board thoroughly with hot, soapy water. Skipping the rinse step keeps your kitchen cleaner and your meal safer.
How to Cut Chicken Breast Into Tenders?
Getting clean, even chicken tenders at home, is simpler than it looks. A sharp knife, the right technique, and a few minutes are all it takes.
Tools and Materials Required
| Tool / Material | Purpose |
|---|---|
| Sharp chef’s knife | Makes smooth, clean cuts without tearing |
| Stable cutting board | Provides a safe surface for slicing |
| Kitchen towel (under board) | Prevents slipping while cutting |
| Boneless, skinless chicken breast | Main ingredient for all cuts |
| Paper towels | Keeps chicken dry for better control |
How to Cut Chicken Breast Into Tenders
Method 1: Remove the Tenderloin
This method gives you the natural chicken tenders attached to the breast. They are smaller, softer pieces and require very little trimming to separate cleanly.
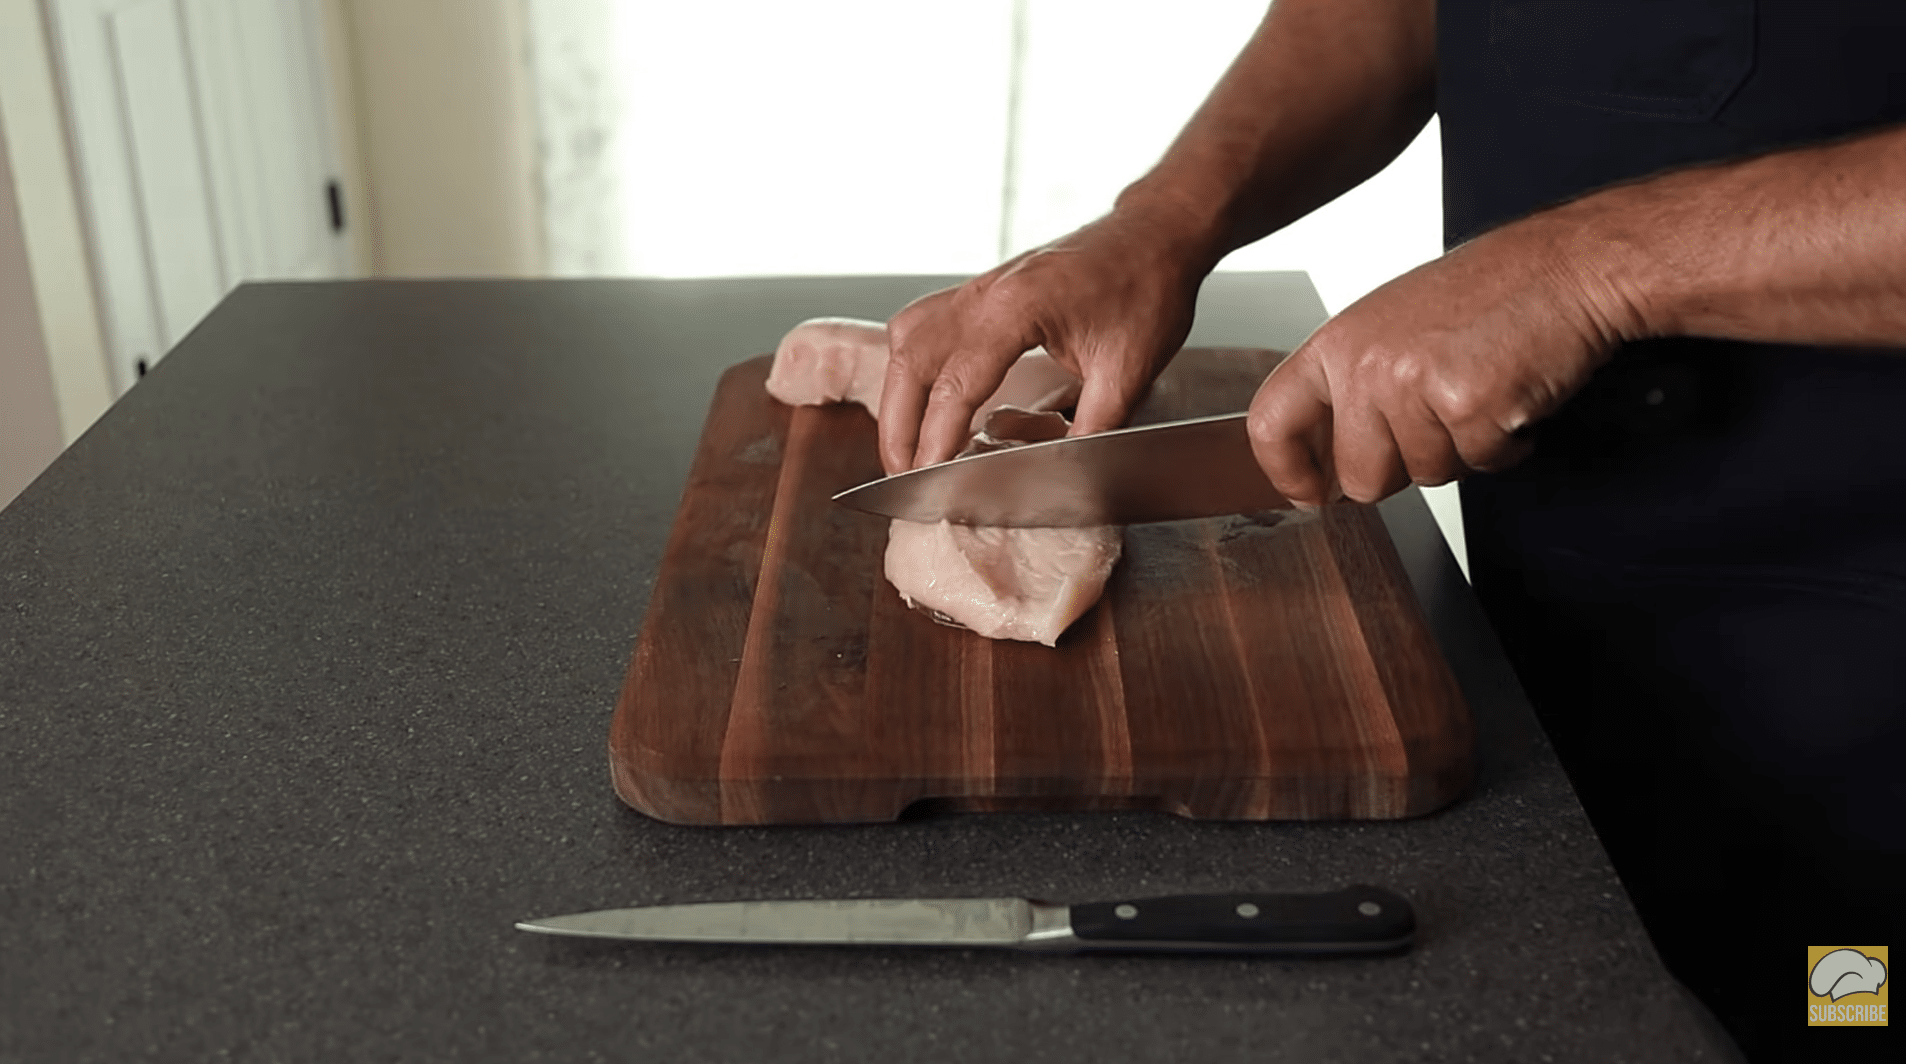
Step 1: Identify the Tenderloin
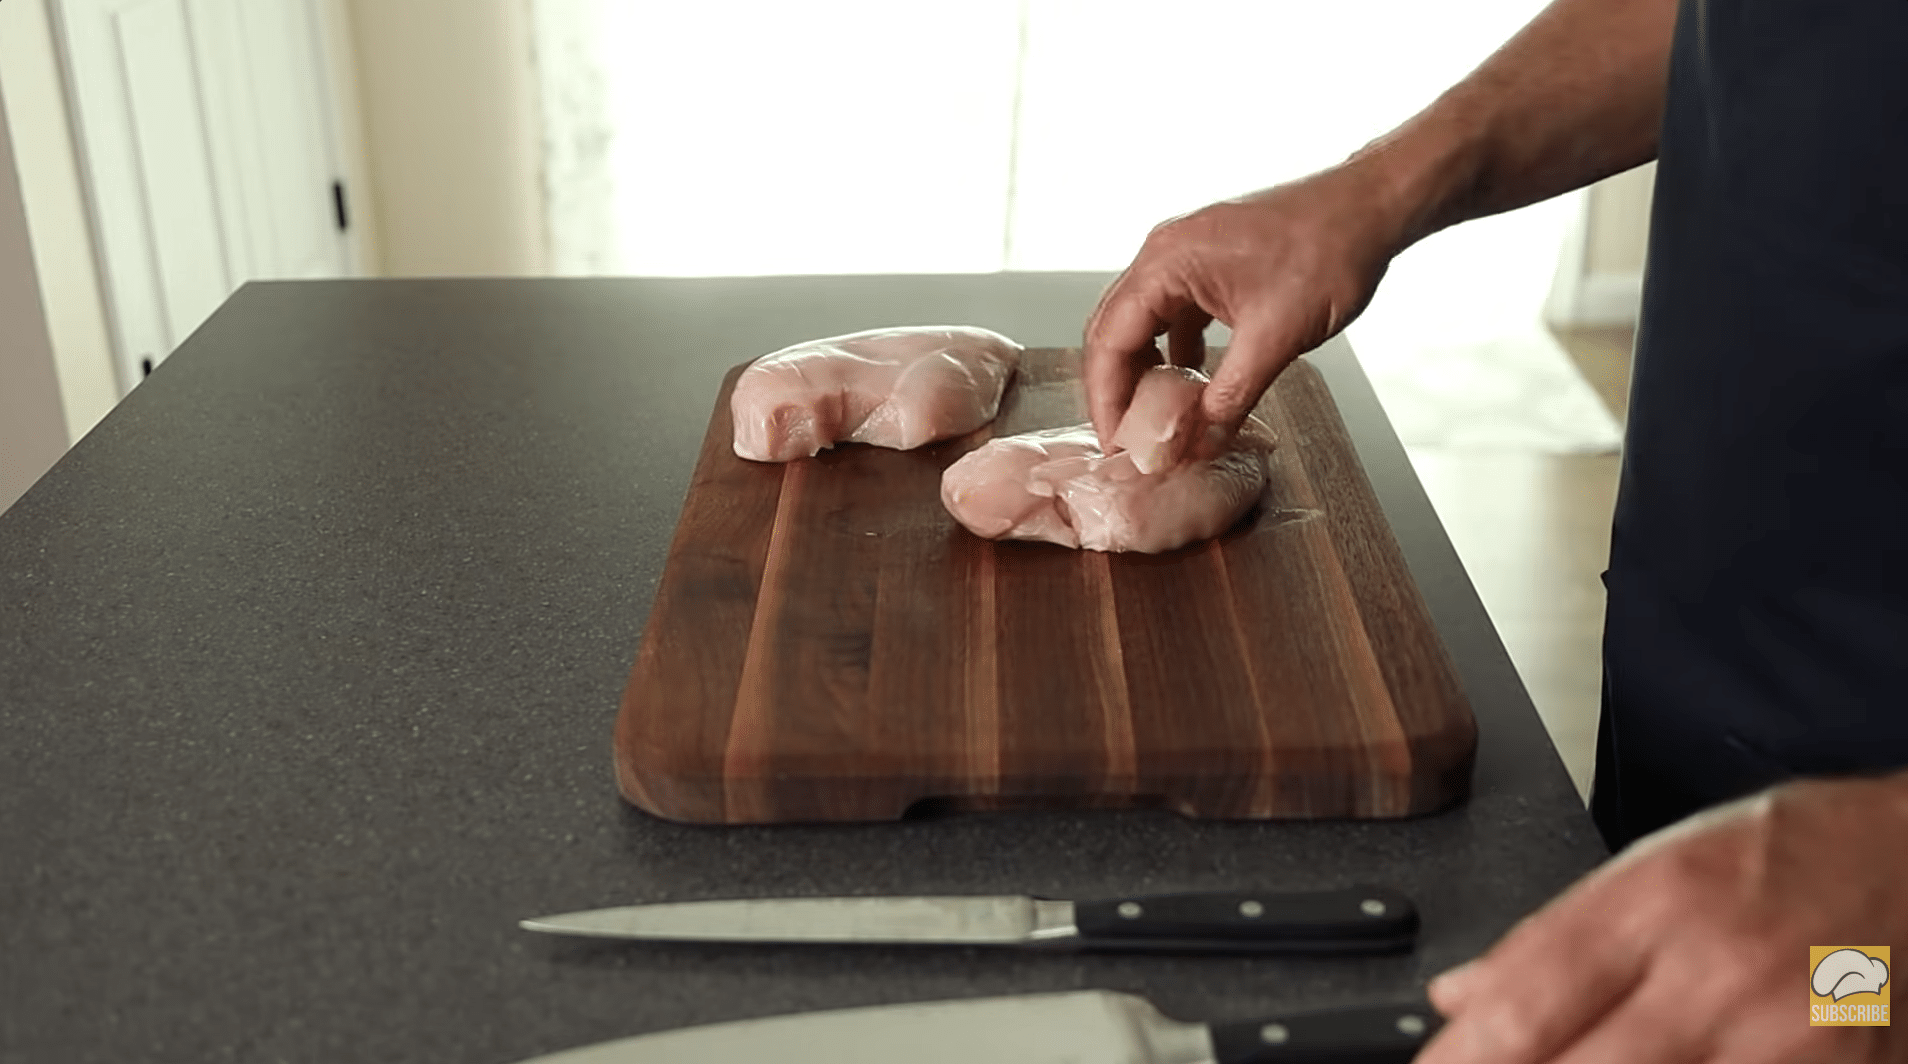
Place the chicken breast flat on your cutting board. Look for a smaller strip of meat attached along one side underneath. This piece is the tenderloin.
It is slightly separated from the main breast and is held in place by a thin line of connective tissue.
Step 2: Cut the Tenderloin Away
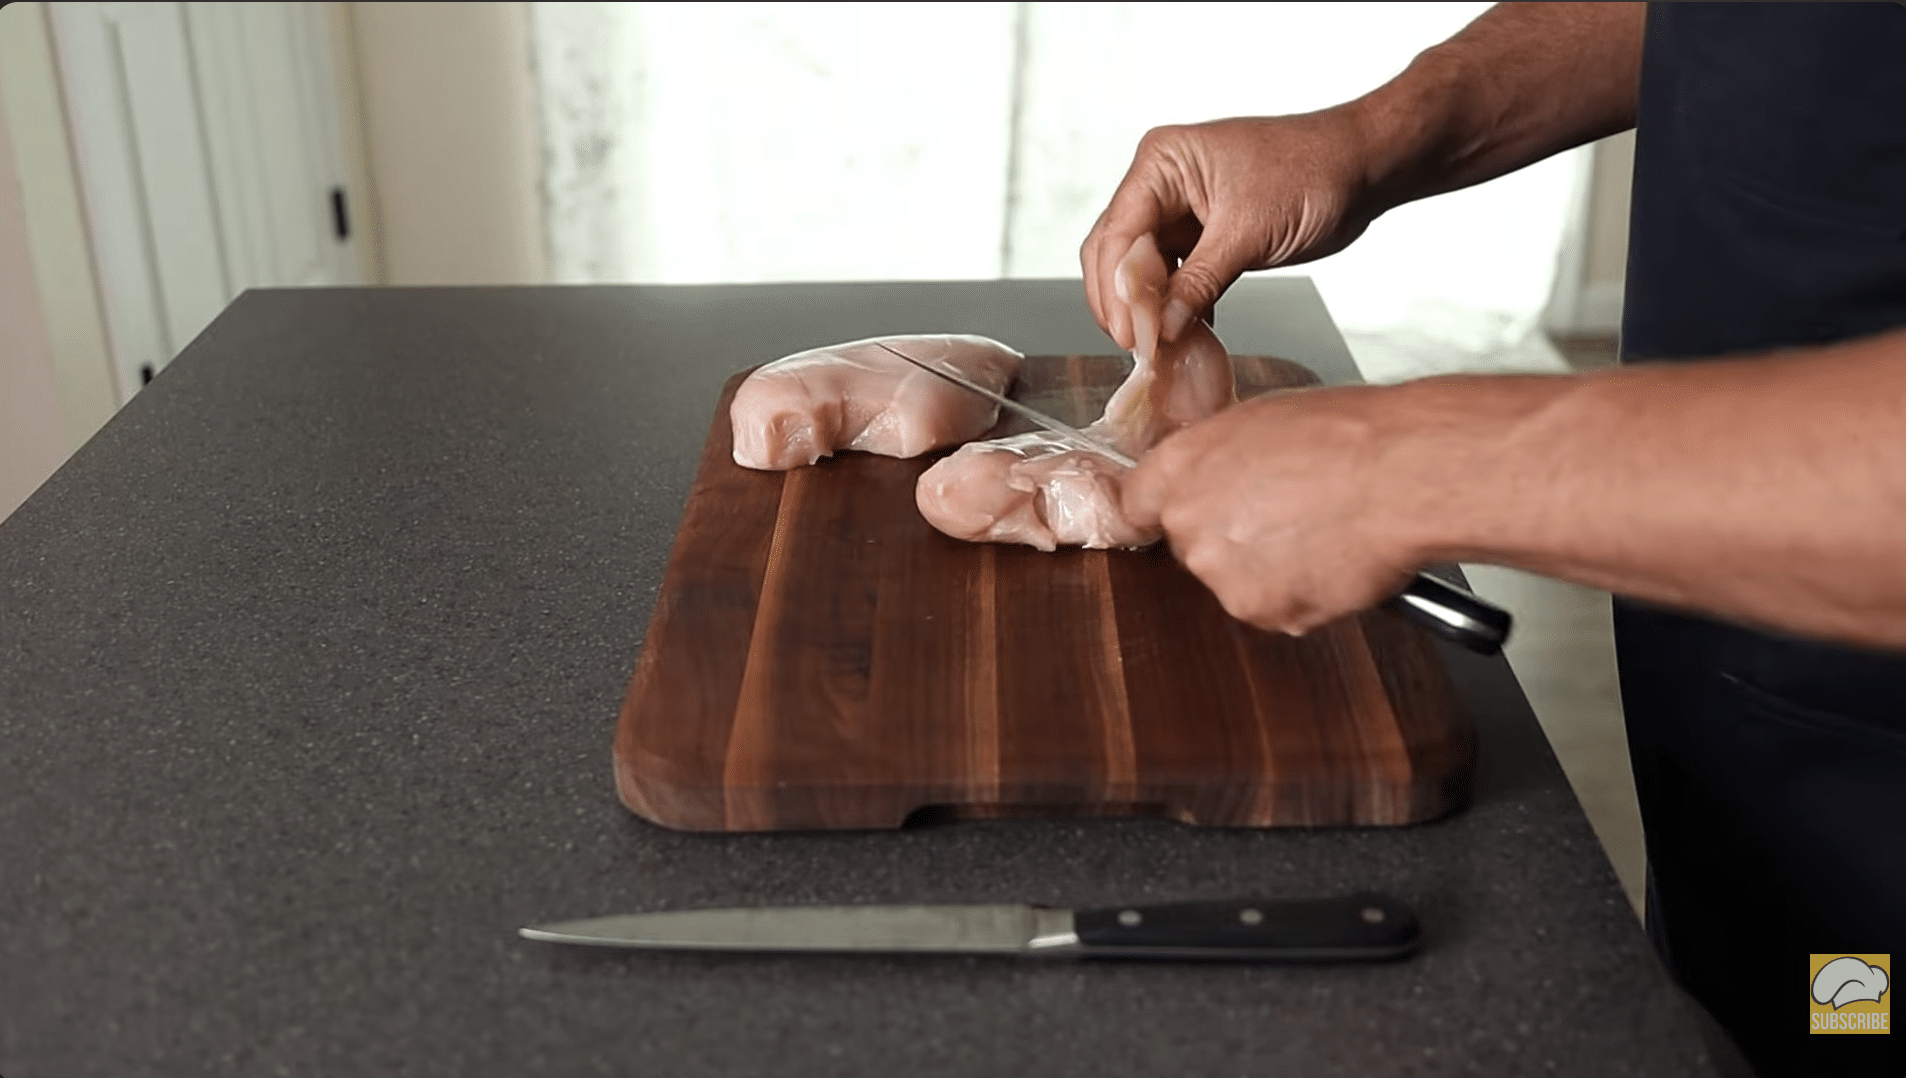
Hold the breast steady with one hand. Using your knife, gently slice along the line where the tenderloin meets the breast. You do not need to cut deeply.
A light, controlled motion will cleanly separate it. Repeat on the other side if present. These pieces are natural chicken tenders.
Method 2: Slice the Breast Into Even Pieces
This method helps reduce uneven thickness in the whole breast. It creates pieces that cook more evenly, preventing dry edges and undercooked centers.
Step 1: Cut Off the Thin Tapered End
Notice that the chicken breast is thicker at the top and thinner at the bottom. Where the thickness drops quickly, make a cut to separate that thinner section.
This gives you one piece that is already fairly even and another, thicker portion to work with.
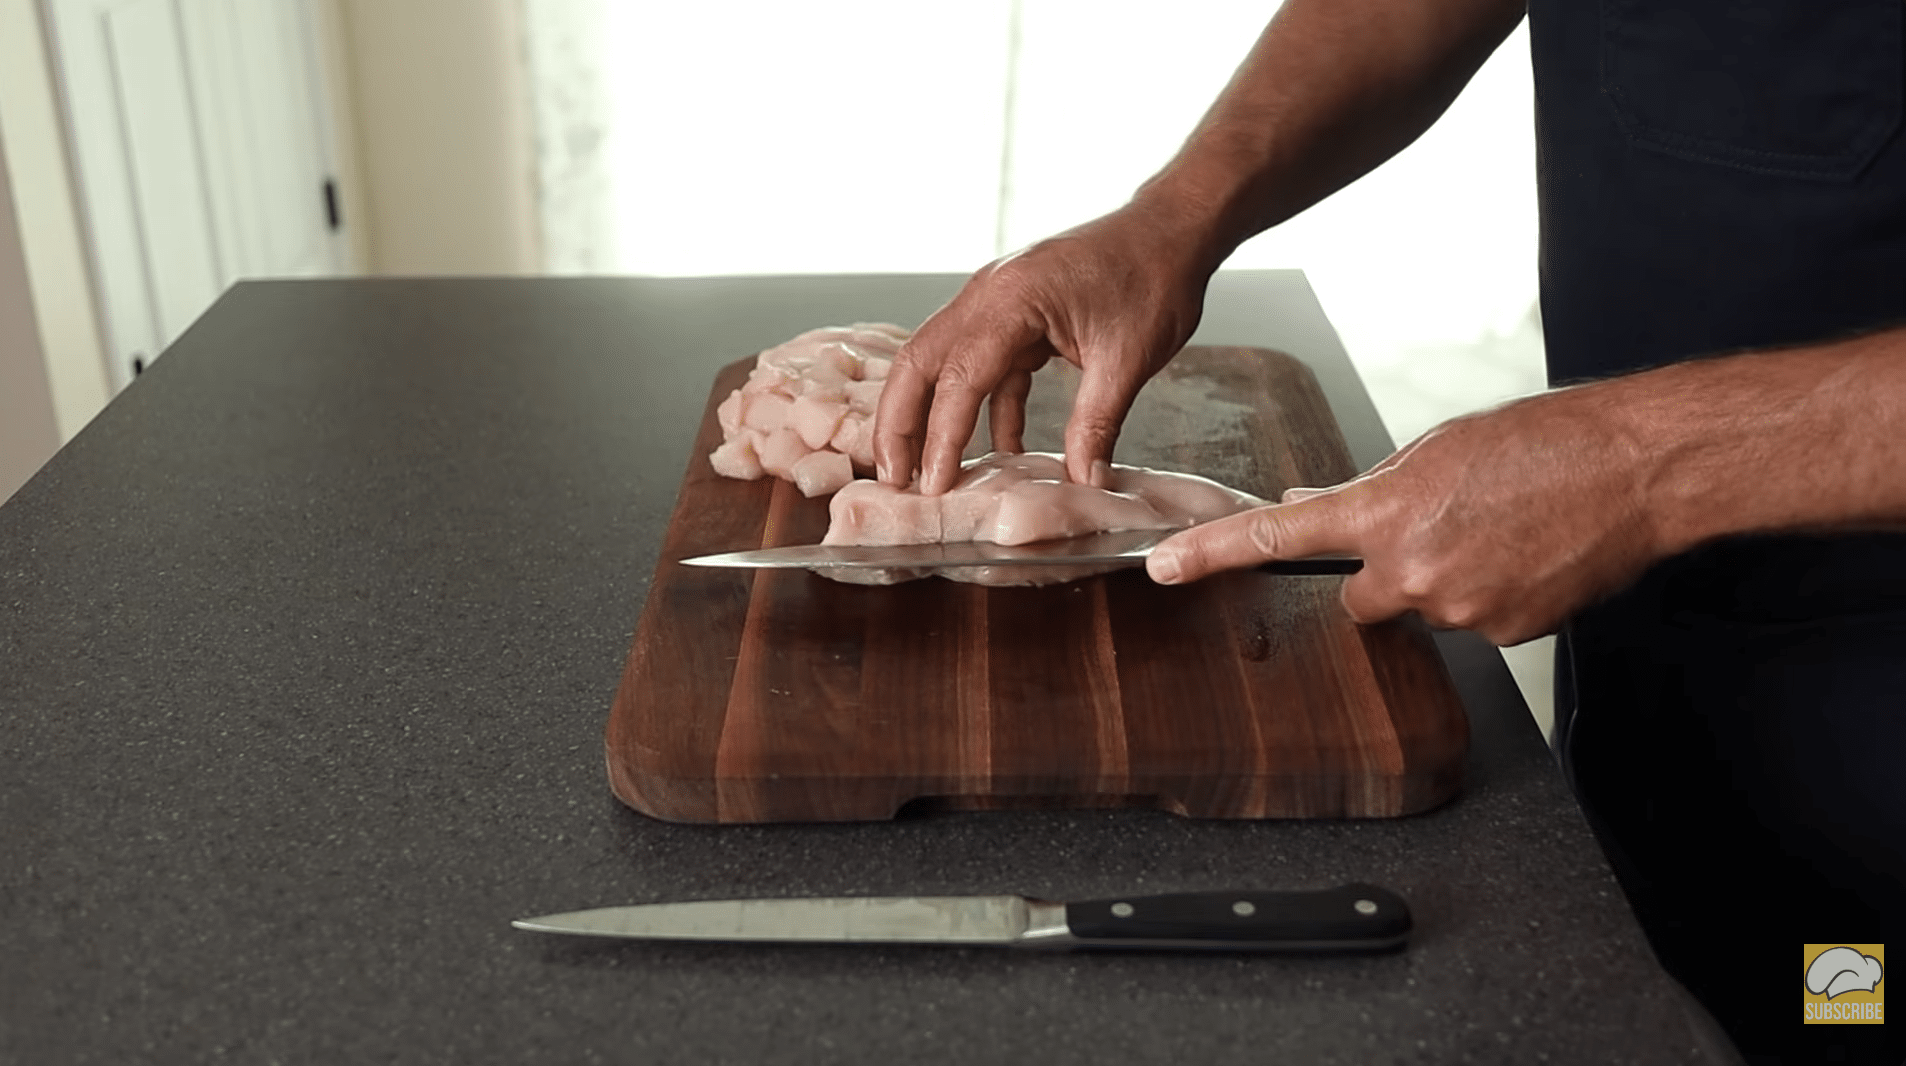
Step 2: Slice the Thick Portion Horizontally
Take the thicker top portion and find the halfway point through the thickness. Hold your knife parallel to the cutting board. Carefully slice straight through the middle using a smooth motion.
Keep your hand clear of the blade. You should now have pieces that are close to the same thickness.
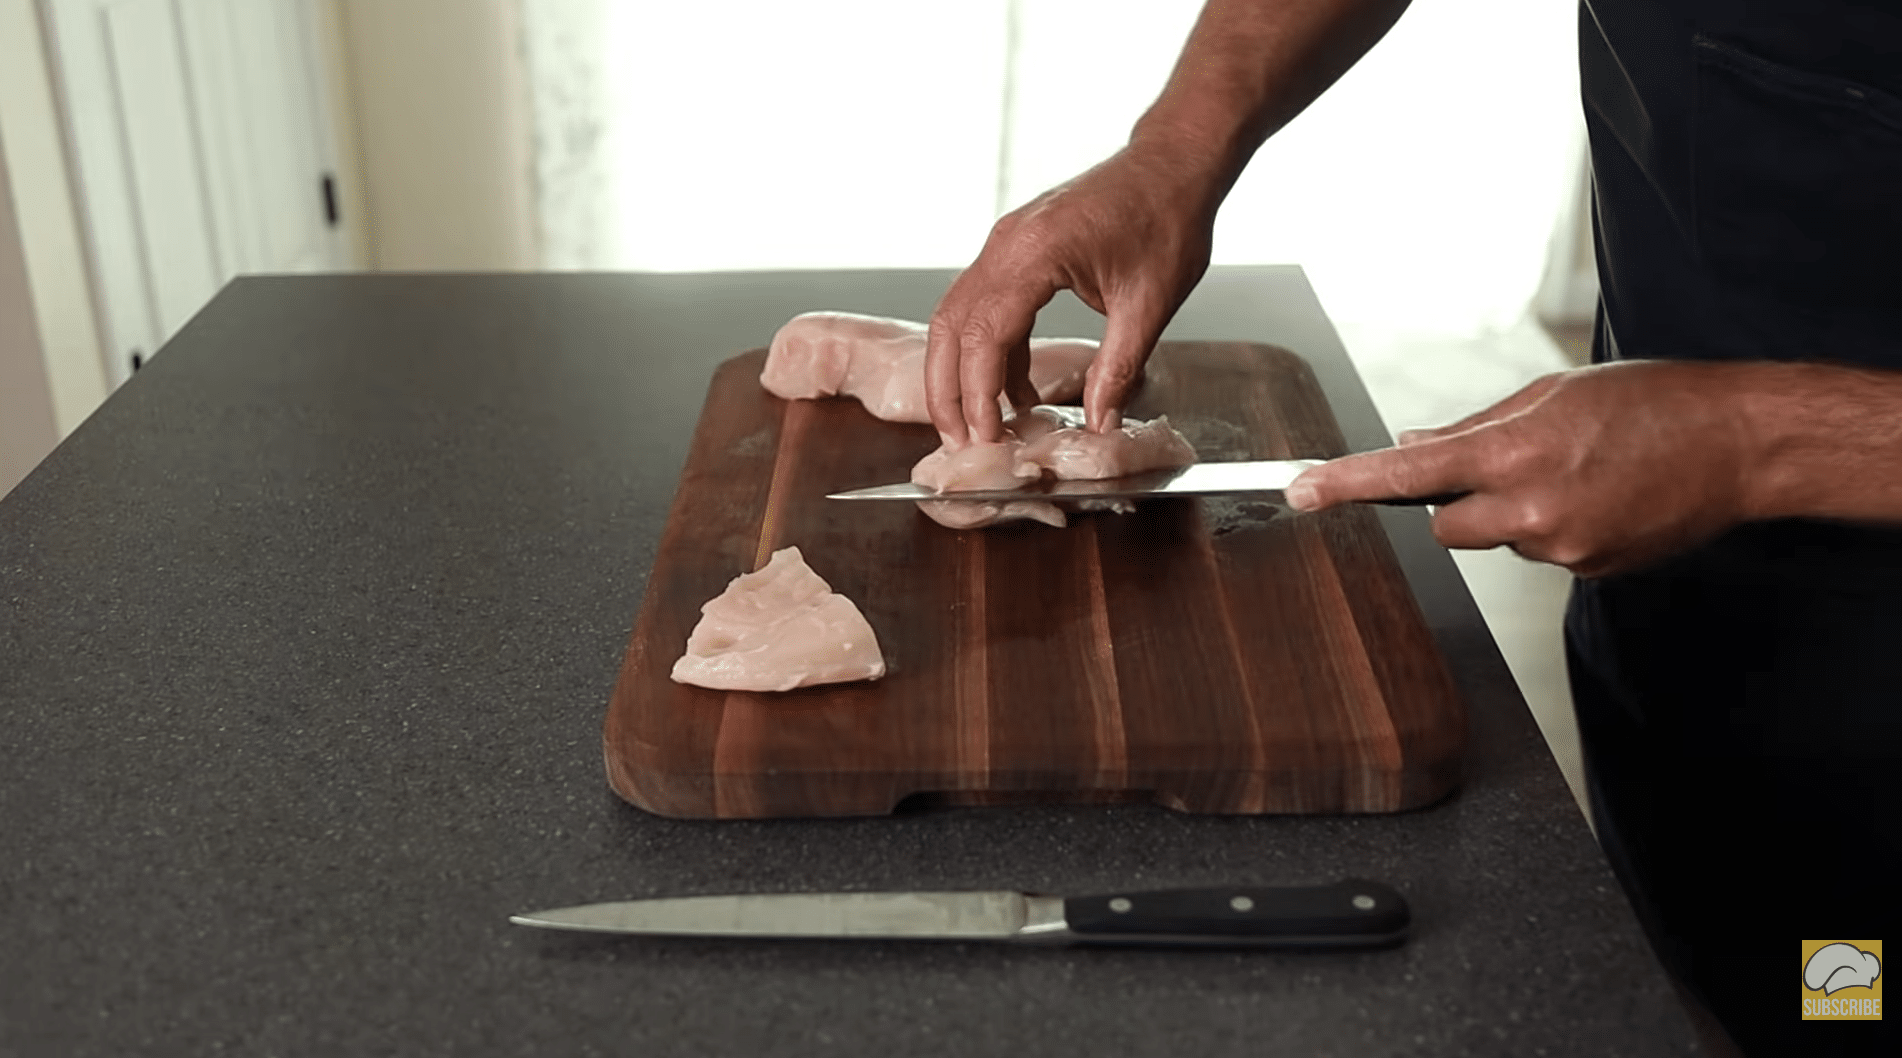
Method 3: Cut Into Strips or Chunks
Use this method for stir-fries, wraps, salads, or quick skillet meals. Even strips and chunks help the chicken cook at the same speed.
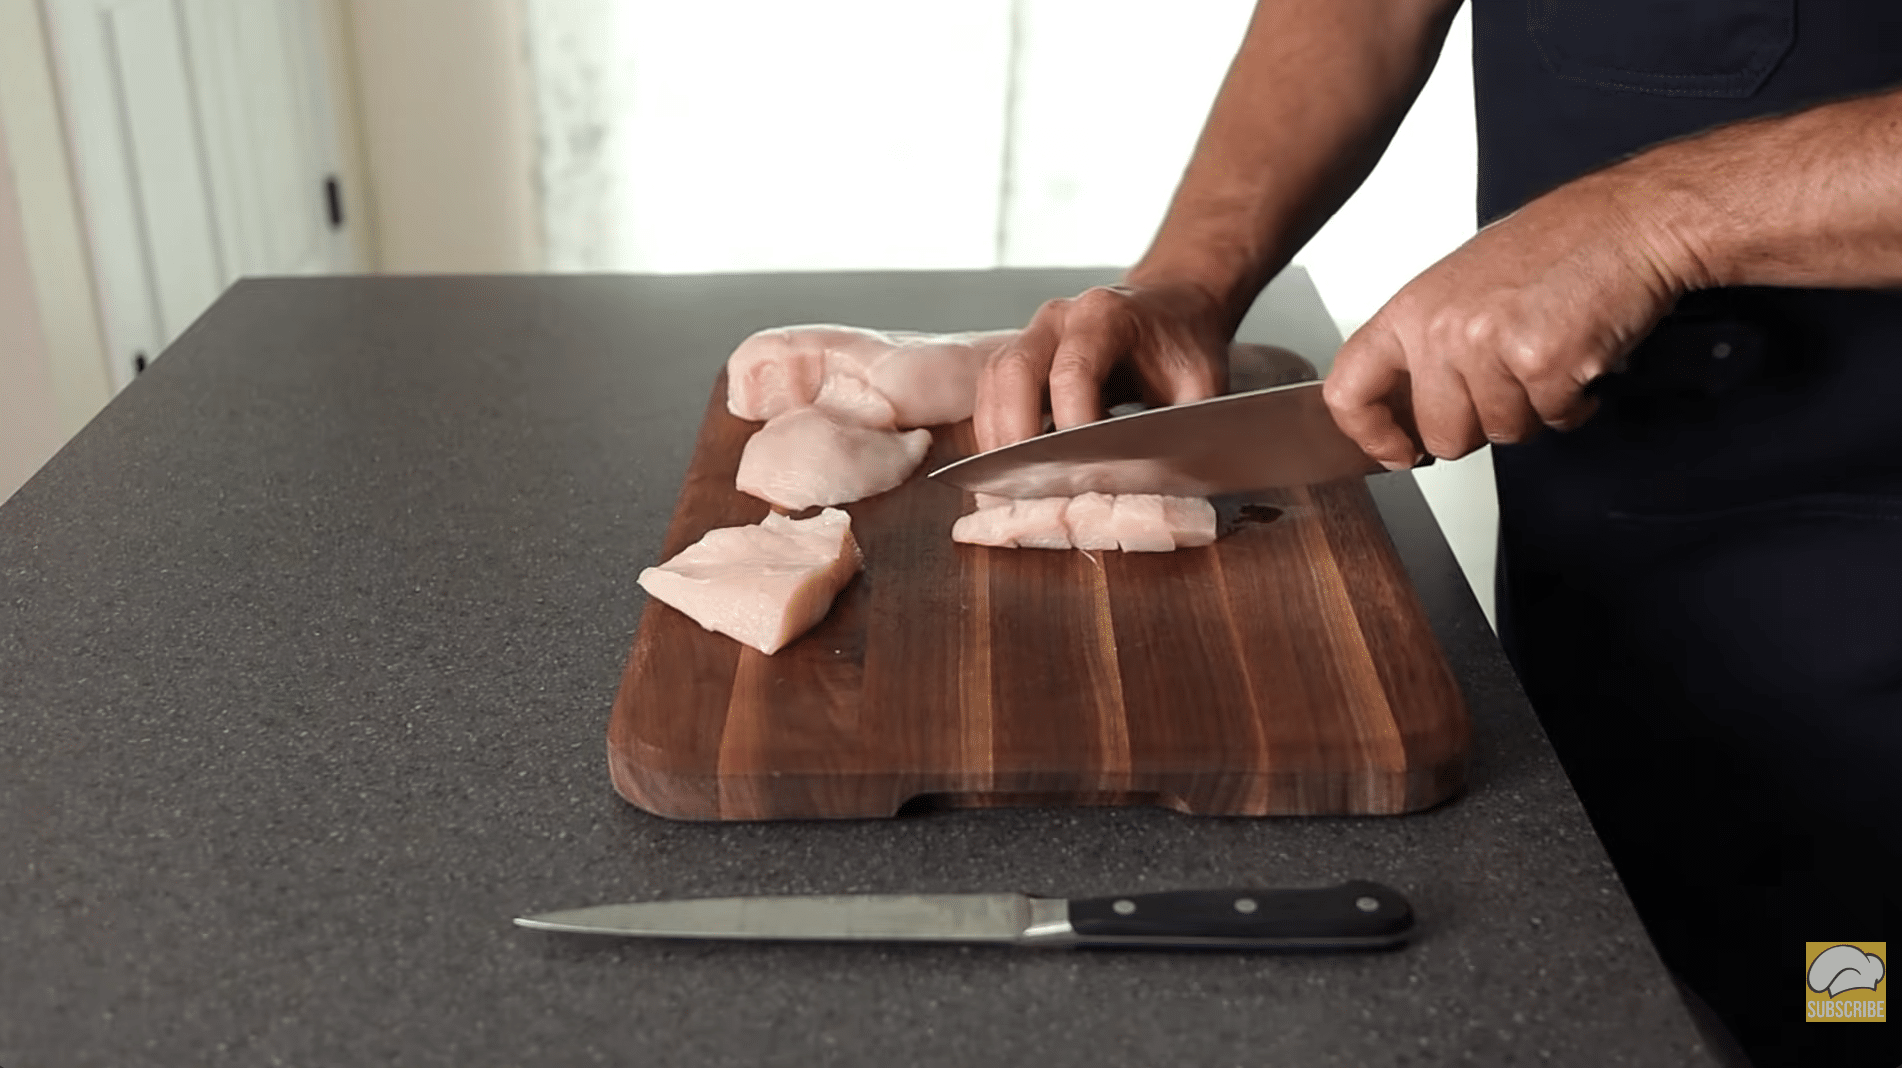
Step 1: Slice Into Strips
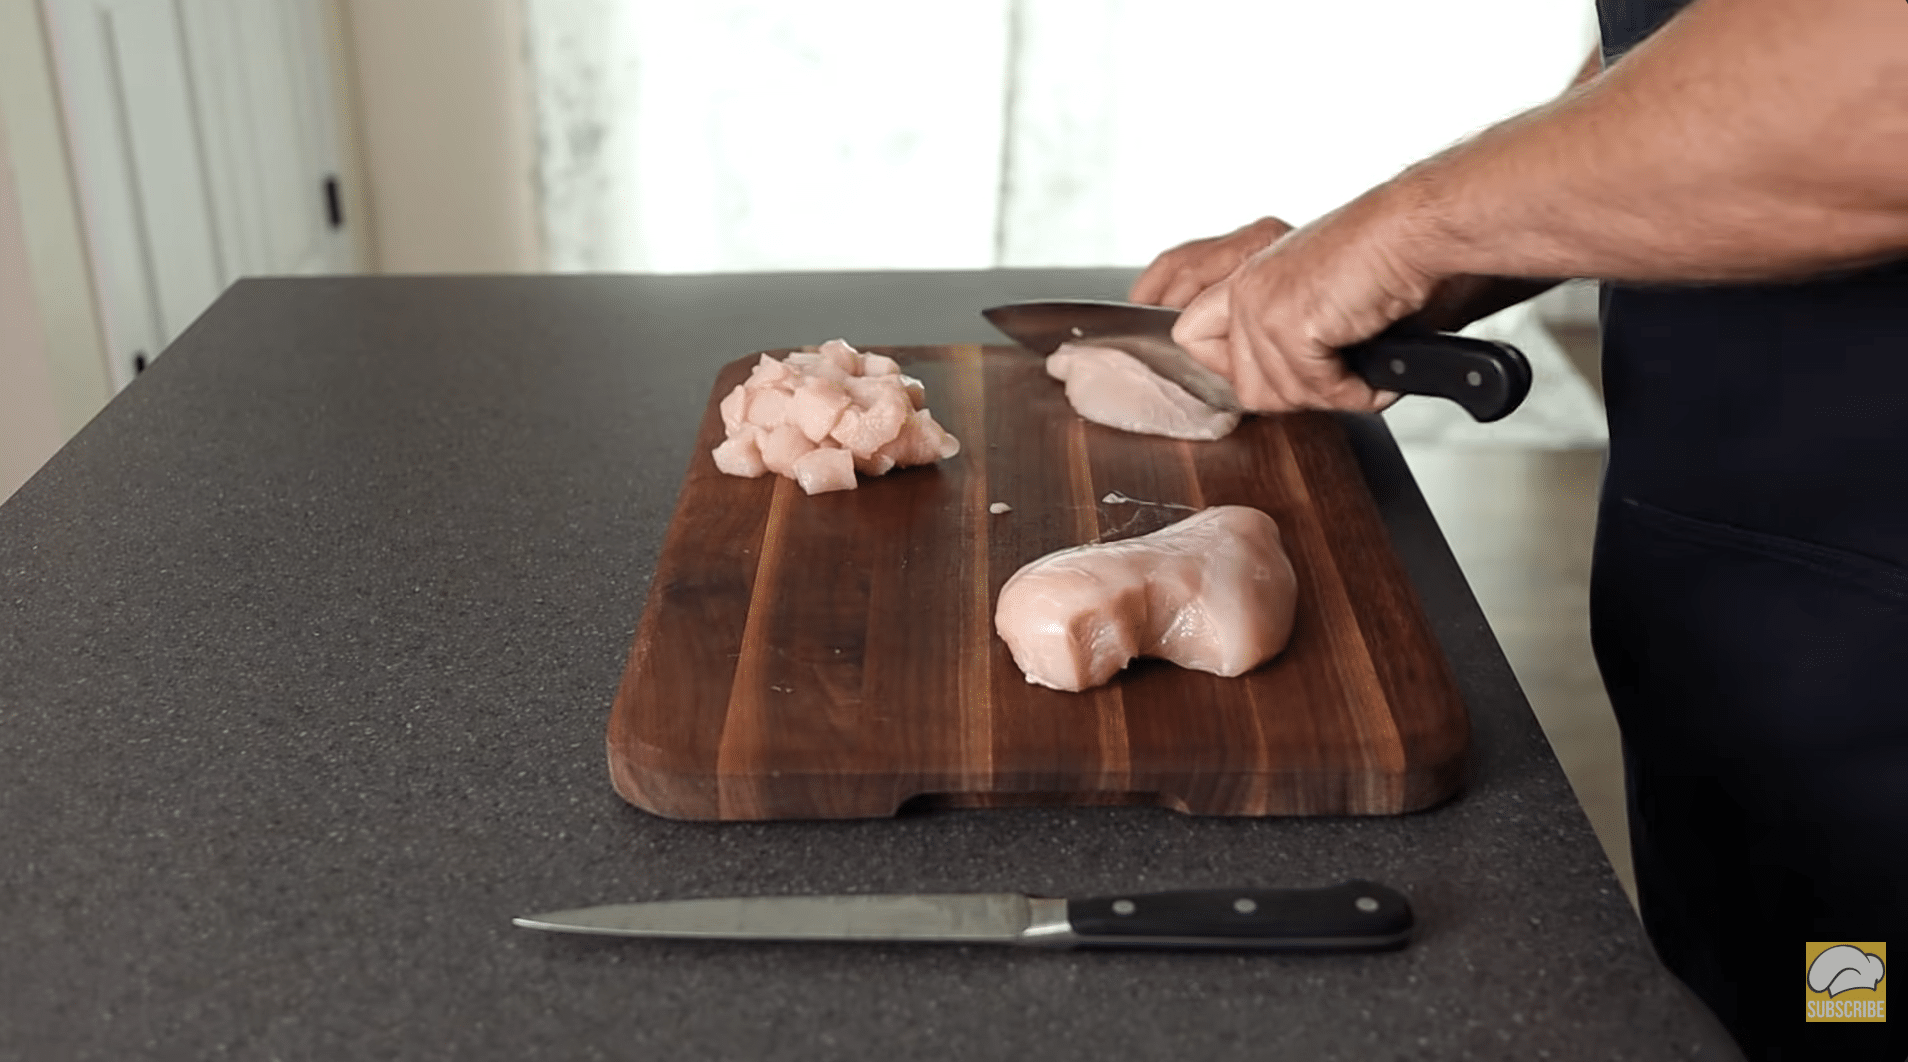
Take your evenly thick pieces and cut them lengthwise into strips. Choose the width based on your recipe. Keep each strip roughly the same size so they cook at the same rate.
Use steady, controlled cuts and keep your fingers tucked safely away from the blade.
Step 2: Cut Strips Into Chunks
Turn the strips and cut across them to create bite-sized chunks. Cutting across the grain shortens the muscle fibers, which helps keep the chicken tender after cooking.
Try to keep the pieces consistent in size so they cook evenly in a pan or stir-fry.
Method 4: Butterfly a Chicken Breast
Butterflying reduces thickness without fully separating the meat. This helps the chicken cook evenly and works well for sautéing or pan cooking whole portions.
Step 1: Position the Knife Correctly

Place the chicken breast flat on the board. Hold your knife parallel to the surface. Find the halfway point through the thickness of the breast.
Keeping the blade level is important. If the knife angles upward or downward, you will cut unevenly.
Step 2: Slice and Open the Breast
Carefully slice into the middle of the breast, stopping before cutting all the way through. Open the breast like a book. If needed, make a small additional cut so it lies flat.
You now have a thinner, evenly sized piece that will cook more evenly.
Important Note: If the chicken is already cooked, slice across the grain. This keeps the meat tender and prevents it from becoming stringy.
For more information, refer to the video below:
Best Thickness for Different Cooking Methods
The right thickness depends on how the chicken is cooked. A small adjustment in strip size can make a real difference in the final texture and juiciness.
| Cooking Method | Ideal Thickness | Why It Works |
|---|---|---|
| Frying | 1 inch | Holds up to heat, stays juicy inside while the outside crisps up |
| Baking | ¾ to 1 inch | Even sizing ensures the whole batch finishes at the same time |
| Air Frying | ½ to ¾ inch | Thinner strips allow hot air to circulate faster for a crispier result |
| Grilling | 1 inch or more | Prevents drying out over direct heat and keeps the texture juicy |
Getting the thickness right doesn’t take much extra effort. A small adjustment before cooking saves a lot of fixing after, and the results speak for themselves.
Common Mistakes to Avoid
Small mistakes in prep can affect the final result more than most people expect. Here’s what to watch out for before picking up the knife.
- Cutting with the grain leaves strips that are chewy and stringy, no matter how well they’re cooked. Always slice across the muscle lines.
- Using a dull knife tears the meat rather than cutting it cleanly. A sharp blade makes the whole process faster and safer.
- Skipping the freezer trick affects the texture of the chicken. Ten to fifteen minutes in the freezer firms the meat up and makes slicing much cleaner.
- Cutting uneven strips means some pieces overcook while others stay underdone. Take an extra second to keep widths consistent.
- Not securing the cutting board is a safety risk. A folded kitchen towel underneath keeps it firmly in place throughout.
None of these is hard to fix; they just need a little attention the first time. Get these right once, and they become second nature every time after.
Can You Cut Cooked Chicken Into Tenders?
Cooked chicken can absolutely be sliced into strips, but it behaves differently from raw. Knowing what to expect makes the process a lot cleaner.
Raw chicken is soft and pliable, which is why technique matters so much before cooking. Cooked chicken is firmer and holds its shape better under the knife, making it slightly easier to control.
The texture, though, is less forgiving. Cooked meat tears more easily if the knife drags or the angle is off. Always cut across the grain; this is non-negotiable with cooked chicken.
Going with the grain pulls the fibers apart, leaving stringy, dry-looking strips. For the cleanest slices, let cooked chicken rest for a few minutes first. A sharp knife and one smooth motion per strip does the rest.
Key Takeaway
Cutting chicken breast into tenders at home is one of those small skills that genuinely changes how meals turn out. Once the grain direction clicks and the right thickness becomes second nature, the results are noticeably better, juicier, more even, and cooked through properly every time.
The key takeaways are simple. Dry the meat first, slice against the grain, match the strip thickness to the cooking method, and keep everything uniform. Avoid the common slip-ups, and the whole process takes under five minutes.
How to cut chicken tenders from the breast isn’t complicated; it just needs a little attention the first time around. Try it on the next cook and see the difference firsthand. Drop a comment below if any step needs clarification.
Frequently Asked Questions
Is it Easier to Cut Chicken Breast When it’s Cold?
Yes, slightly cold chicken is much easier to cut cleanly. Placing the chicken breast in the freezer for 10–15 minutes firms up the texture without freezing it solid. This makes slicing more precise and prevents the meat from slipping under the knife. It’s especially helpful when cutting thin strips or uniform tenders.
How Thick Should Chicken Tenders be?
For most cooking methods, chicken tenders should be between ½ inch and 1 inch thick. Thinner strips cook faster and work well for air frying or stir-frying. Thicker strips are better for frying or grilling because they stay juicier inside while developing a crisp exterior.
Can You Cut Chicken Breast While it’s Frozen?
You should not cut fully frozen chicken breast because it’s difficult and unsafe to slice. However, slightly frozen chicken is actually ideal for clean cuts. If the chicken is rock solid, allow it to thaw partially in the refrigerator before attempting to cut it safely.
How do You Cut Chicken Breast Thin for Cutlets?
To cut chicken breast thin, place your hand flat on top of the breast and hold a sharp knife parallel to the cutting board. Slice horizontally through the middle of the breast in one smooth motion. This technique, also called butterflying, creates thin cutlets that cook evenly and quickly.