
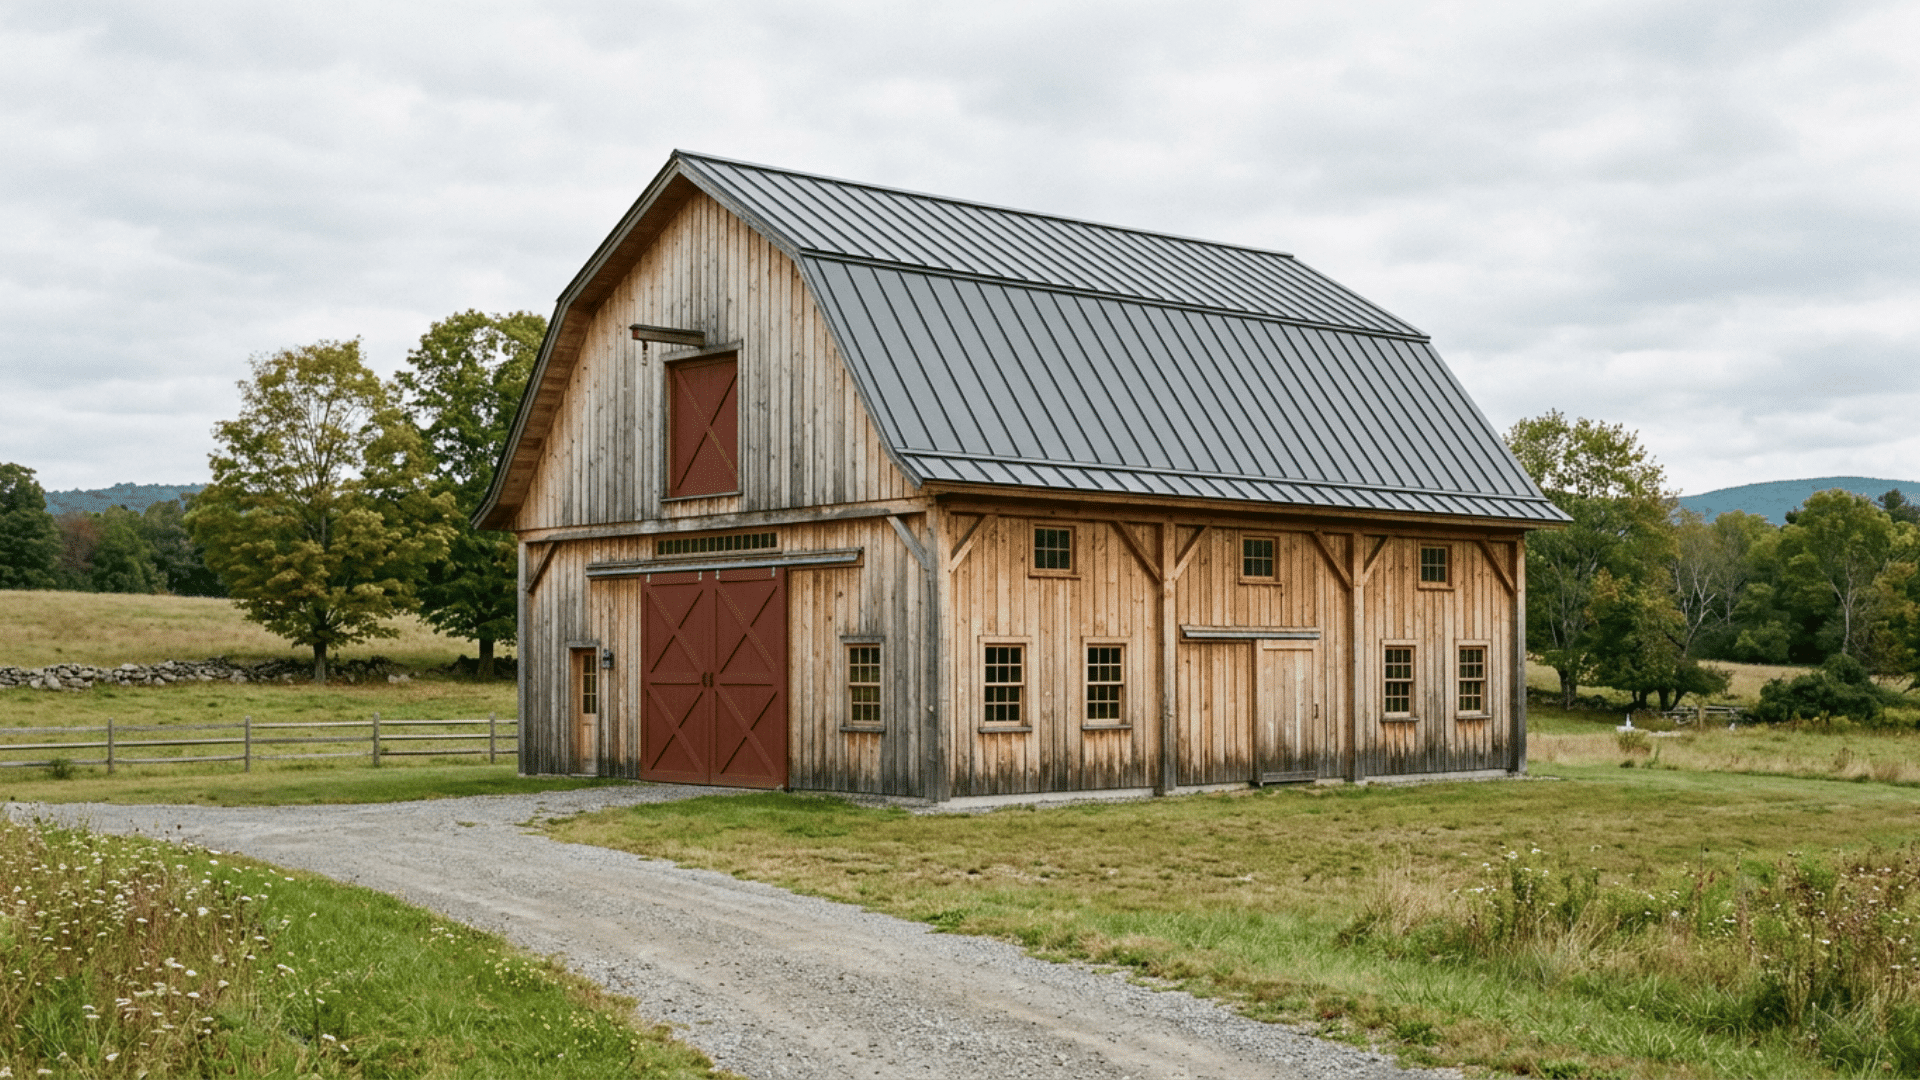
A gambrel roof may look like a simple barn-style structure, but achieving the right proportions requires accurate measurements and careful planning.
Its distinctive double slopes can create generous loft space, support effective drainage, and add timeless character to barns, sheds, garages, and homes.
However, roof angles, rafter lengths, structural loads, and ventilation must align for a safe, practical design.
Follow the measurements and design steps below to plan your gambrel roof confidently, use the available space wisely, and avoid costly construction mistakes.
What Is a Gambrel Roof Design?
A gambrel roof is a symmetrical roof with two slopes on each side. The upper section has a shallow slope, while the lower section is much steeper.
Gambrel roofs are common on barns, sheds, garages, and Dutch Colonial homes, as the steep lower section creates more usable room under the roof.
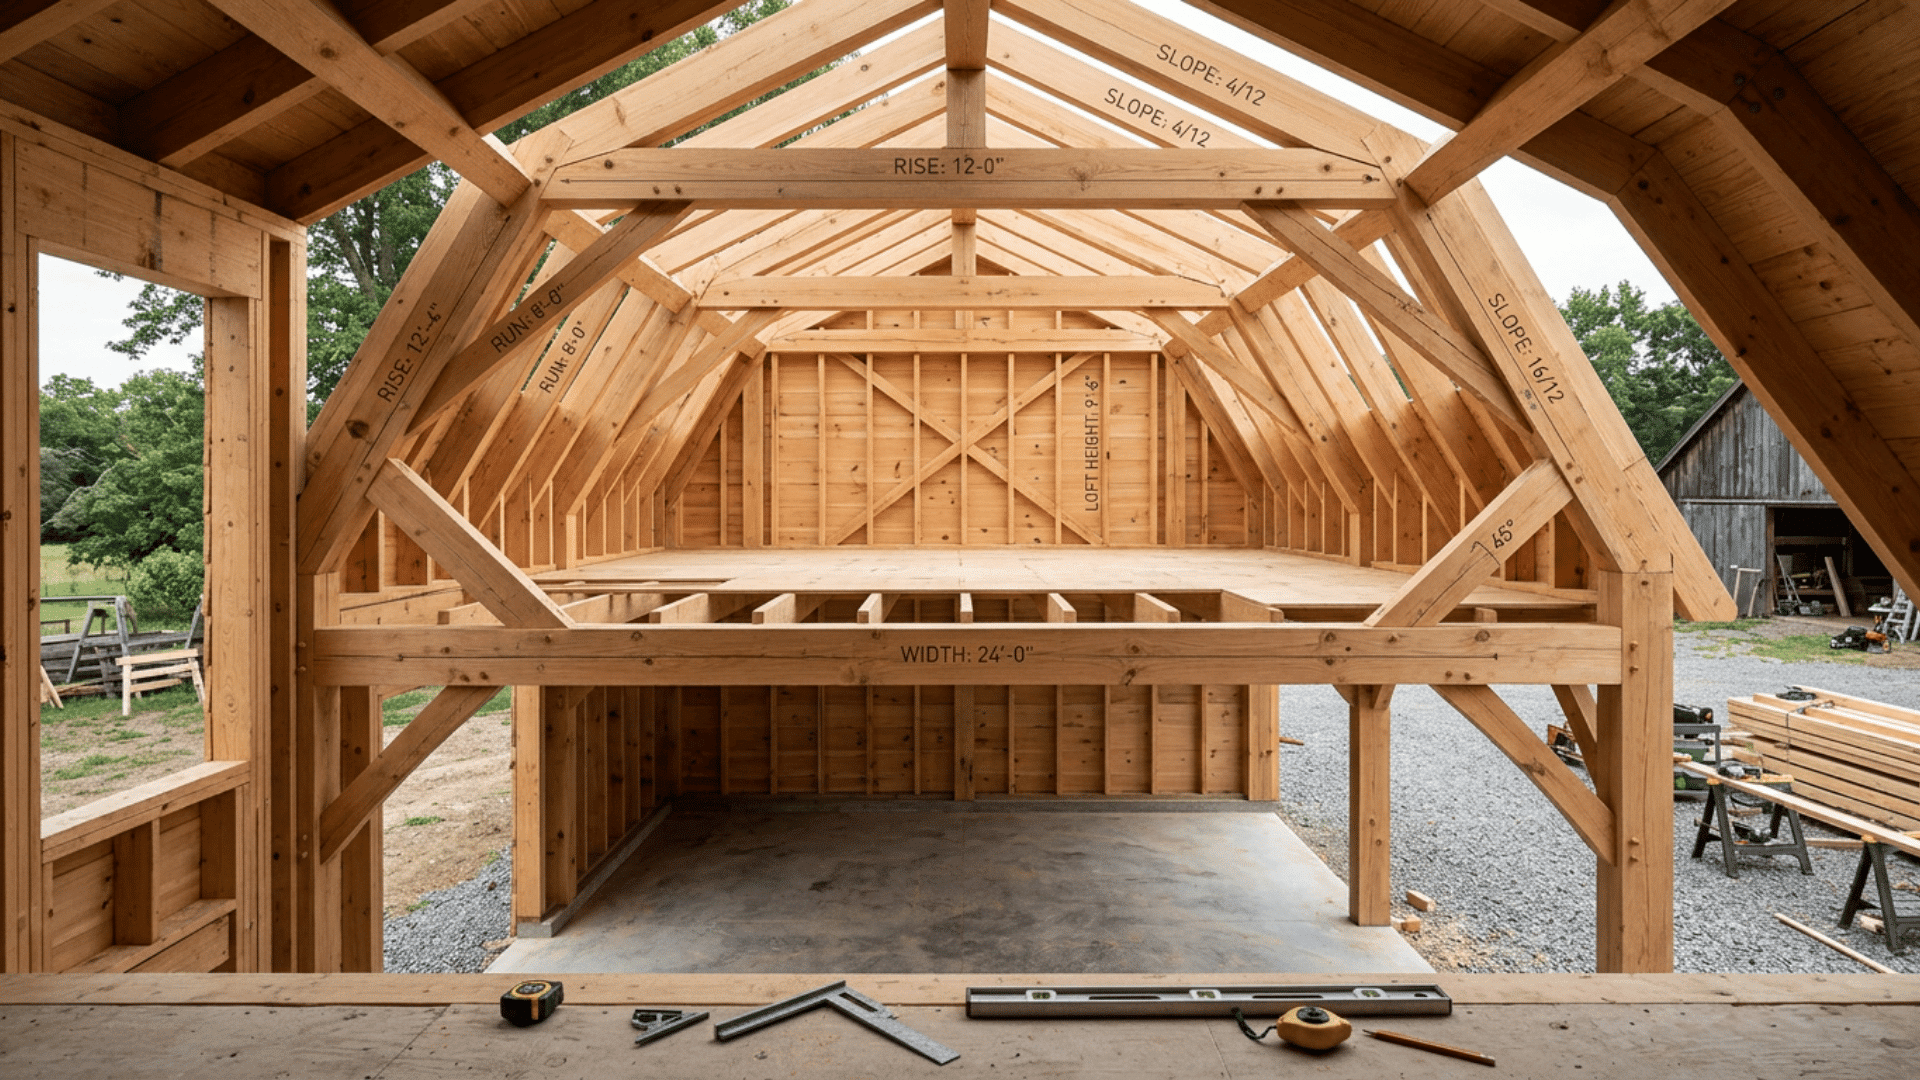
The ridge forms the highest point of the roof. Upper and lower rafters create its two distinct slopes, while slope-break joints connect them.
Wall plates support the roof at its bearing points, while eaves project past the exterior walls.
Ceiling ties or bottom chords secure the lower frame, and internal truss webs provide extra strength when needed.
How to Design and Calculate Gambrel Roof Measurements?
Follow these steps to create a symmetrical gambrel roof layout and verify rafter measurements before construction.
Step 1: Draw the Building Layout
Choose a large, level surface where you can draw the roof profile at full scale. A concrete foundation may work well if the walls have not yet been framed.
Snap chalk lines to mark the exterior walls and the complete width of the building.
Use different chalk colors for the wall and roof lines so the measurements remain easy to identify. Avoid drawing on concrete that will serve as the finished floor, as chalk may leave visible marks.
A full-size layout makes it easier to spot inaccurate dimensions before construction begins.
Step 2: Mark the Ceiling and Roof Centerlines
Draw a horizontal line representing the ceiling or the tops of the exterior walls. Measure the building width carefully and mark its exact midpoint.
From this midpoint, draw a vertical line that is perfectly perpendicular to the ceiling line.
This becomes the roof centerline and establishes the position of the ridge. Confirm that the measurements on both sides of the centerline are equal.
An incorrectly positioned centerline can result in an uneven roof with different rafter lengths on each side.
Step 3: Create a 45-Degree Guide
Draw a square beside the roof centerline to establish an accurate 45-degree reference line.
For example, measure four feet horizontally and four feet vertically before drawing a diagonal between the opposite corners.
Extend the diagonal into the roof layout area. Using a larger square can improve accuracy by reducing the effect of small measuring or marking errors.
Check the square and diagonal carefully. An inaccurate guide can shift the slope-break points and produce mismatched rafter sections.
Step 4: Draw the Half-Circle Roof Guide
Use the point where the vertical centerline meets the horizontal ceiling line as the center of the circle. The radius should equal half the building’s width.
Secure a string or another suitable marking tool at the center point. Extend it to one exterior wall and draw a smooth half circle from one wall to the other.
The arc should meet both wall lines evenly and remain symmetrical around the centerline.
Correct any uneven areas before continuing because this guide determines the roof angles, break points, and rafter dimensions.
Step 5: Mark the Rafters and Slope Breaks
Mark where the 45-degree guide intersects the arc to locate the upper and lower roof slope breaks.
Draw straight lines from each exterior wall to its nearest break point. Then connect both break points to the ridge at the top of the centerline.
These lines form the gambrel roof sections. Measure both sides to ensure the upper and lower rafters match.
If they differ, recheck the centerline, square, diagonal, and half circle before proceeding.
Step 6: Check Loft Space and Rafter Measurements
Draw the proposed attic walls, ceiling beams, collar ties, and other interior framing components within the completed roof profile.
Measure the loft’s height and width to confirm adequate headroom and usable space.
Record each rafter’s rise and run, then calculate its length when needed: Rafter length = √(rise² + run²).
Before cutting, account for connections, overhangs, and birdsmouth cuts. Have a qualified professional verify structural loads and local code compliance.
Types of Gambrel Roofs
Gambrel roof styles use different slopes and structural details to suit barns, homes, sheds, and usable lofts.
- Classic Gambrel: This symmetrical barn-style roof has matching double slopes on both sides and open gable ends.
- Dutch Colonial Gambrel: Flared eaves extend beyond exterior walls, providing added weather protection and a distinctive residential appearance in shingle-style homes.
- Dormer Gambrel: Dormers built into the lower slopes add natural light, ventilation, and useful upper-floor living space.
- Asymmetrical Gambrel: Unequal slopes or lengths create a customized roof profile for specific architectural and spatial requirements.
- Wall-Supported Gambrel: The lower roof sections extend toward supporting walls, reducing the need for additional interior framing.
- Mansard-Style Gambrel: This variation resembles a mansard roof but retains the gambrel roof’s two-sided structure and gabled ends.
How to Calculate Gambrel Roof Dimensions?
Use the half-span, rise, slope, and break position to calculate each roof section accurately.
| Calculation Element | Details |
|---|---|
| Building Width | 24 feet |
| Half-Span Run | 12 feet per side, excluding overhangs |
| Run Division | Divide the 12-foot run between the upper and lower roof sections |
| Roof Rise | Determines ridge height, headroom, rafter length, roof area, and wind exposure |
| Slope-Break Position | Affects roof angles, loft space, joints, and connector requirements |
| Slope Measurement | Vertical rise for every 12 inches of horizontal run |
| Angle Measurement | Roof steepness expressed in degrees |
| Common Slope Angles | 4:12 = 18.4°, 6:12 = 26.6°, 8:12 = 33.7°, 12:12 = 45°, 18:12 = 56.3°, 24:12 = 63.4° |
| Section Calculations | Calculate upper and lower sections separately using their individual rise, run, and angle |
Common Gambrel Roof Ratios and Angles
Gambrel roof ratios shape the roof’s appearance, height, interior space, drainage, and ability to handle local structural loads.
- Half-Octagon Layout: Traditional gambrel roofs often use 22.5° upper slopes and 67.5° lower slopes.
- 30° and 60° Layout: This combination creates a clear roof break but requires careful span and rise calculations.
- Custom Combinations: Ratios such as 4:12 with 12:12 or 6:12 with 18:12 offer different heights and interior space.
- Slope Effects: Shallow upper slopes lower ridge height, while steep lower slopes increase usable space near exterior walls.
Typical Pitch Combinations by Building Width
Building width affects roof rise, rafter length, slope-break placement, and loft space, so these pitch combinations are preliminary examples.
| Building Width | Upper Pitch | Lower Pitch | Typical Design Effect |
|---|---|---|---|
| 8–12 feet | 4:12–6:12 | 12:12–16:12 | Creates a compact profile suitable for small sheds |
| 14–20 feet | 4:12–6:12 | 16:12–18:12 | Balances roof height with practical storage space |
| 22–30 feet | 6:12–8:12 | 18:12–24:12 | Provides greater headroom for garages and lofts |
| 32–40 feet | Custom-designed | Custom-designed | Requires engineered framing for longer spans and heavier loads |
Benefits of Gambrel Roof Design
Gambrel roofs combine practical interior space, efficient drainage, flexible design, and traditional architectural character for various buildings.
- More Interior Space: Steep lower slopes provide greater headroom for bedrooms, offices, storage areas, or functional loft spaces.
- Efficient Footprint: The expanded upper level adds usable space without increasing the building’s overall ground area.
- Simpler Construction: Its two-sided form can require fewer complicated valleys, hips, and framing details than complex roofs.
- Effective Drainage: Steep lower slopes help direct rain and snow downward when roofing and gutters are properly installed.
- Flexible Design: Dormers, windows, insulation, and ventilation can be incorporated to create comfortable, functional upper-level rooms.
- Traditional Appearance: The distinctive profile adds classic barn-inspired or Dutch Colonial character to homes, sheds, and agricultural buildings.
Gambrel Roof Design for Different Building Types
The same roof shape may need a very different structure depending on how the building will be used.
| Building Type | Main Design Priority |
|---|---|
| Storage shed | Simple framing and overhead storage |
| Barn | Clear-span space, ventilation, and agricultural loads |
| Detached garage | Vehicle clearance and usable loft space |
| Home | Insulation, egress, stairs, comfort, and code compliance |
| Addition | Drainage and connection to the existing structure |
| Post-frame building | Truss bearing, column spacing, and lateral stability |
Structural Loads a Gambrel Roof Must Handle
Gambrel roof design must account for permanent, temporary, weather, and occupancy loads while maintaining a continuous load path.
Dead loads include framing, roofing, insulation, finishes, and fixed equipment, while live loads come from workers and movable equipment.
Uneven or sliding snow can add concentrated weight near slope breaks and eaves.
Wind uplift may pull on the roofing, sheathing, rafters, and trusses. Loft areas must also support people, furniture, storage boxes, and partitions.
Every load must transfer safely through the roof framing, walls, anchors, floors, and foundation without encountering weak connections.
Local wind and snow design parameters must be considered when calculating the loads placed on the roof.
Gambrel Roof Truss Design Basics
Gambrel roof trusses rely on properly designed member connections, spacing, and bracing to transfer structural loads safely downward.
- Connected Members: Each chord, web, and joint works together to transfer roof loads safely into walls and foundations.
- Truss Components: Top chords shape slopes, bottom chords connect walls, webs transfer forces, and gussets secure structural joints.
- Design Requirements: Spacing, member sizes, connectors, and bracing must suit the span, materials, wind, and snow loads involved.
- Factory Trusses: Never cut, drill, or notch manufactured trusses without written approval from the responsible truss designer first.
- Site-Built Trusses: Careful structural planning ensures members, joints, and connections safely support all expected roof loads over time.
- Bracing: Temporary and permanent bracing must follow approved instructions to keep trusses stable, aligned, and safely restrained throughout.
Necessary Framing and Connection Details
Weak joints, missing supports, and unapproved framing changes can reduce roof strength. Check these details before construction.
| Area to Check | Required Action |
|---|---|
| Roof Sections | Secure the ridge, upper chords, and slope-break joints |
| Wall Connections | Check truss anchors and uplift connectors |
| Truss Members | Inspect chords, ceiling ties, web joints, and bracing |
| Openings and Edges | Support dormers, stairs, sheathing edges, and loft floors |
| Connector Hardware | Use only the specified nails, screws, bolts, and anchors |
How to Design for Loft Space and Headroom?
A gambrel roof provides more interior space, but the loft layout should be planned with the roof structure from the beginning.
Measure finished headroom while accounting for framing, insulation, ventilation channels, furring, and drywall.
Include dormers, stairs, skylights, and windows early since openings may require headers, doubled members, girder trusses, or supports.
When planning a finished loft, consider framing depth, lighting, insulation, and ceiling decor ideas before finalizing the available headroom.
Deep rafters or raised-heel details can help preserve insulation near eaves and slope breaks while supporting proper energy and moisture control.
Roof Sheathing, Underlayment, and Material Selection
Careful detailing at slope breaks helps maintain roof strength, drainage, and weather protection.
- Sheathing Support: Add blocking beneath panel edges near slope breaks and follow approved fastening requirements.
- Underlayment and Flashing: Use compatible underlayment and protect valleys, dormers, vents, penetrations, and roof-to-wall joints.
- Roofing Materials: Choose asphalt shingles, metal roofing, shakes, synthetic slate, or tiles based on structure and climate.
- Slope Requirements: Confirm the roofing material supports both slopes and whether shallow sections need additional underlayment.
- Drainage and Snow Control: Install suitable gutters and downspouts, and consider snow guards above entrances and walkways.
Gambrel Roof Advantages and Disadvantages
A gambrel roof offers useful space, but its extra joints and changing slopes add design demands.
| Advantages | Disadvantages |
|---|---|
| Creates more upper-level headroom | Has more complex joints than a gable roof |
| Provides a large loft or storage area | Slope changes need careful detailing |
| Offers a distinct barn-style appearance | May face demanding wind-uplift forces |
| Can support a clear central room | Snow can create uneven loading |
| Works on many types of buildings | Ventilation can be difficult at slope breaks |
| Offers flexible exterior proportions | Dormers and openings complicate framing |
Gambrel Roof Ventilation and Moisture Control
Poor ventilation can trap warm, moist air, leading to condensation, mold, wet insulation, and damaged sheathing. A vented gambrel roof usually combines soffit intake vents with a ridge or high-level exhaust vent.
Baffles should keep airflow open through both slopes and across the pitch change.
Air-seal gaps around wiring, ducts, plumbing, lights, top plates, and attic access before adding insulation.
Unvented roof assemblies require climate-appropriate insulation and moisture-control details.
Avoid combining vented and unvented roof methods unless a qualified professional has reviewed and approved the complete assembly design.
Common Gambrel Roof Design Mistakes
Avoiding common design mistakes helps protect a gambrel roof’s strength, weather resistance, usable space, and long-term structural performance.
- Choosing Angles for Appearance: Attractive slopes may reduce headroom, increase roof height, or conflict with roofing requirements.
- Treating Geometry as Structural Design: Roof calculations do not determine member sizes, spacing, connector strength, or load capacity.
- Ignoring Uneven Snow Loads: Snow can collect differently across each slope and create concentrated structural loads.
- Underestimating Wind Uplift: Weak roof-to-wall connections may fail even when framing supports downward loads.
- Using Weak Slope-Break Connections: Unapproved gussets and fastener patterns may not safely transfer forces between slopes.
- Altering Engineered Trusses: Never cut, drill, or remove truss members without an approved repair plan.
Conclusion
A successful gambrel roof design balances appearance, usable loft space, structural strength, and weather protection.
Accurate dimensions shape the roof profile while strong truss connections, bracing, insulation, ventilation, and drainage support lasting performance. The basic geometry cannot confirm safe member sizes or load capacity.
Local snow, wind, roofing, and building code requirements must shape the final plan.
Before ordering materials or beginning construction, create a scaled layout and have the complete design reviewed by a qualified architect, structural engineer, or truss designer.
Start planning carefully now to build a safer, stronger, and more practical gambrel roof.
Frequently Asked Questions
How Much Does a Gambrel Roof Cost?
A gambrel roof typically costs more than a simple gable roof because it requires additional framing, joints, labor, flashing, and roofing materials.
Can You Add a Gambrel Roof to an Existing House?
Yes, but an engineer should first assess the existing walls, foundation, framing, drainage, connections, loads, and local building code requirements.
How Long Does a Gambrel Roof Last?
A well-built gambrel roof can last several decades, depending on the roofing material, installation quality, climate, ventilation, maintenance, and moisture control.
What Is the Difference Between Gambrel and Gable Roofs?
A gambrel roof has two slopes on each side for greater loft space, while a gable roof has one continuous slope per side.